Bracers for a Ranger Risen to the Mark
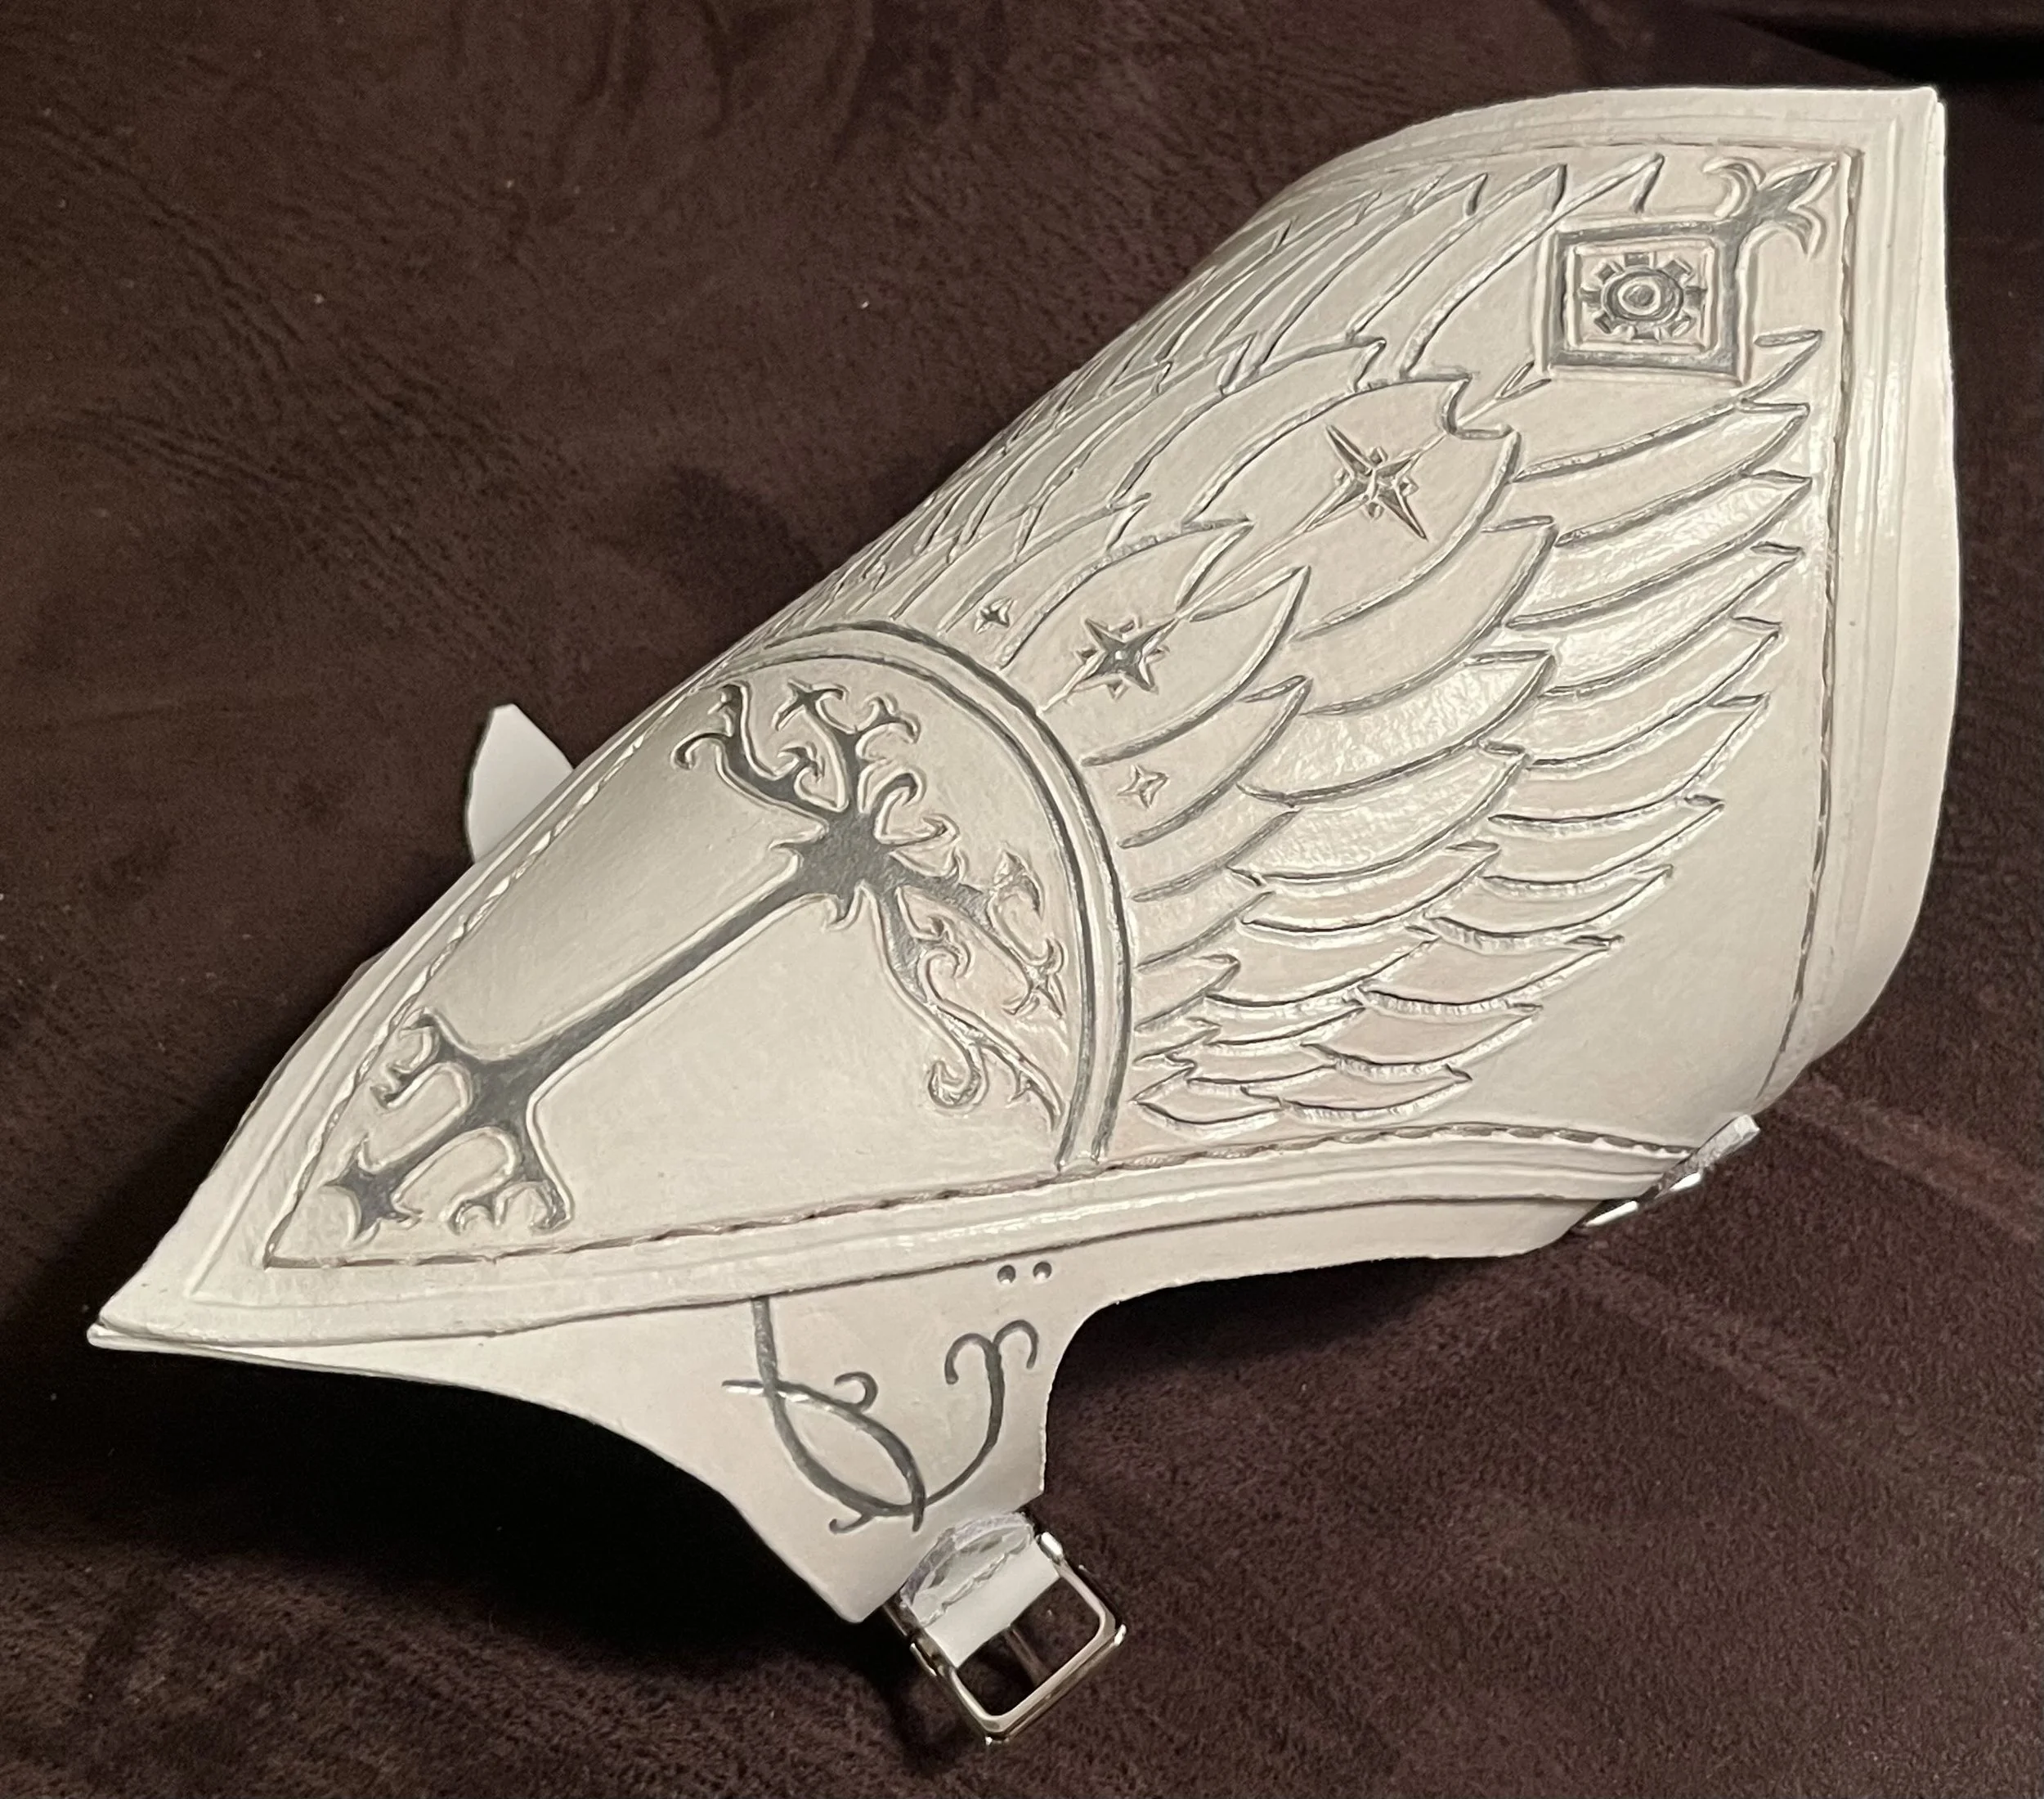
A friend and mentor, Morien, was raised to a new peerage, the Order of the Mark. The livery of the Order of the Mark includes white braces or silver bracelets. To mark the occasion, he asked me to make a set of white bracers for him. I was honored to be asked and readily accepted. I offered him a few options in terms of style; however, it was no surprise when he chose to model his bracers after Boromir/Aragon’s bracers from the Lord of the Rings films. So, with just three weeks until the elevation day, off I went!
Supplies
2 mm veg tan leather
Silver embroidery floss
White leather paint
Silver acrylic paint
4 buckles
X-acto knife
Mechanical pencils
A sewing needle
Freezer paper
Step 1: Pattern
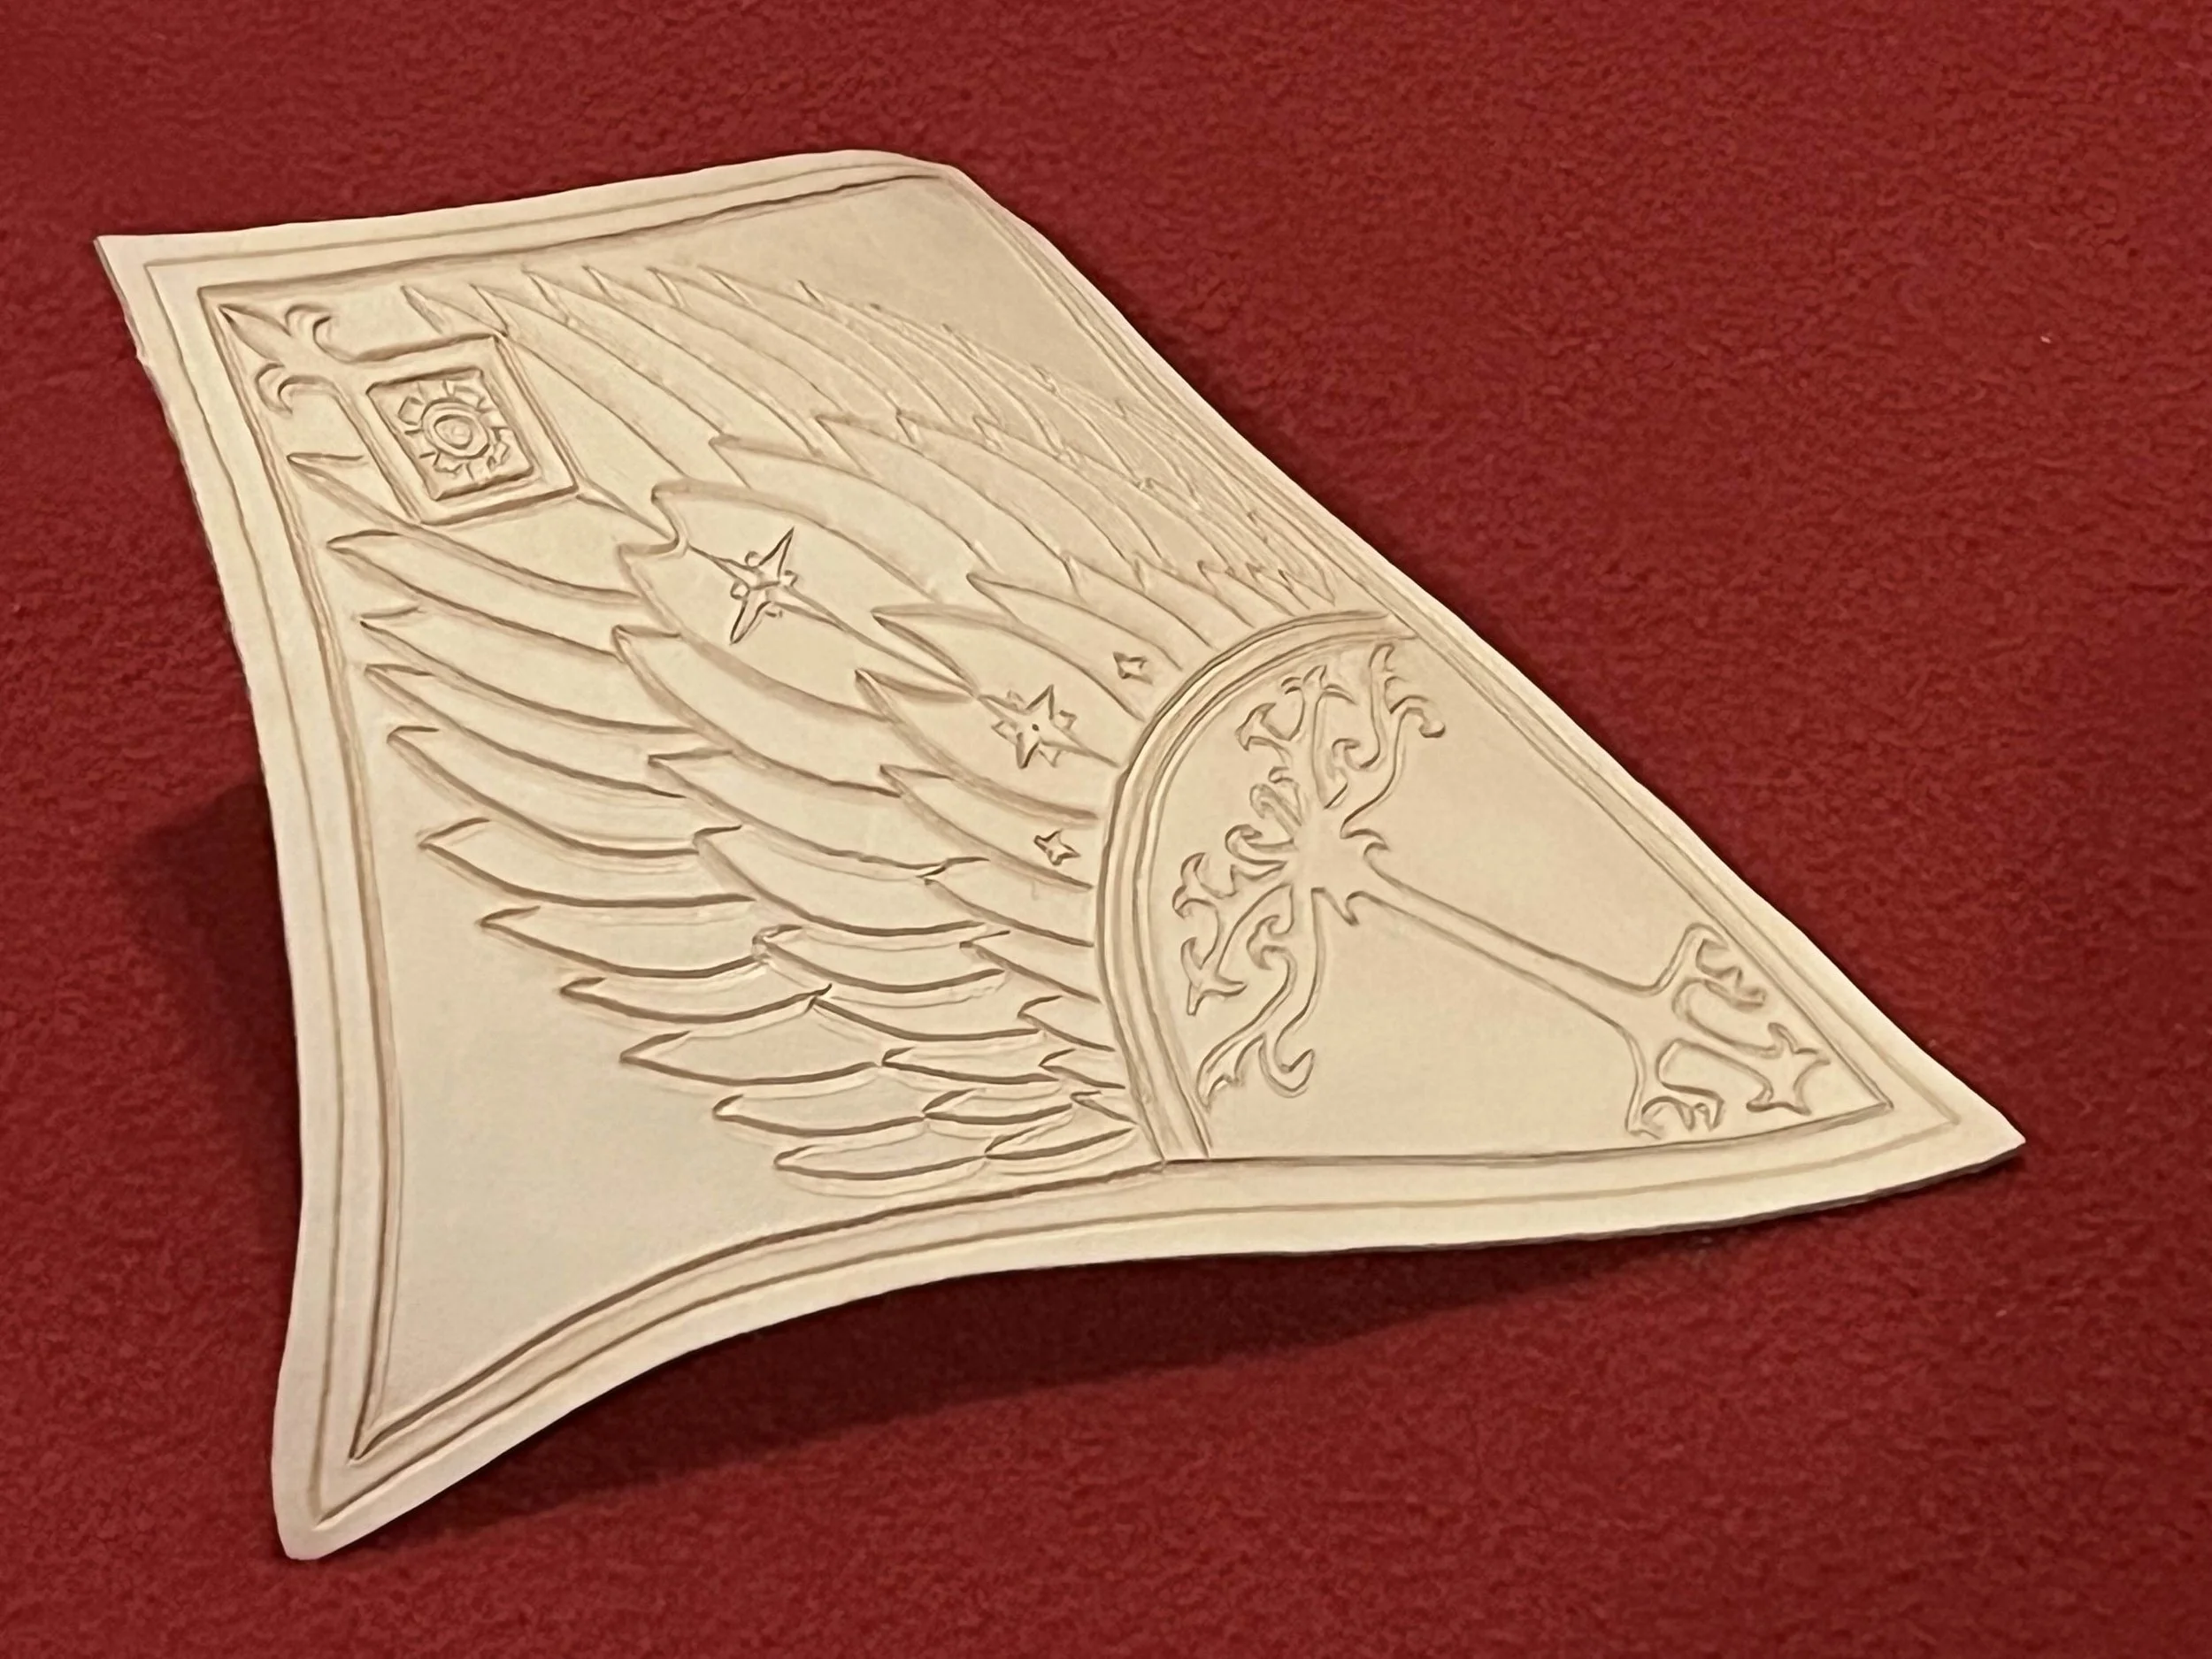
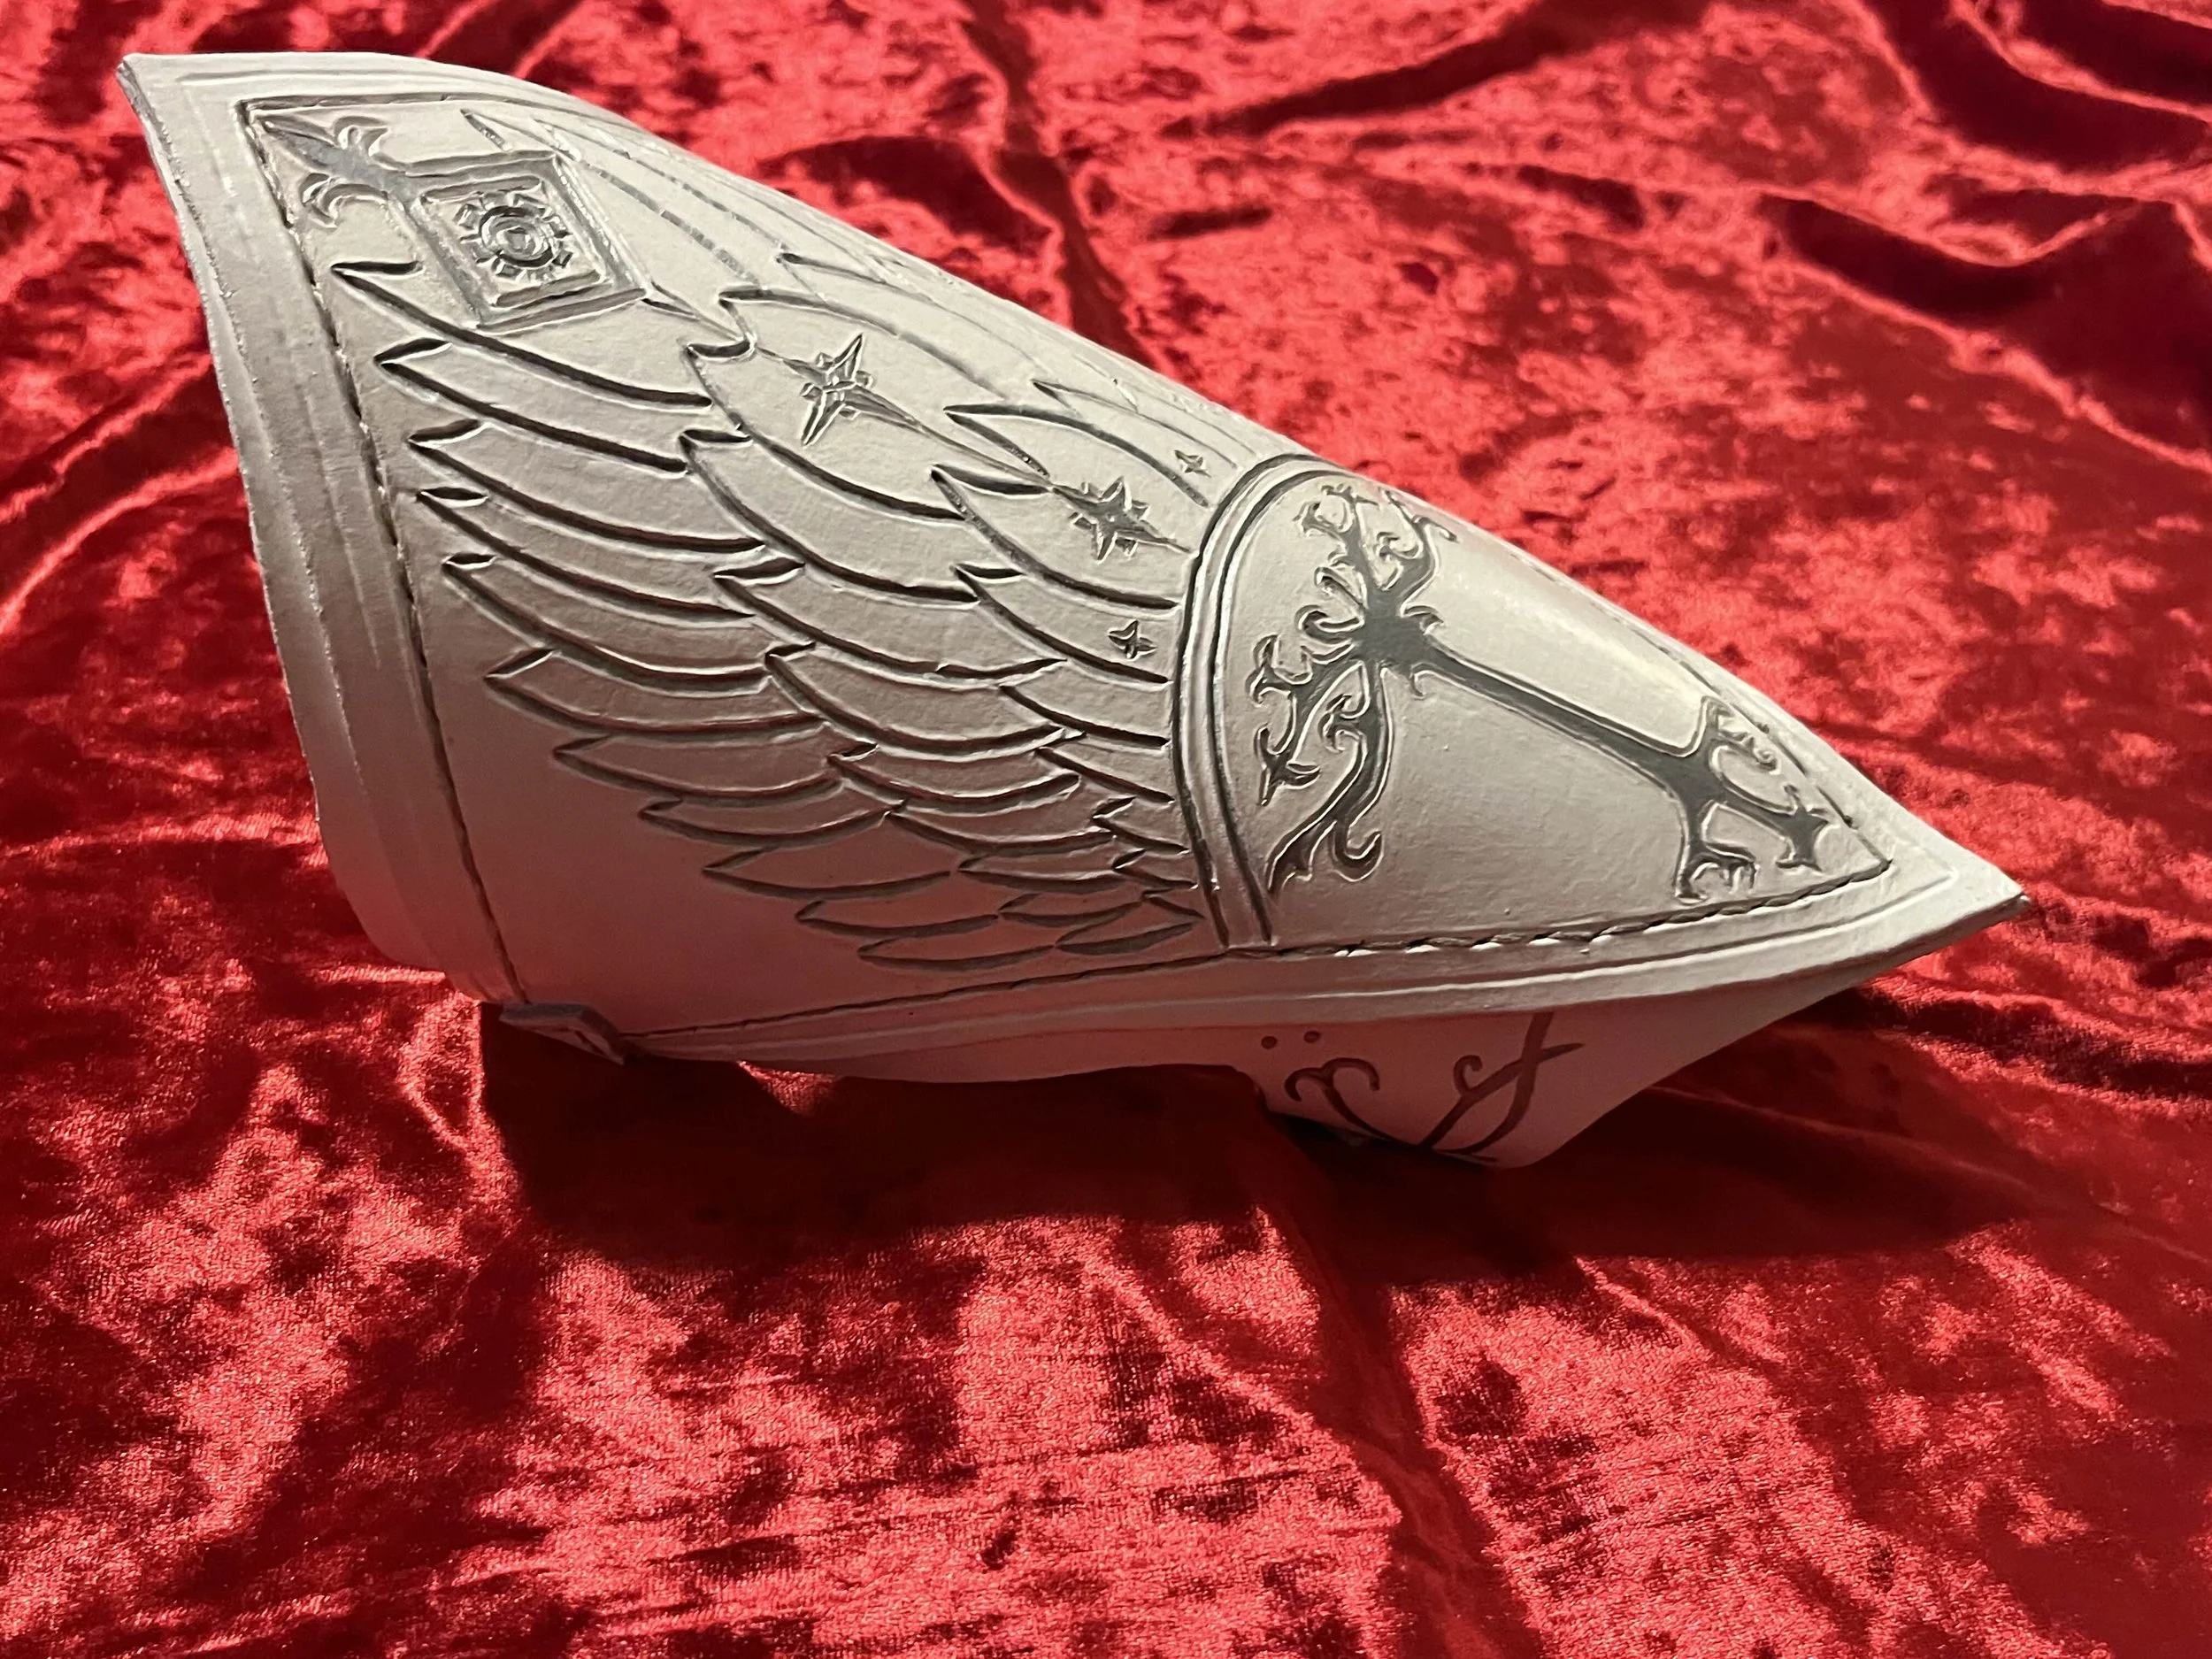
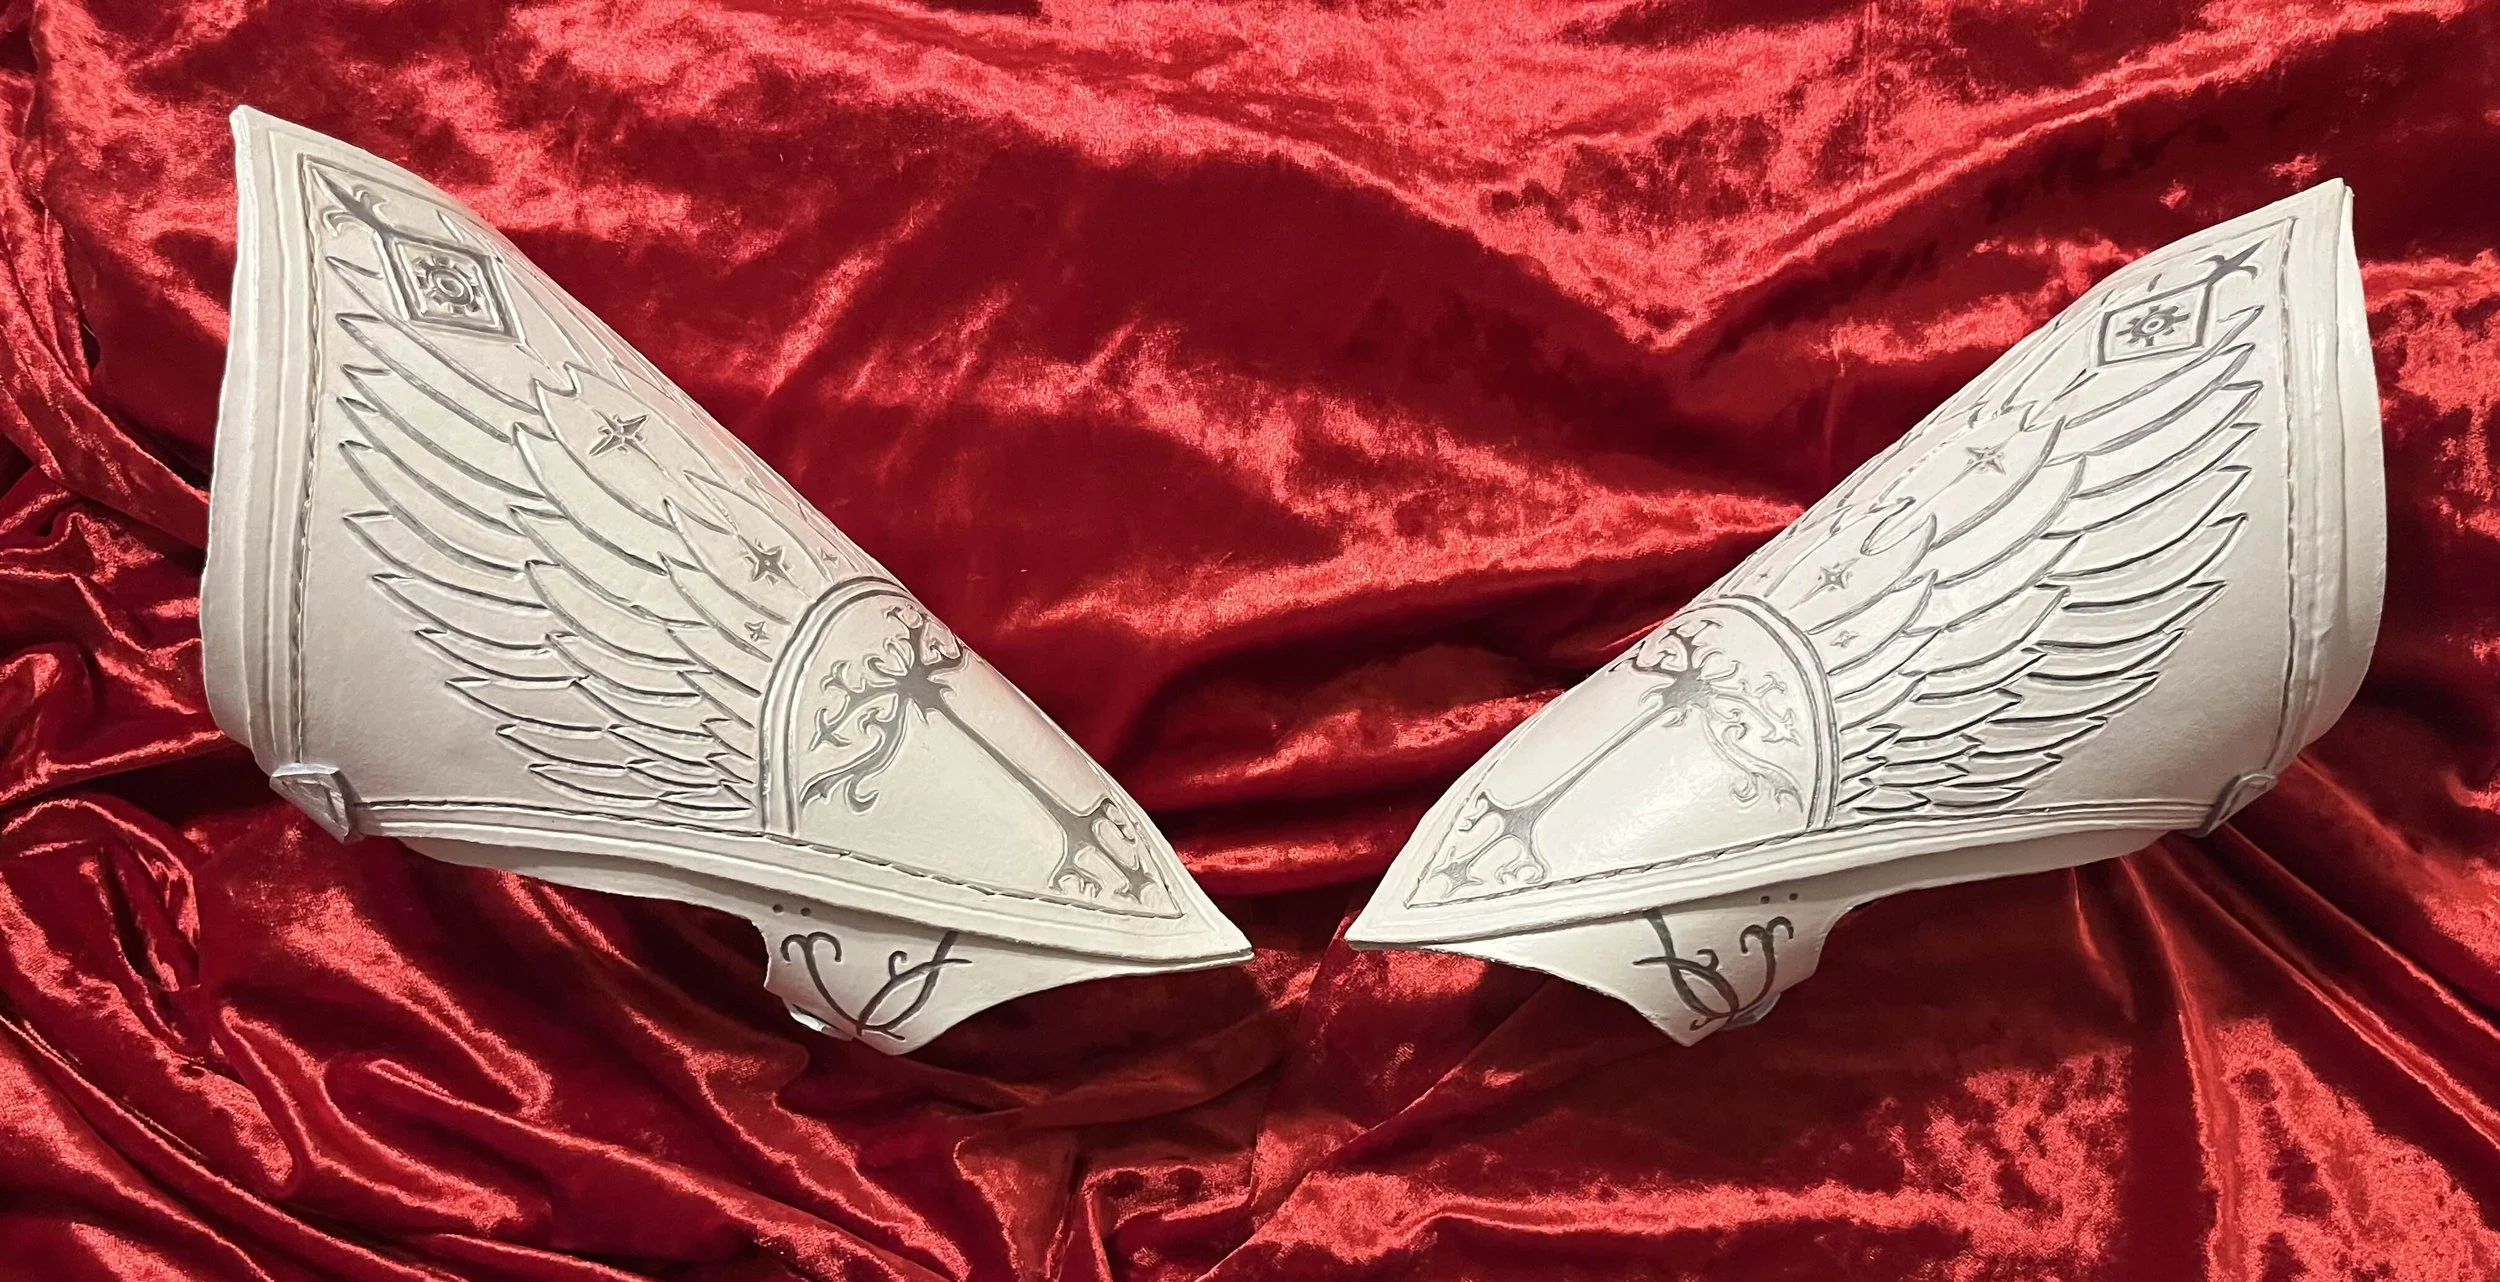
I found a partial pattern online for Aragon’s bracers online (source). I could not get it to print properly (or fully); but hey, it’s a start. I printed out what I could, and then extrapolated the remaining details and elements based off measurements and a wealth of pictures I could find online (thank you, Pinterest). I drew the combined result onto freezer paper. The one difference between the pattern I made and the one used in the Lord of the Rings films is the upper most star was replaced by the device for the Order of the Mark.
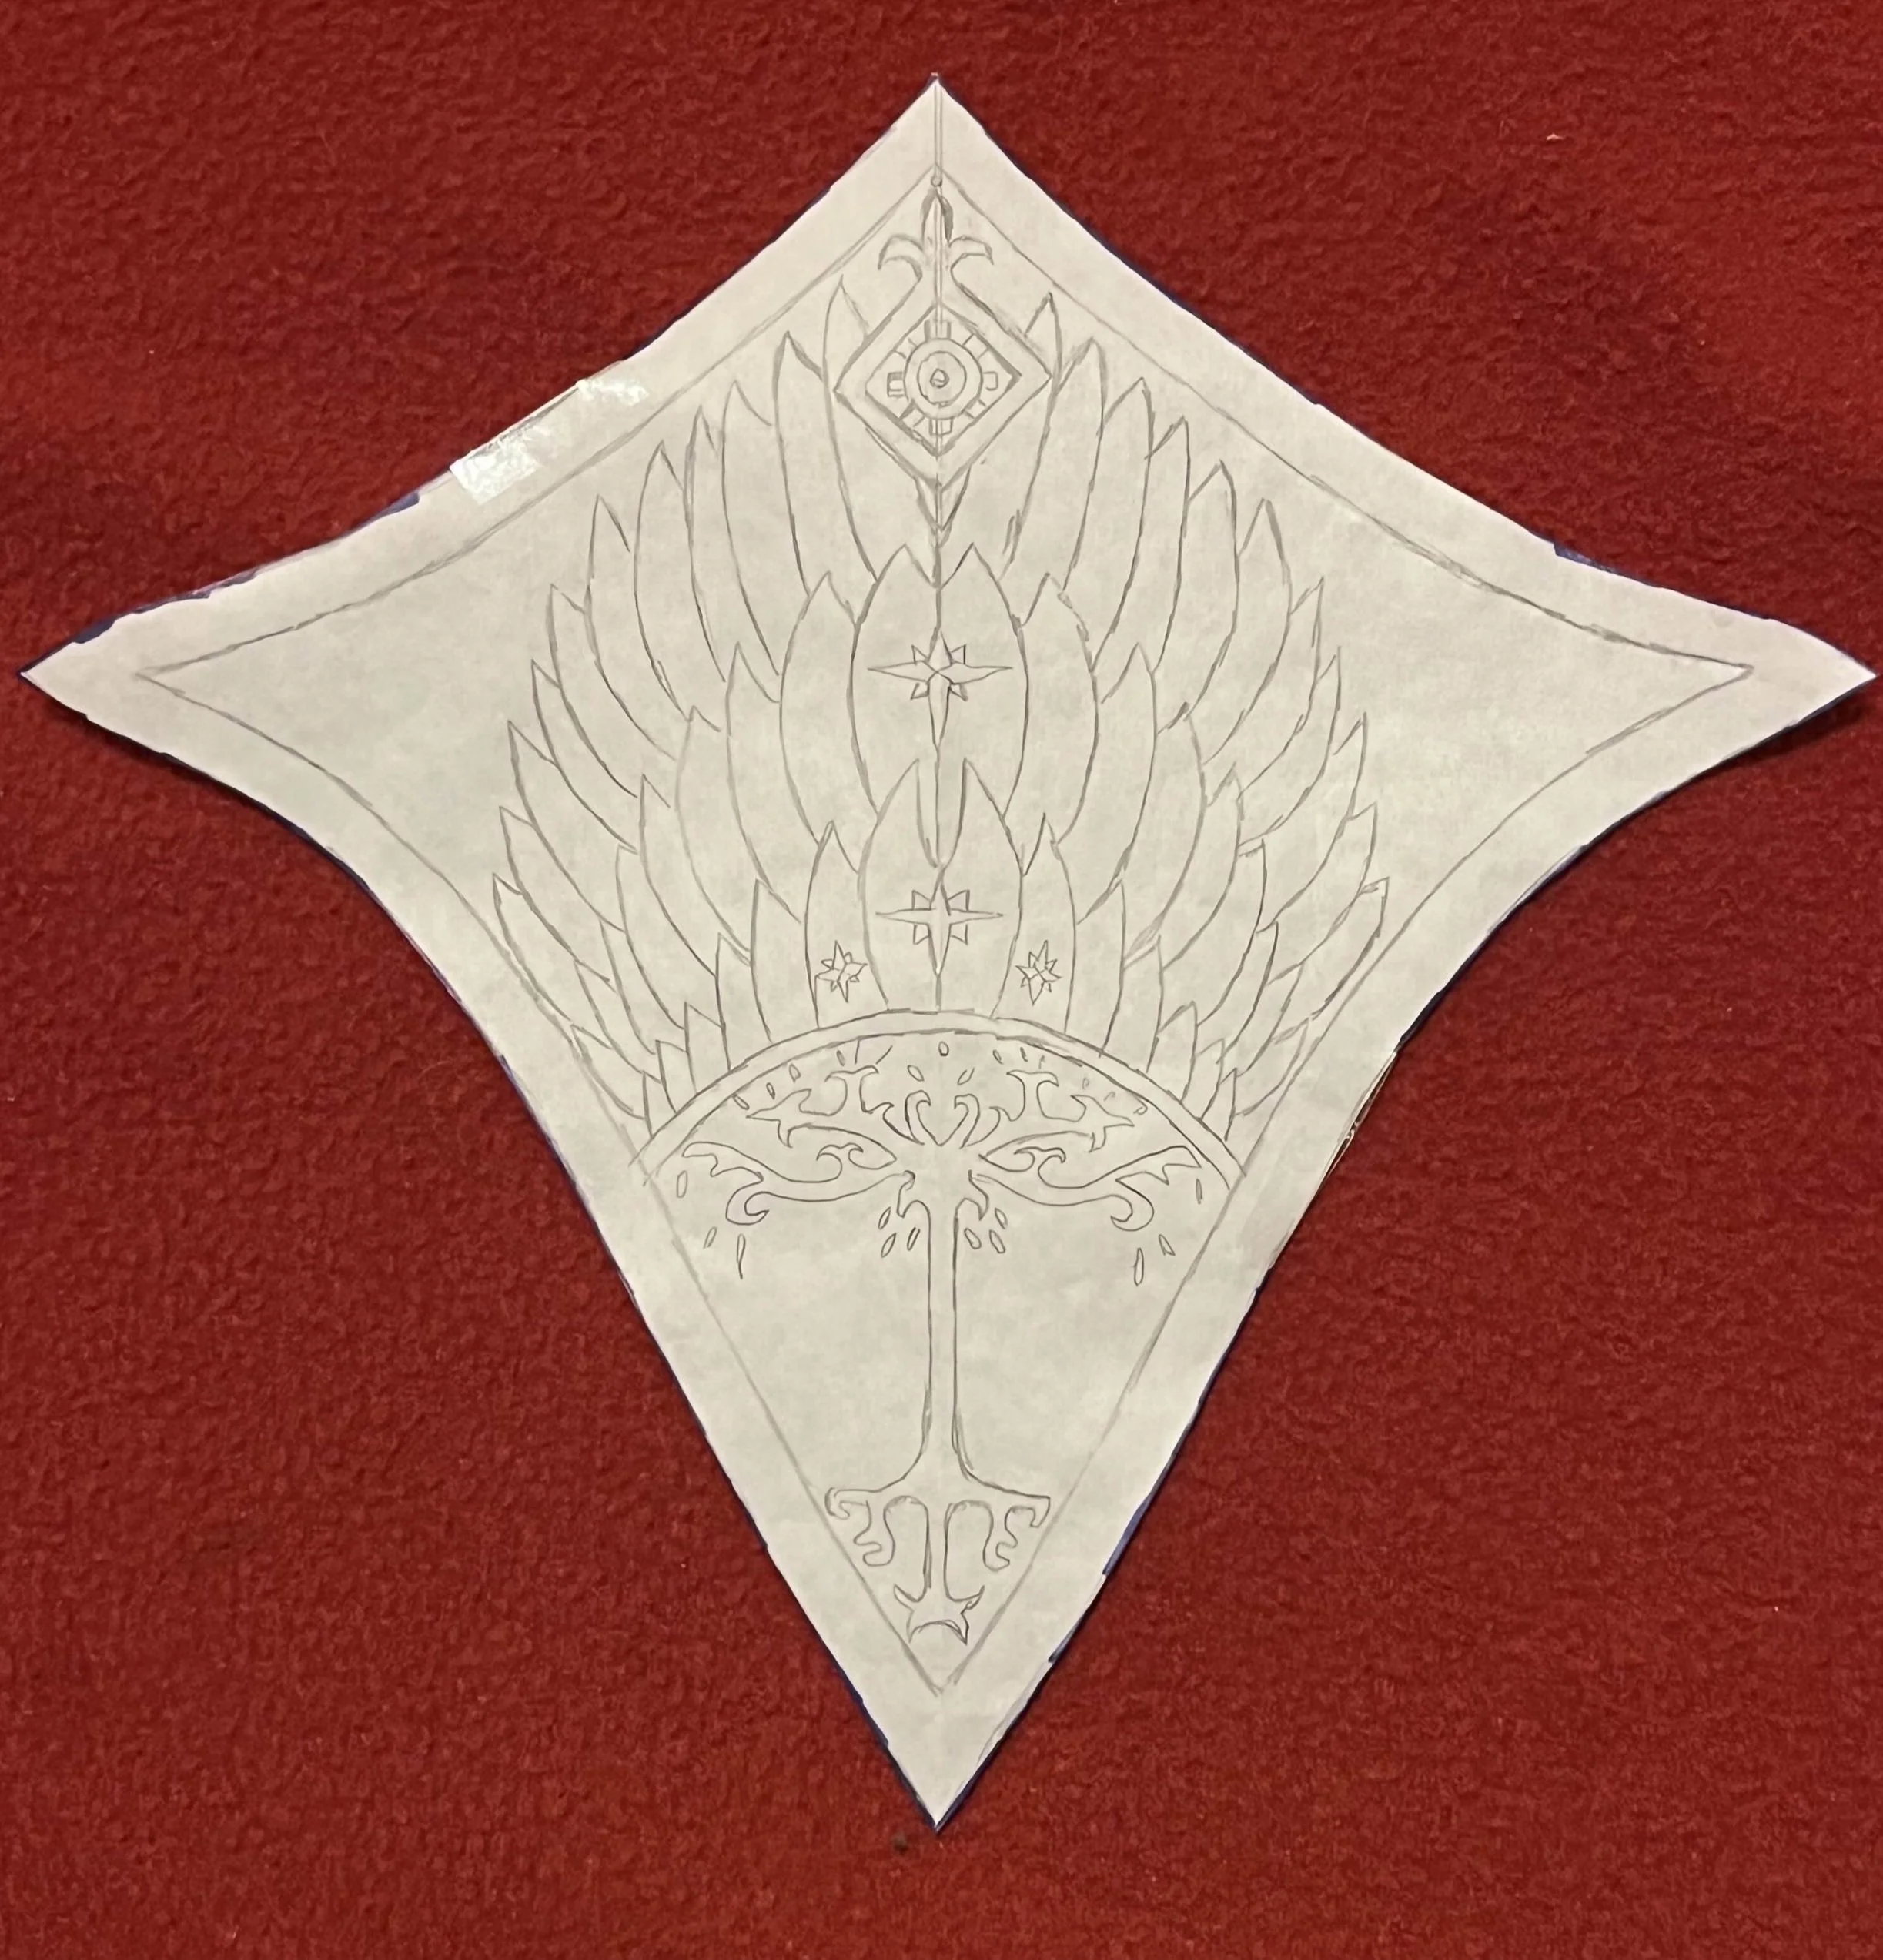
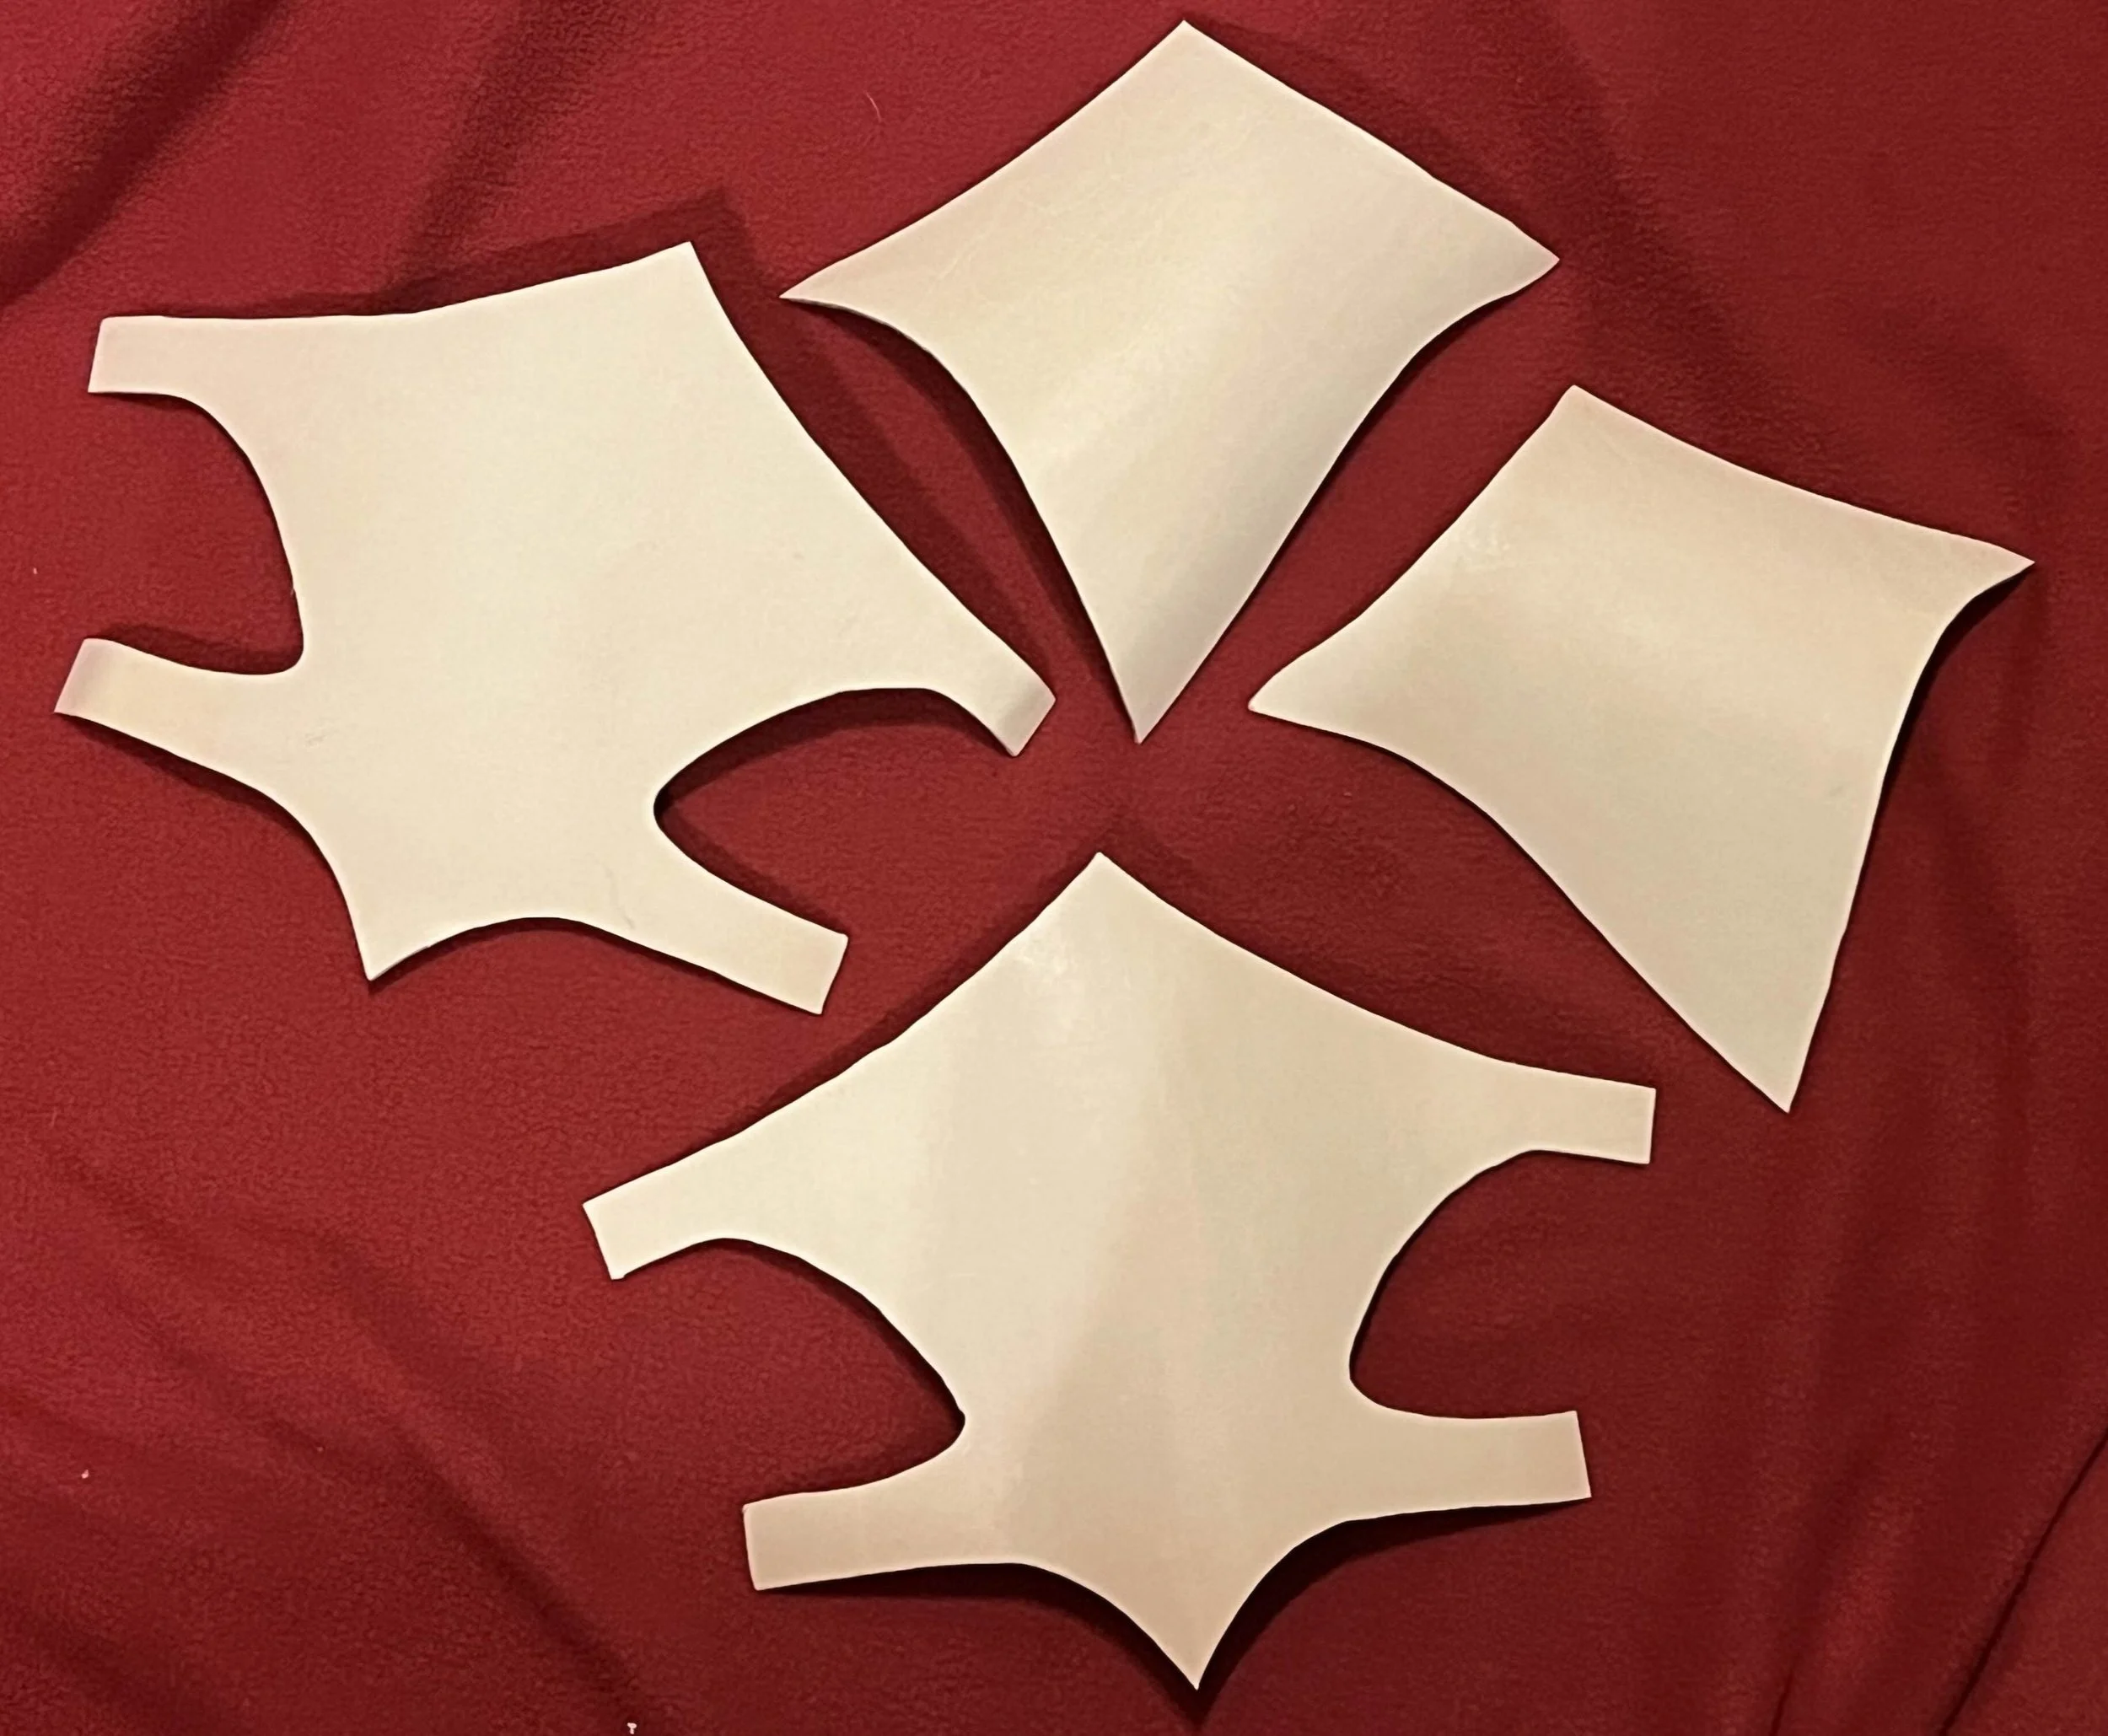
The project called for two separate pieces of leather for each vambrace - a diamond upper piece and a second lower piece to secure the scraps. These pieces were cut from 2 mm veg tan leather.
Step 2: Tooling
I wet the top diamond-shaped leather pieces and lay the pattern over the leather. I traced the pattern onto the leather using a mechanical pencil (with the graphite retracted). I then used an X-acto knife to lightly cut the traced lines into the leather. I rewet the leather and used the mechanical pencil to broaden the lines cut into the leather.
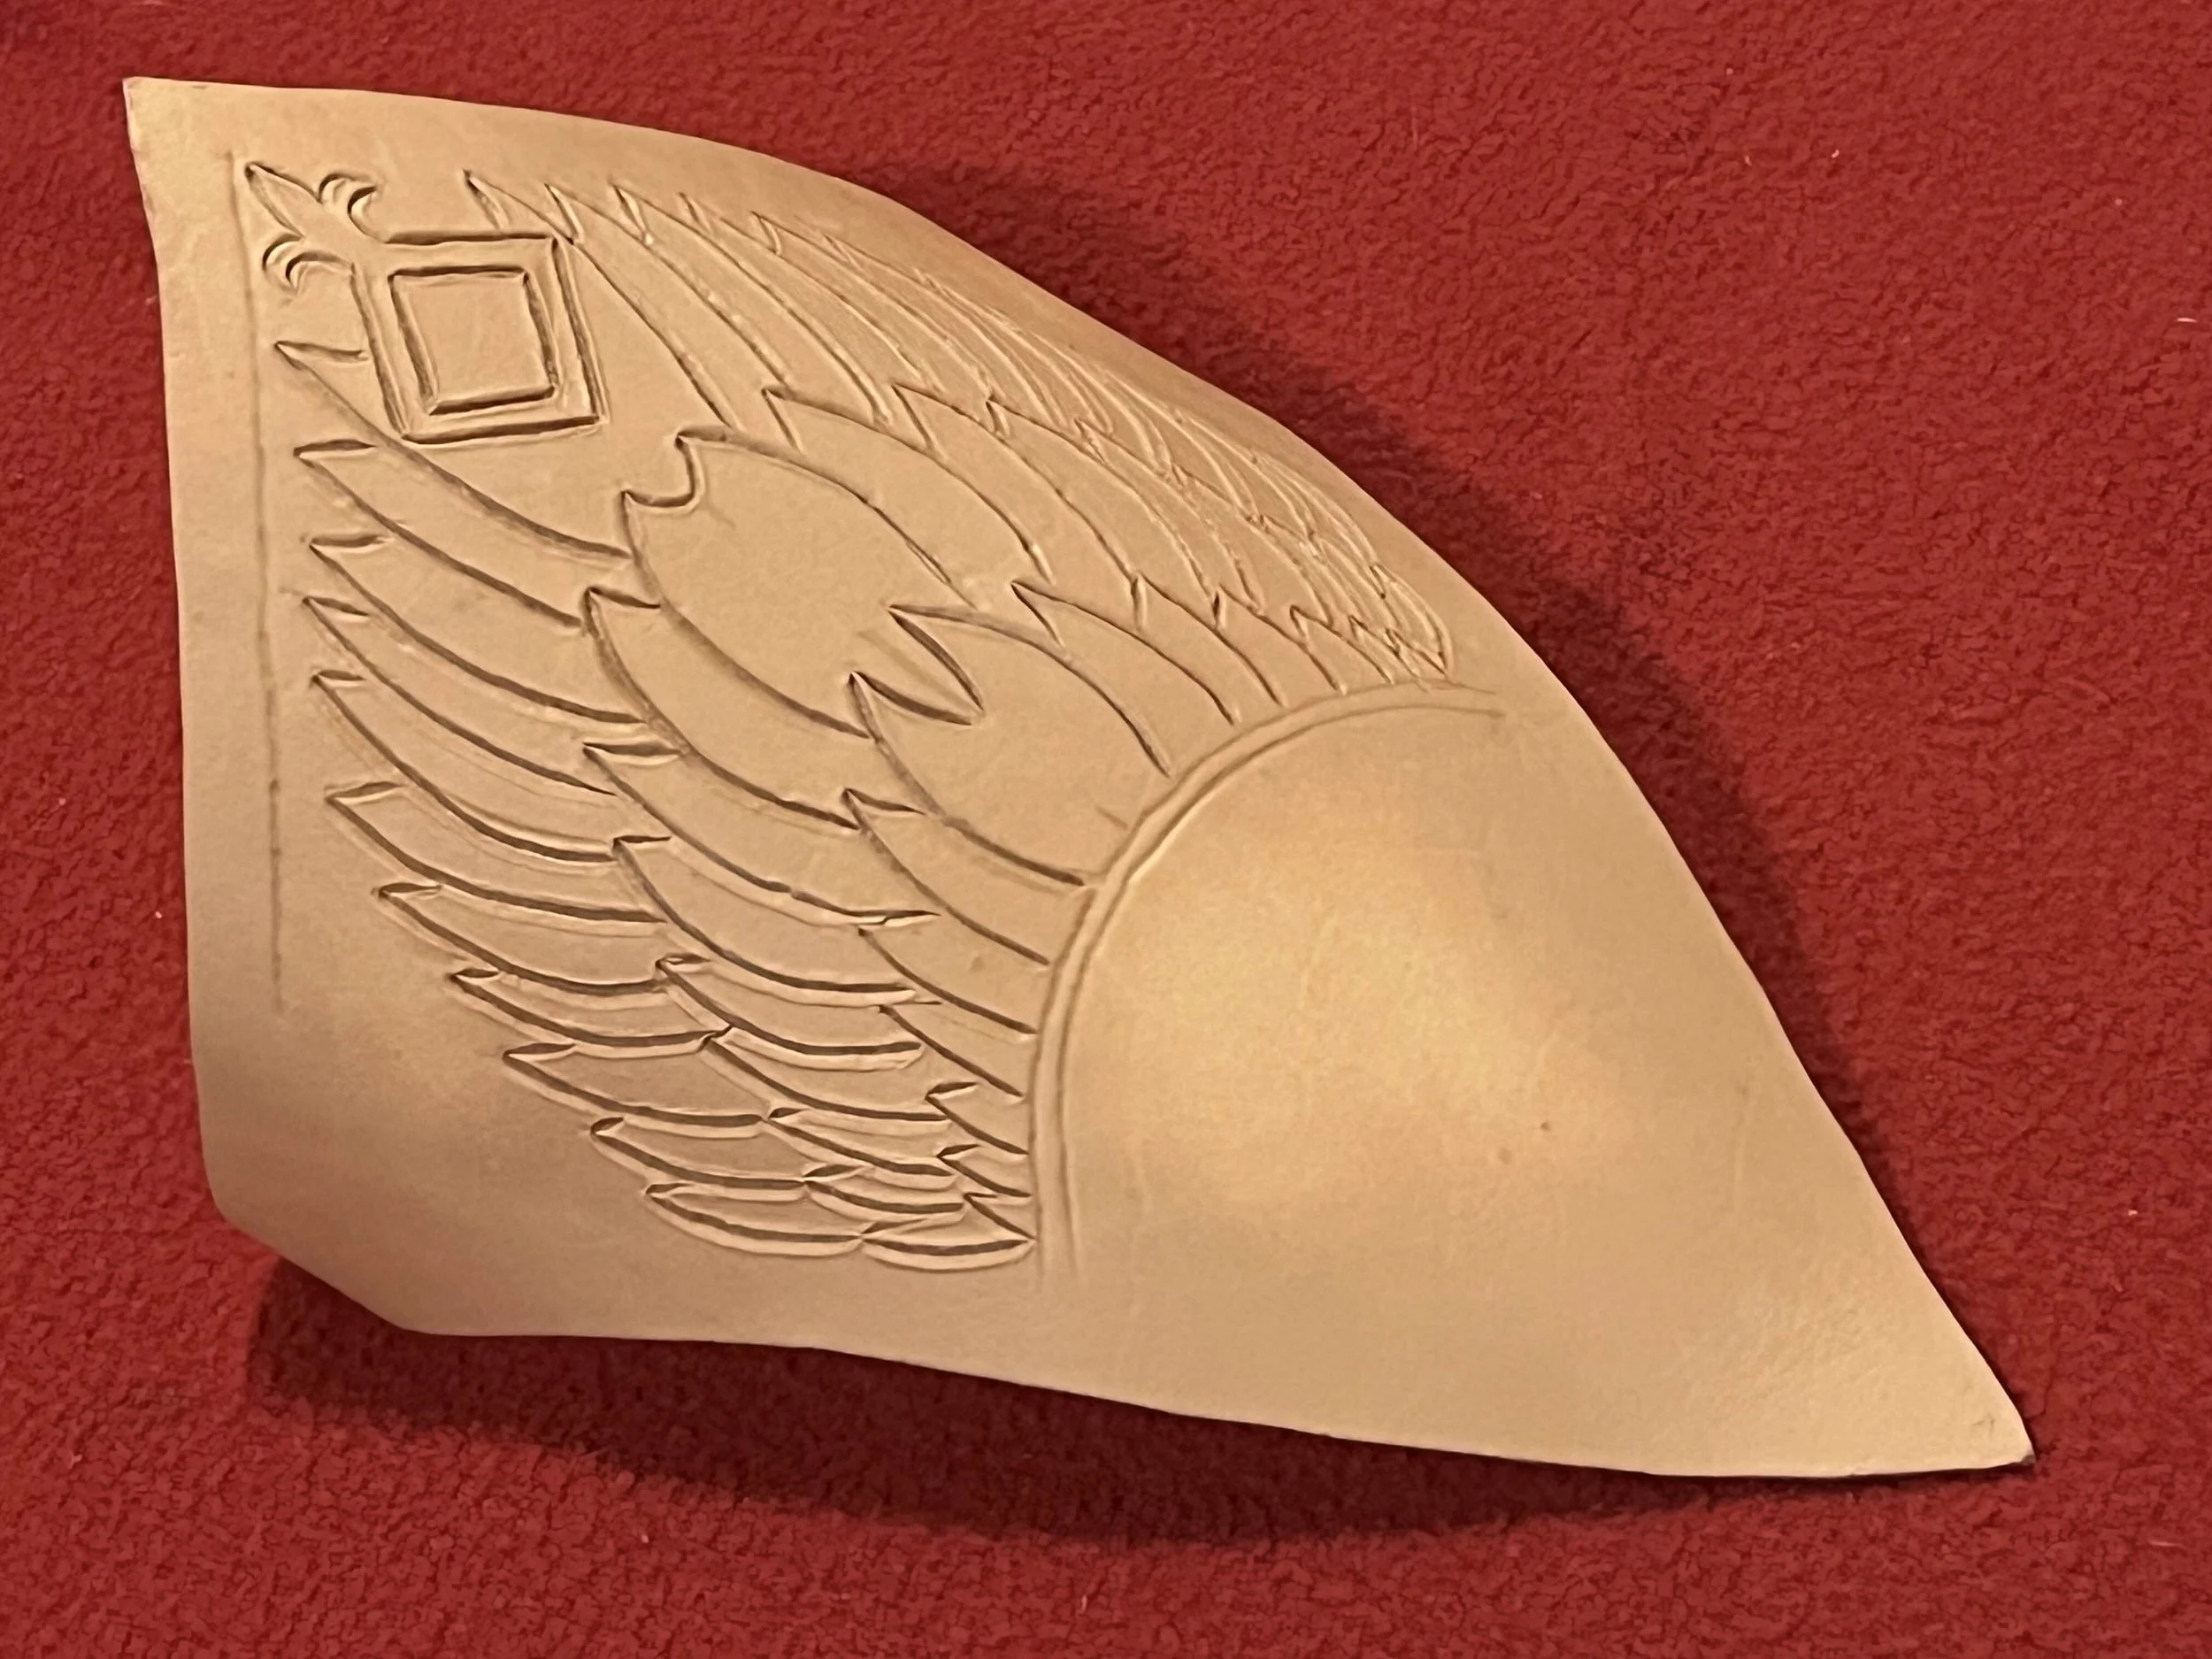
For the finer lines (ex. the stars and the tree), I used the blunt end of a sewing needle to broaden the cuts.
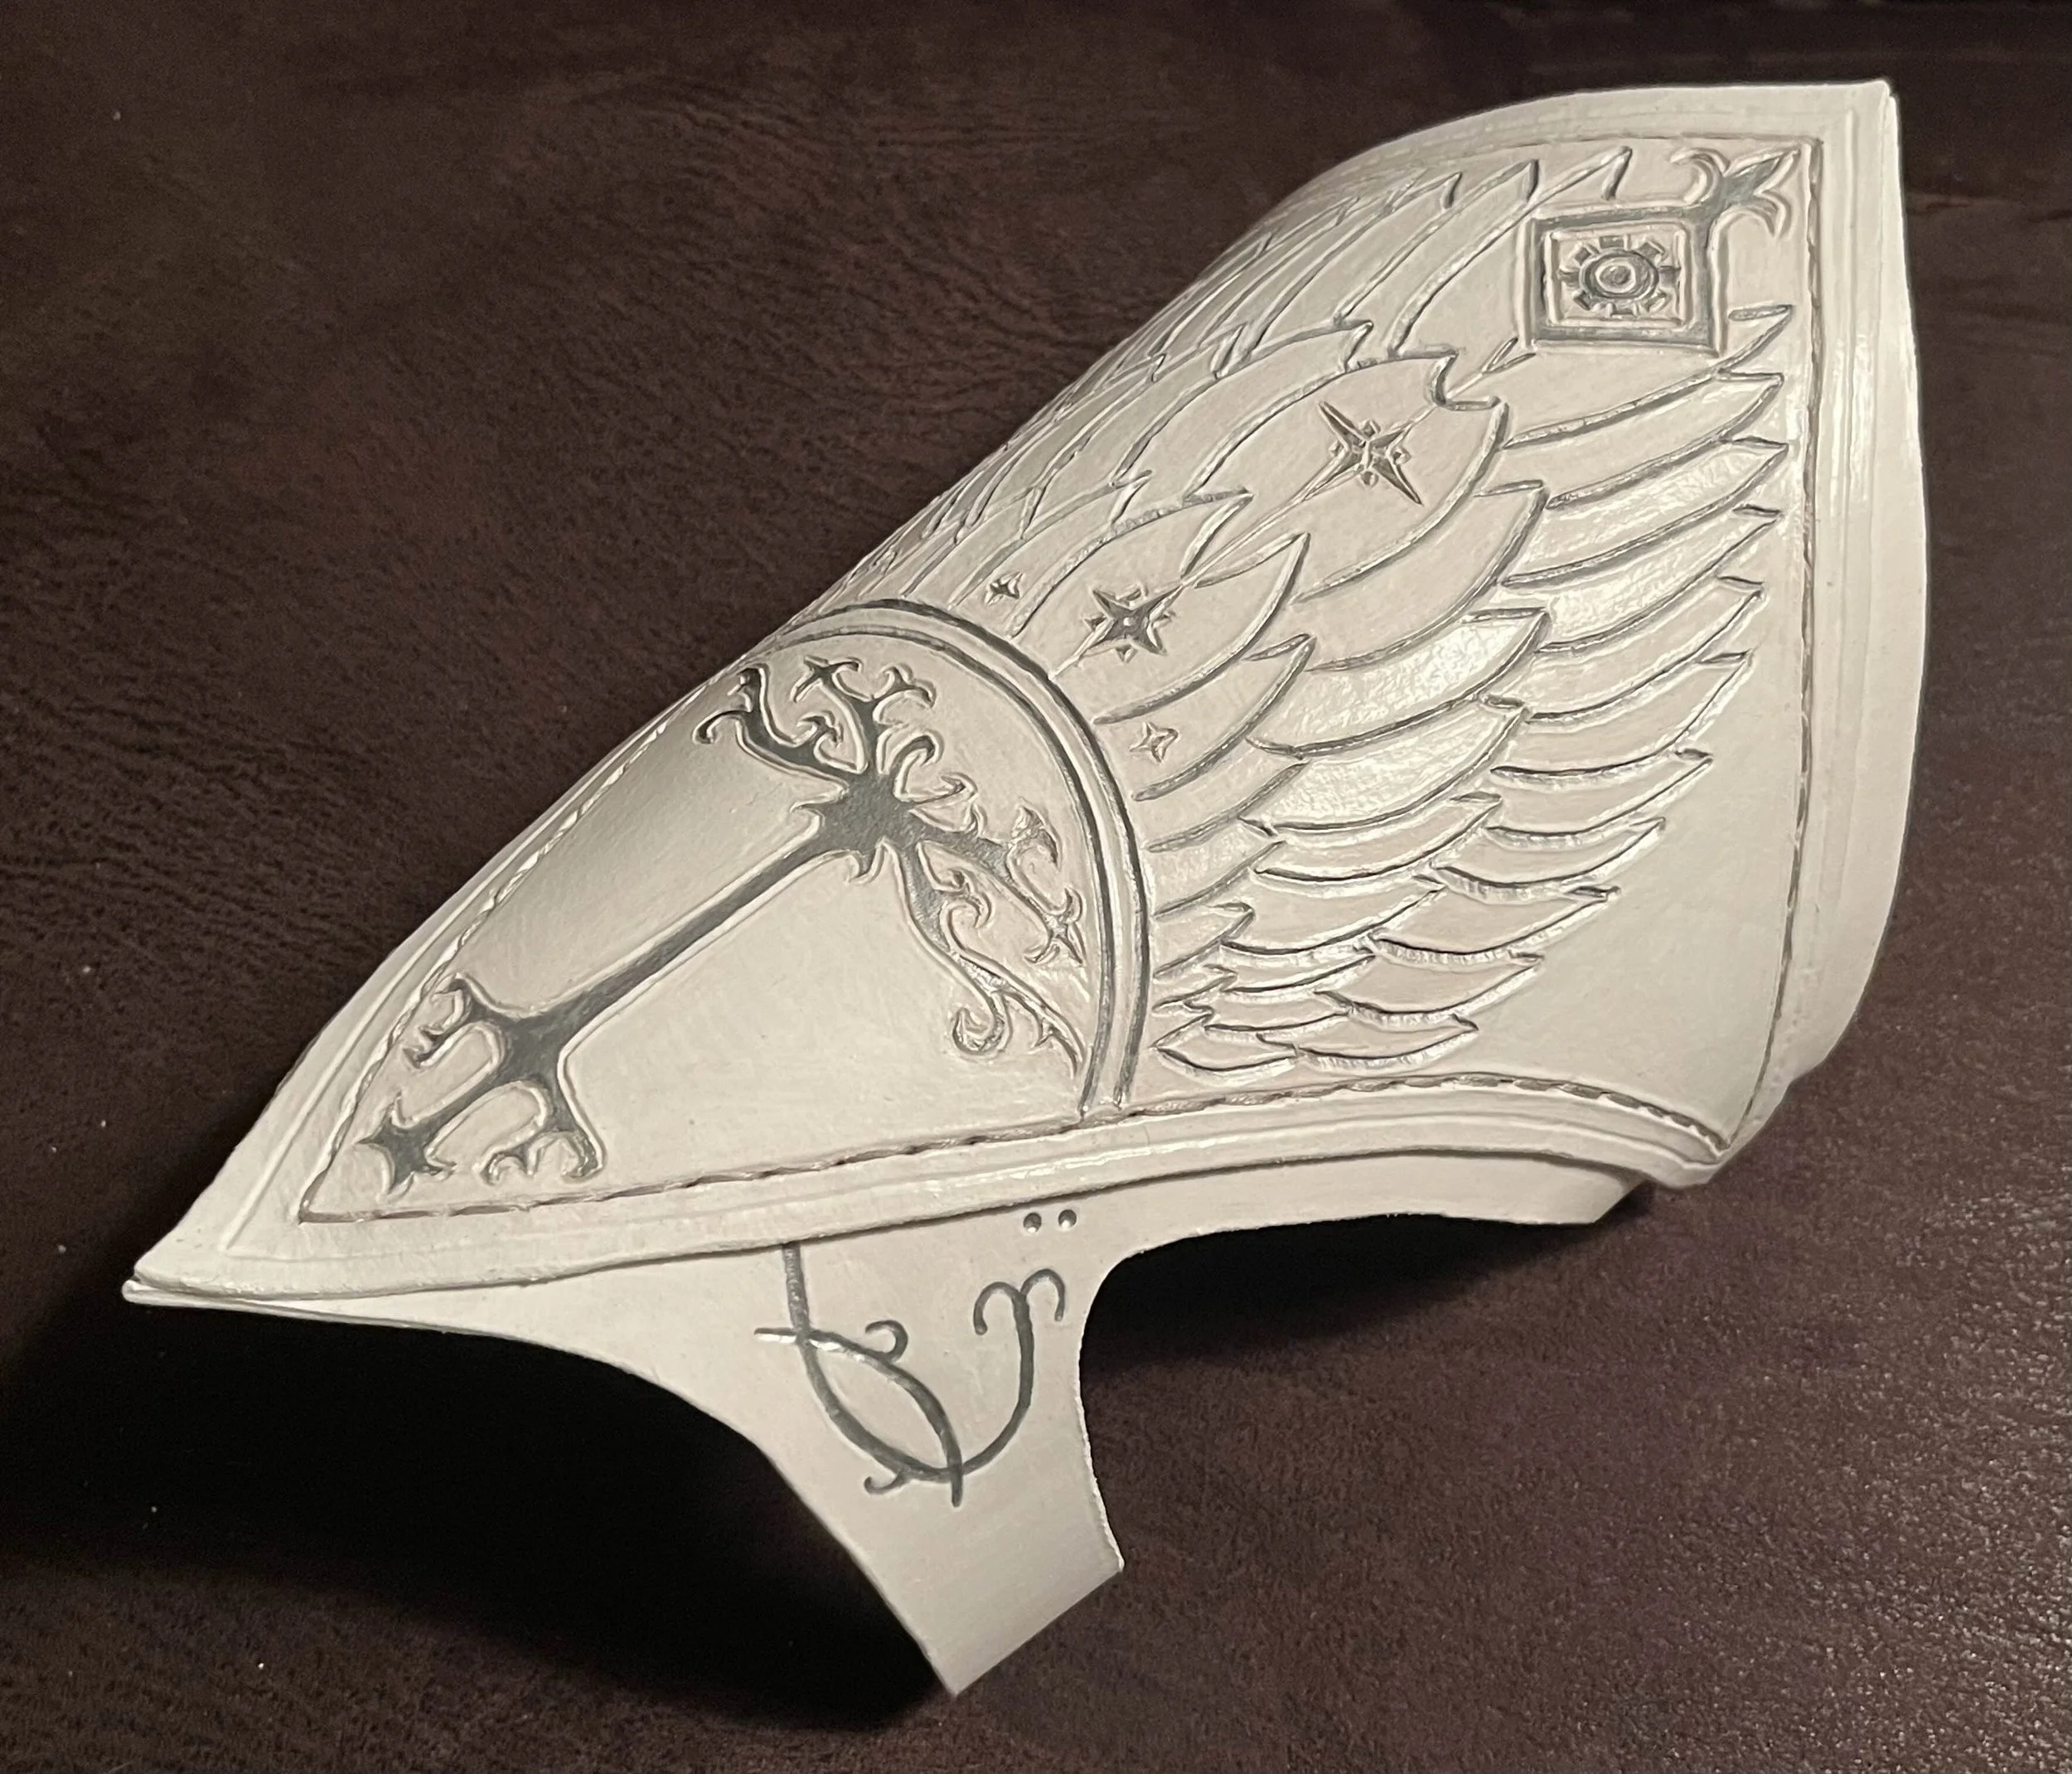
Step 3: Paint
It is very difficult to dye leather white. In all honesty, I have not figured it down yet. So, I used leather paint on the veg-tanned leather. I applied multiple coats of white paint until I achieved a uniform smooth color. I then used seal over the leather. After the seal, I used a toothpick and silver acrylic paint to paint the edges of the feathers, the Mark device, the stars, and the tree. Then more leather seal and acrylic seal to keep the paint from getting scratched.
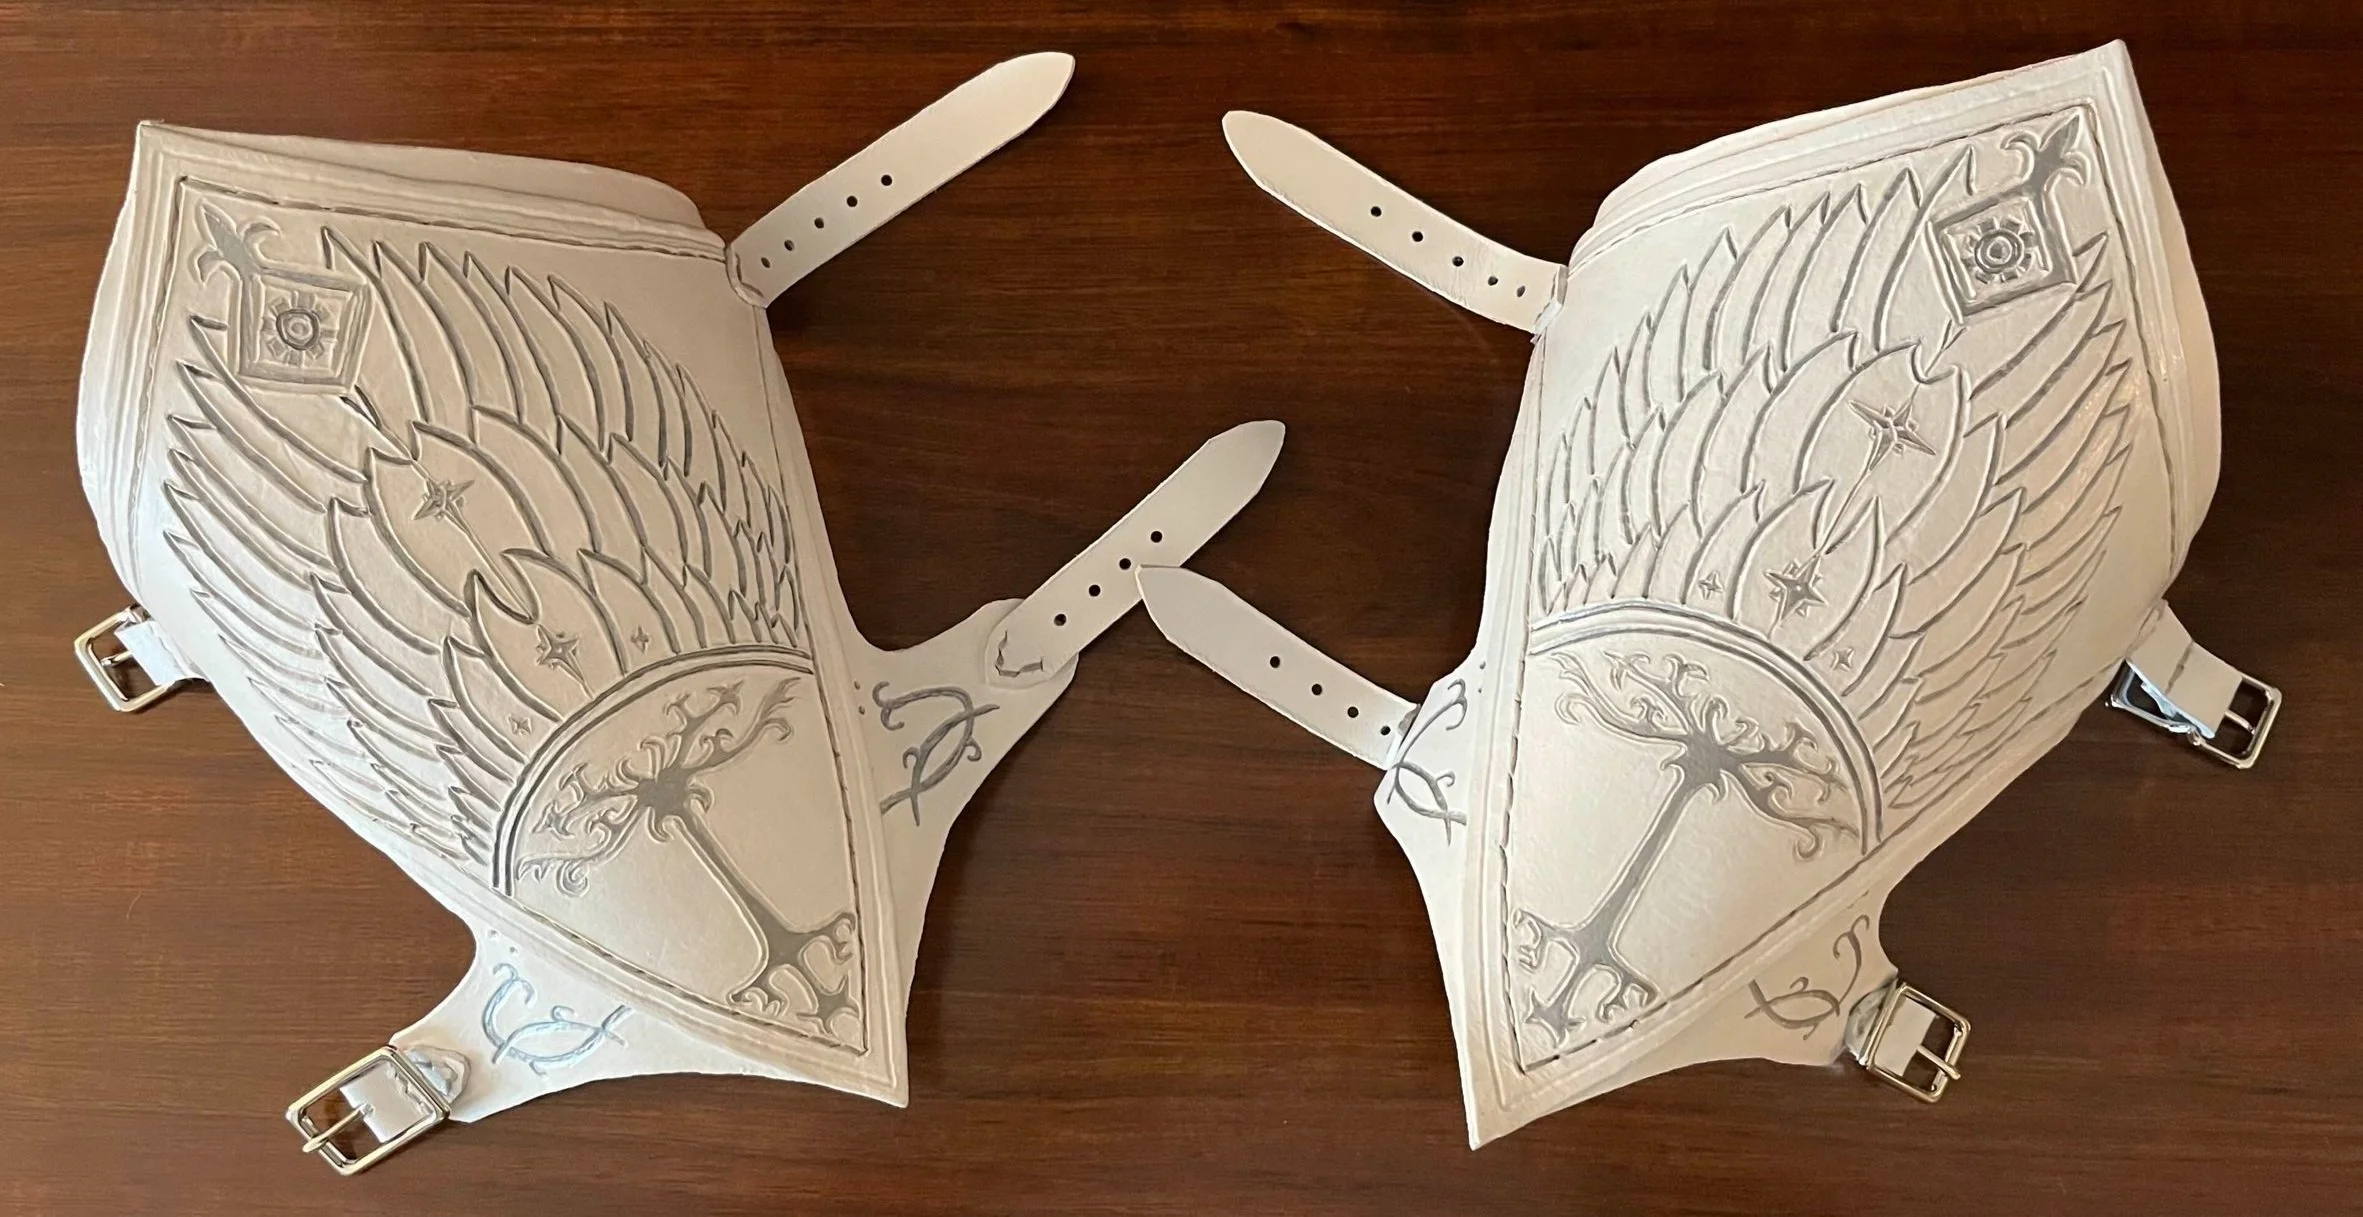
Step 4: Sewing
Next, I placed the diamond shaped leather over the unpainted bottom portion. I punched holes along the second outermost line in the top sections at 1/8-1/4 intervals. Then, using silver-grey embroidery floss, I sewed the top section of the leather onto the bottom section.

Step 5: More Tooling and More Painting
After the two layers were connected, I did a bit of minor tooling near the straps around the cuff. Then I painted the base layer white, and sealed everything. Once the seal dried, I painted the tooled lines on the straps silver, and sealed everything again.
Step 6: Straps
The movie design’s straps are sown on separately to the bracers. So, I cut the extensions on the base layer of leather short. I cut a couple of new straps out of white leather (that was not suitable for tooling). I also got a couple of silver-colored buckles to compliment the other silver elements. The straps were about ¾ of an inch wide. I cut them long enough to fit on the bare arm of the recipient, but long enough to still fit over a thick coat or gambeson. The straps were sewn on with more silver embroidery thread.
Step 7: Done
Finished, and in time for my friend and mentor’s elevation!
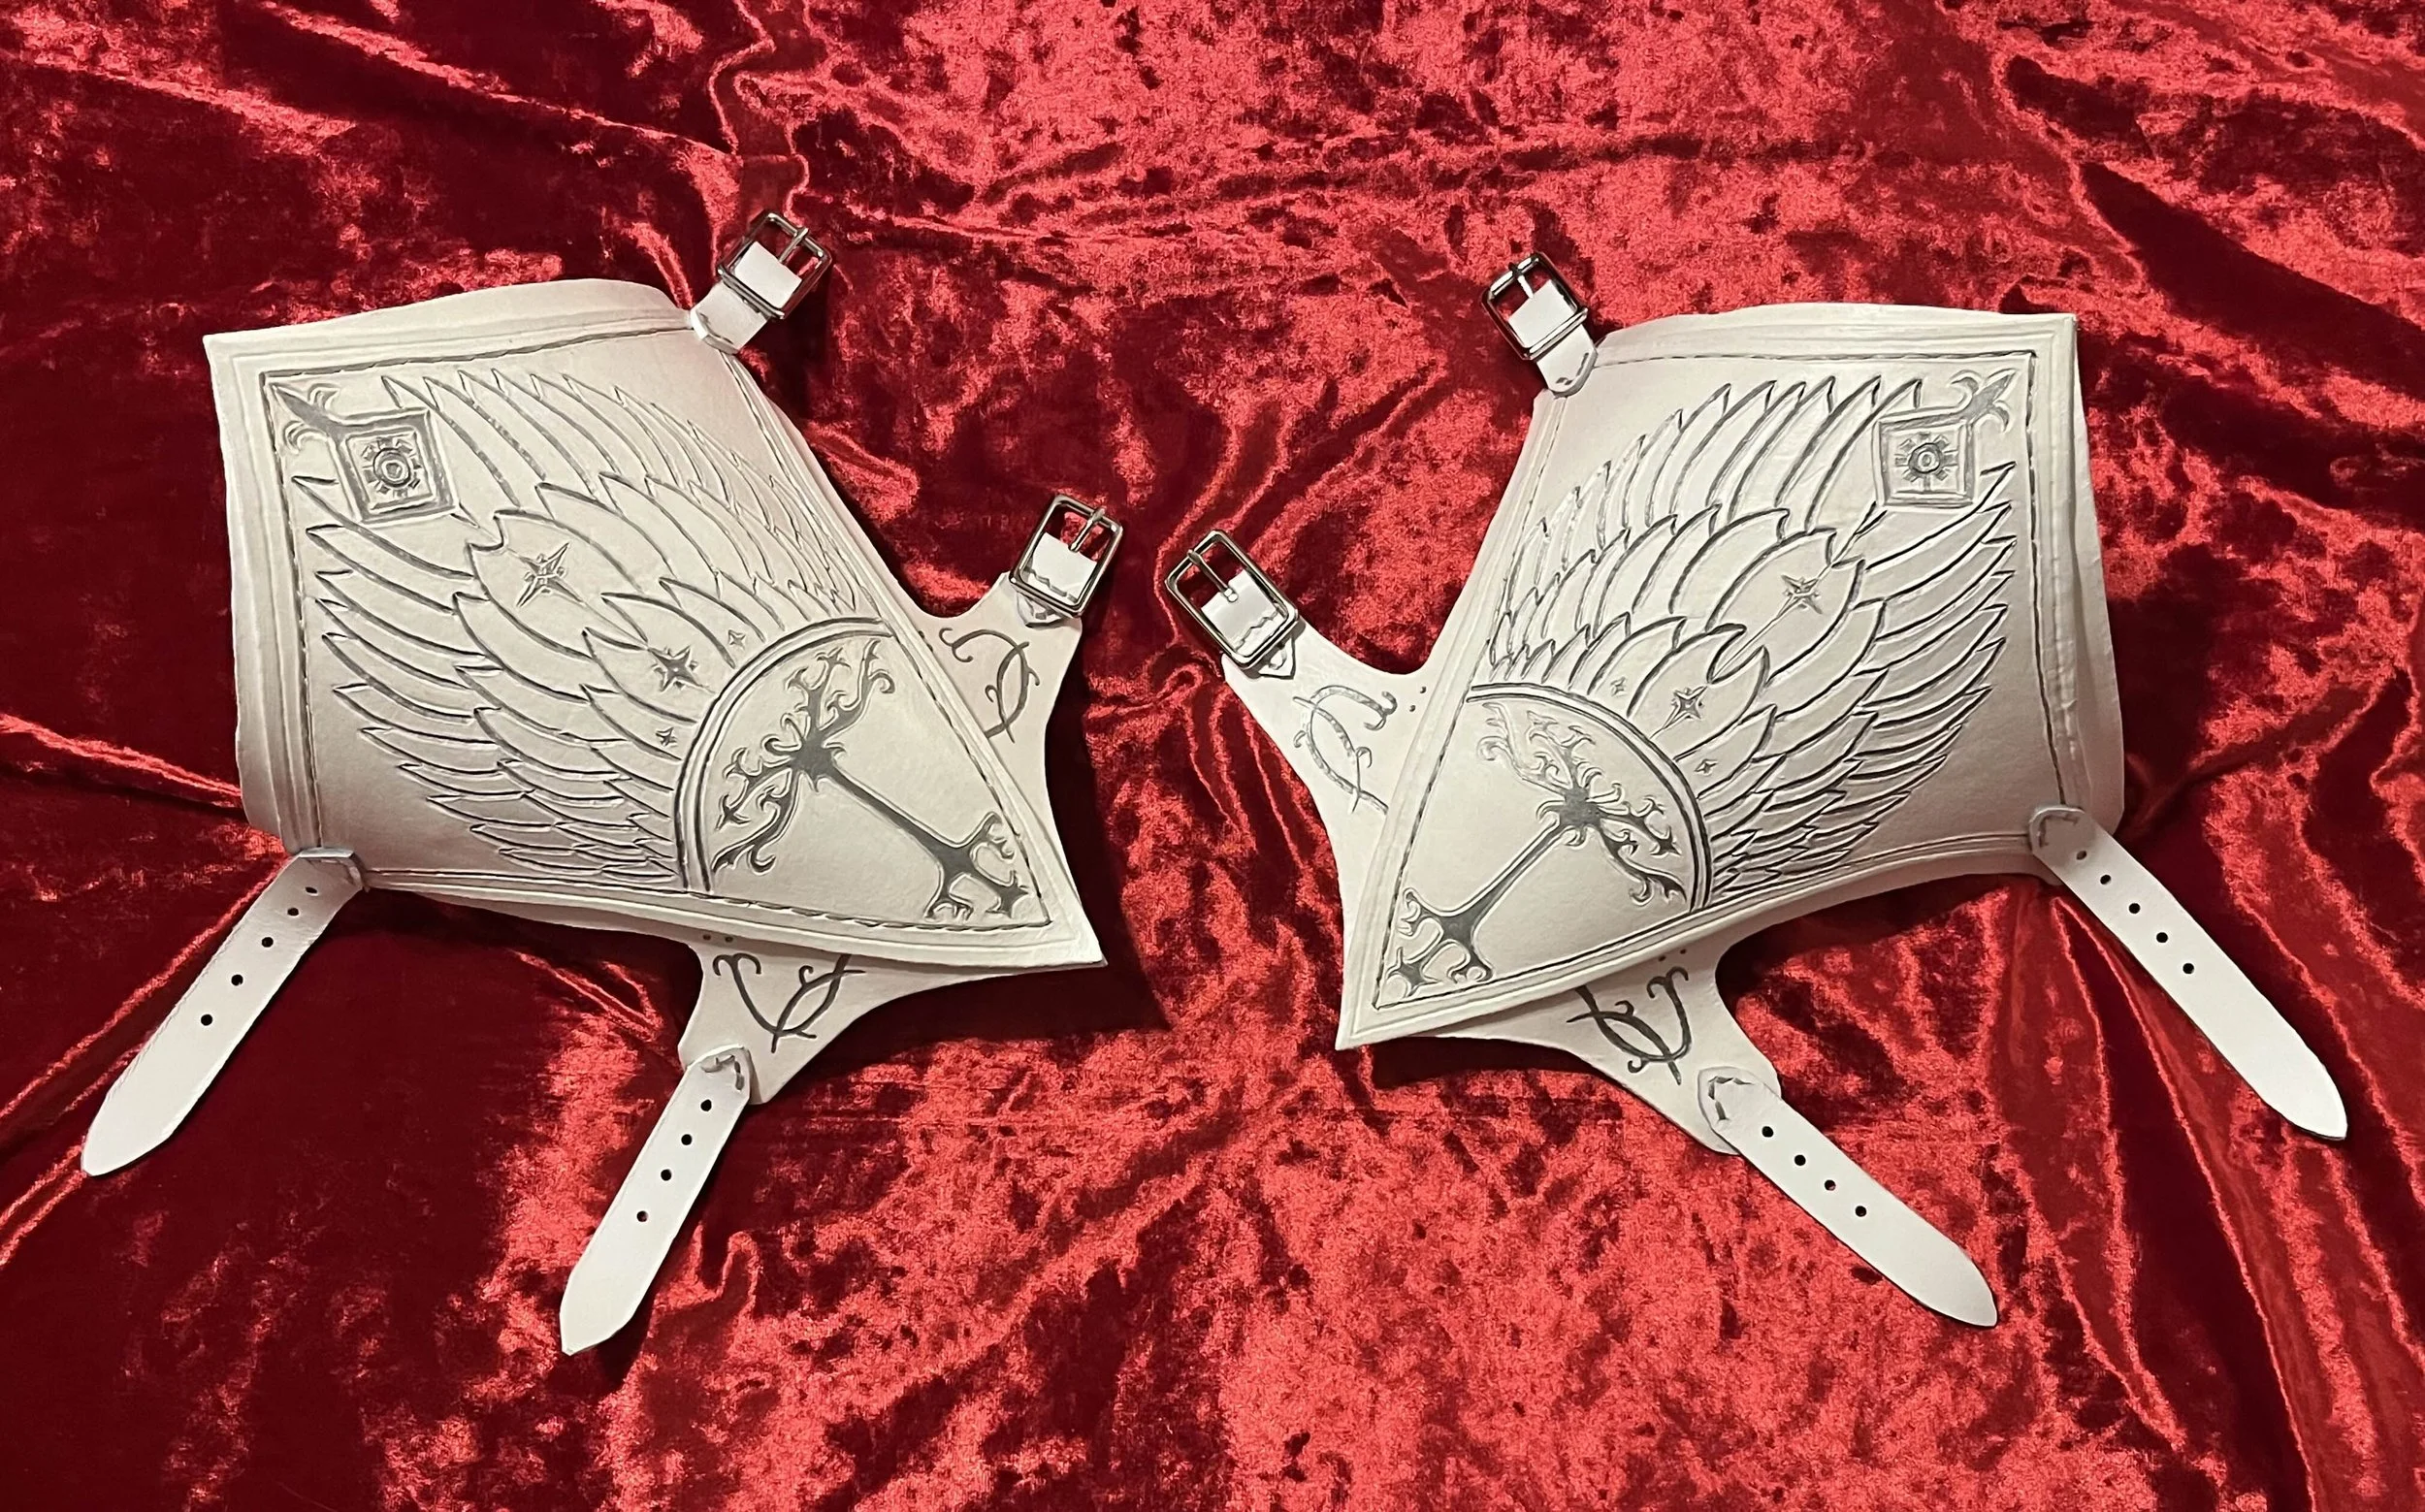
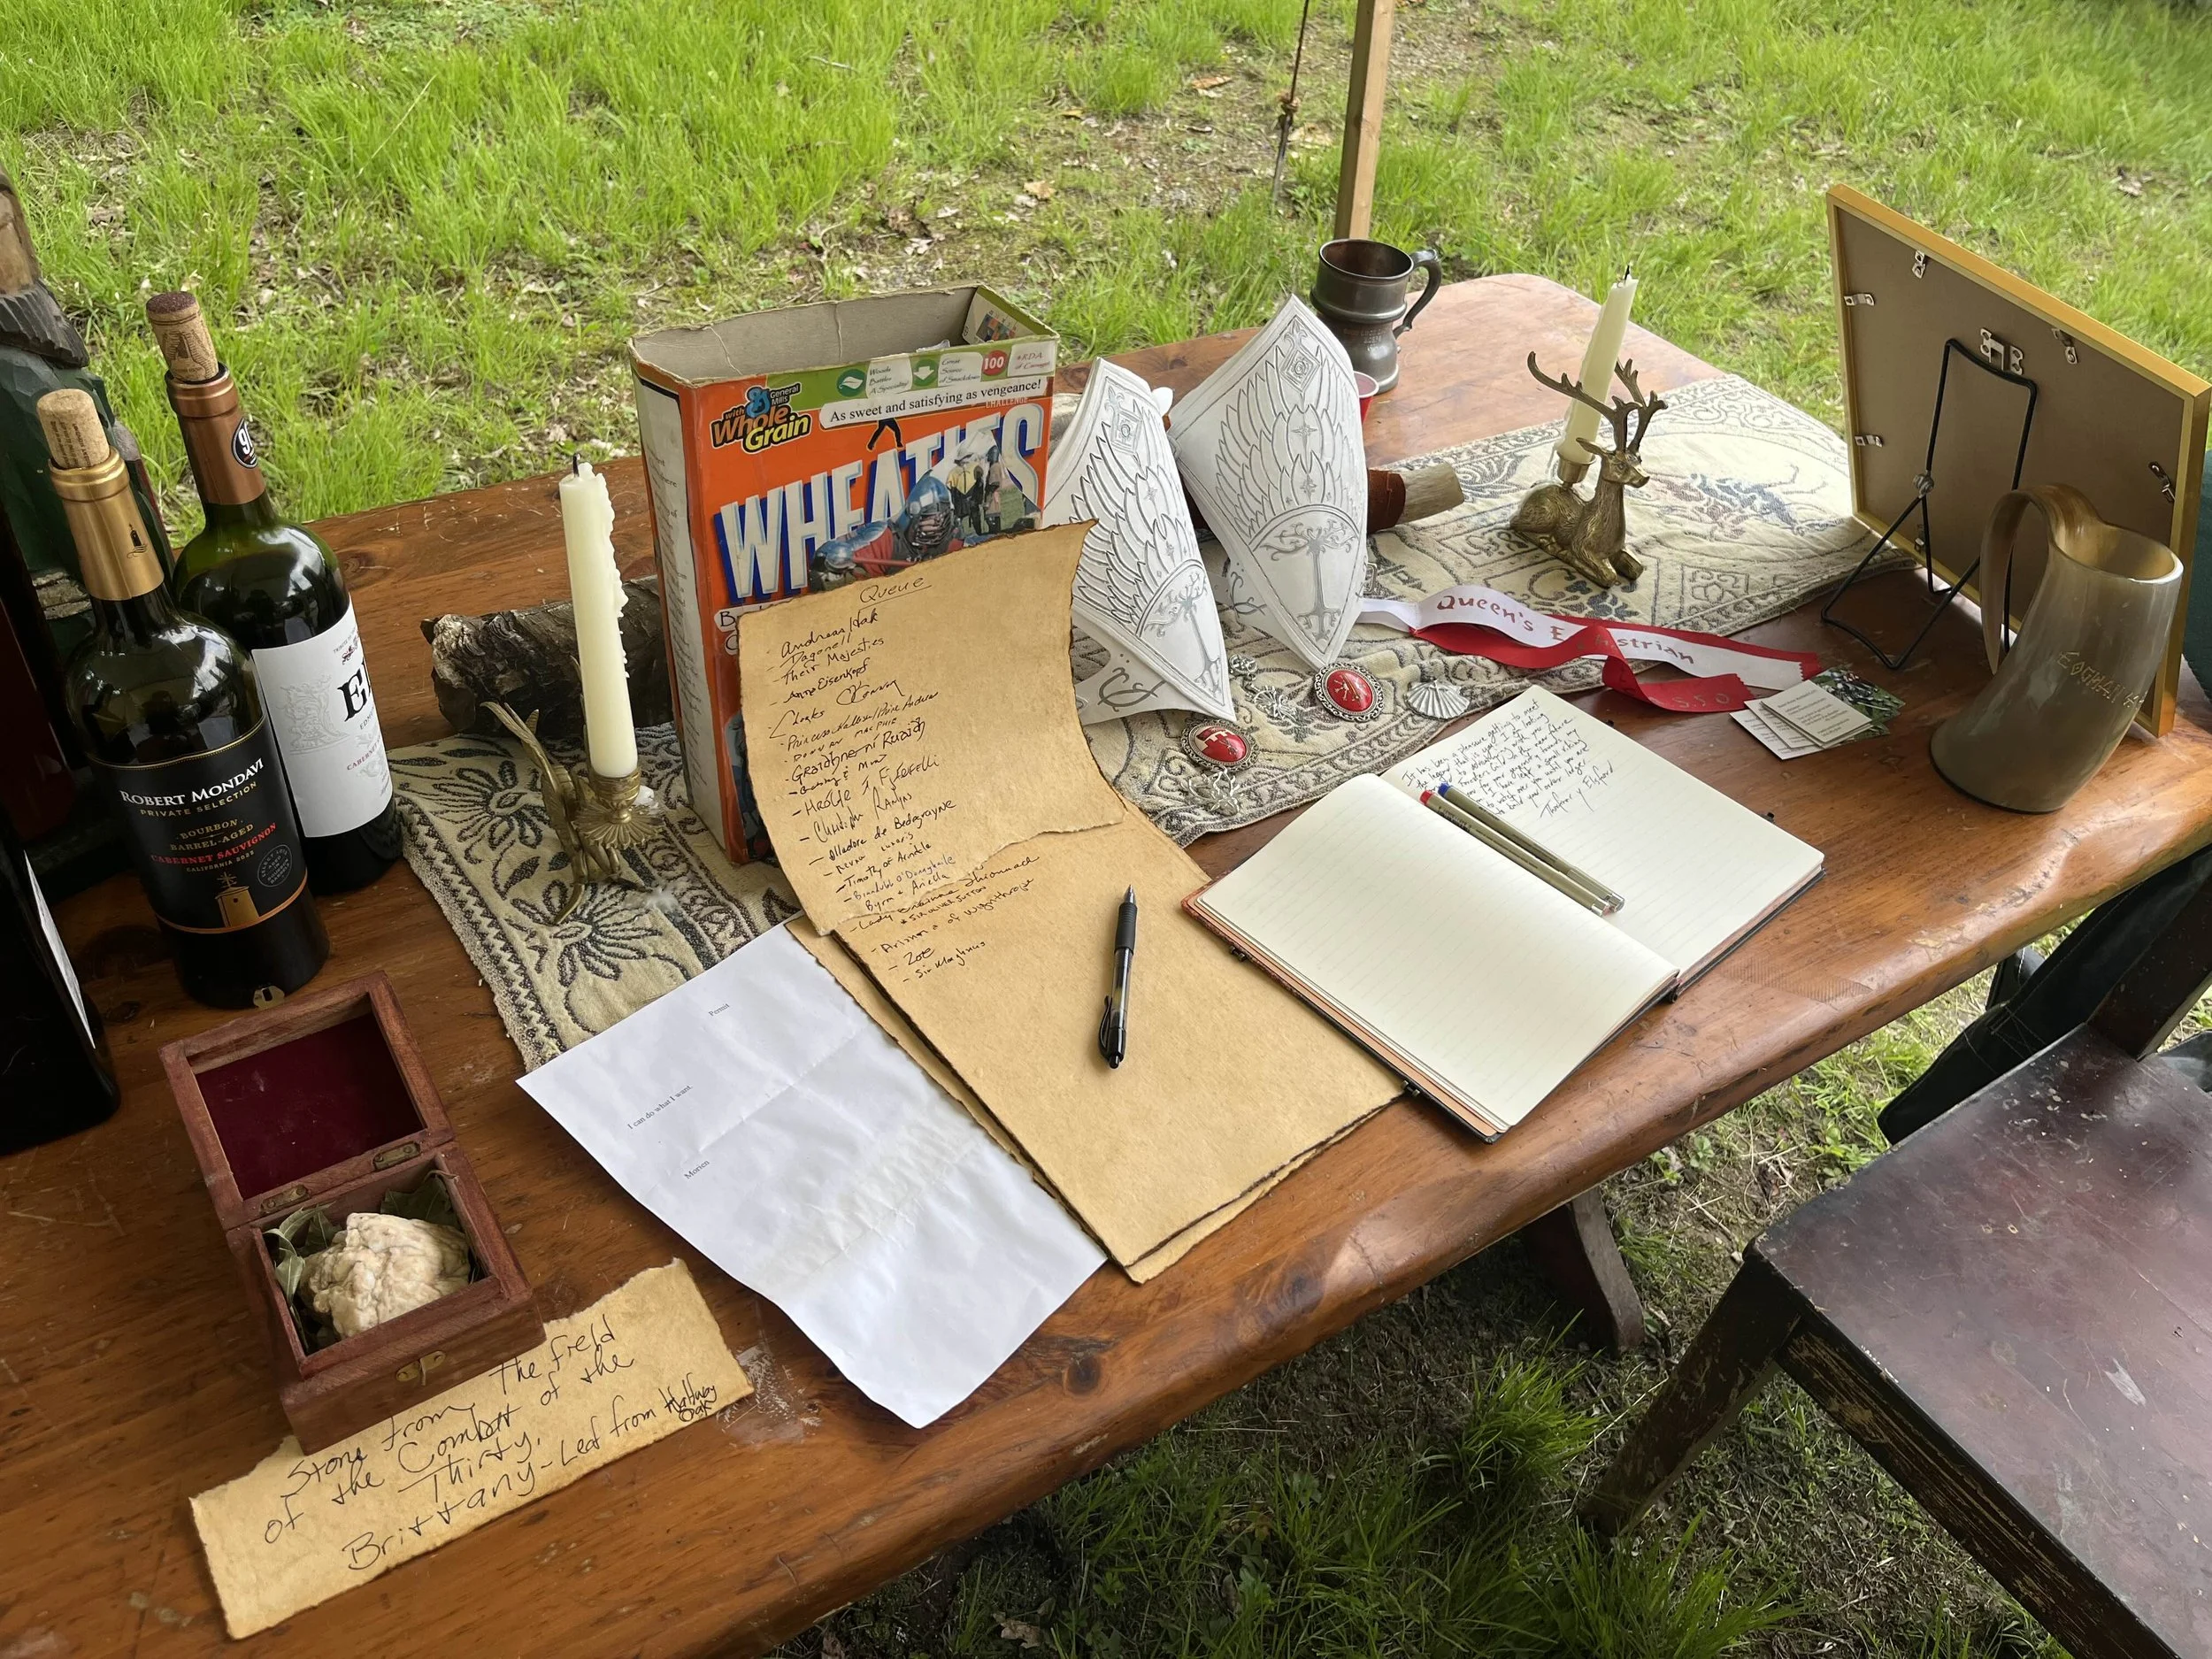
Ready for the day of the ceremony!