Hanging Around with Scary Porpoises: A Rapier Hanger and Scabbard.

Description
The scabbard serves to store and carry a sword when not in use. It further serves to protect the blade from water and other oxidizers, as well as protect random objects from coming into contact with the sword’s edge. The hanger is a device that fastens around the scabbard to help secure it to a sword belt.
This scabbard and hanger are based on surviving examples and artistic depictions from the 16th-17th century in western and central Europe. Examples of hangers from this time period can be found in the Wallace Collection. For reference photos, please see the attached documents.
Supplies
3/4 inch PVC pipe
Leather
4 mm
0.8 mm
Canvas (a drop cloth should be fine)
Artificial sinew
String
Hot glue
Preferred dye or paint
Leather dye seal
Acrylic seal
Aluminum sheet (18 gauge -20 gauge is probably best)
11-12 one inch wide buckles
14 gauge stainless steel wire
14 gage stainless steel rings (3/8 in diameter)
Aluminum rivets
Stainless steel washers
Stainless steel scales
Chicago screws
Two-part epoxy
Tools
Saw (hand saw and/or jig saw)
Dremel tool (with bits to cut metal and PVC)
Leather punch (leather punch stamp)
Leather sewing needle
Permanent marker
Clamps
Paint brushes
Ballpein hammer
Dishing form
Stout Scissors
X-acto knife or a very sharp knife
Plyers
Tin-snips or equivalent
Safety goggles
Leather gloves
Power drill
Heat gun
Hot glue gun
Construction
First of all, be careful when working with tools - especially sharp blades and power tools. If it can cut leather, wood, and metal, it can cut you. I know this from experience. Wear safety goggles. Wear work gloves. Be safe.
Part 1: PVC
Begin by measuring the blade of the weapon you intend to sheath. The dimensions should be 1. The length of the blade from the tip to the guard, 2. The width of the blade at the base, and 3. (if you are using a rapier with a tip) the widest point of the tip. Once you have these measurements, get a plastic pipe that can accommodate all of the measurements of the blade. I used a PVC pipe with a 3/4 inch diameter. However; Syloflex or some other variety could also work. Pass the blade into the pipe to make sure it will fit.
The next step is to cut the pipe to the appropriate length, which will be the sword blade’s length plus 1.5 inches. I recommend adding an extra 1.5 inches to allow for shaping. Once it is cut, the end will need to be shaped. Using a heat gun, heat the tip of the pipe until it is soft enough to be compressed. This may take a hot minute (ha!) and I recommend using a pair of insulated gloves to not burn yourself while heating the pipe. Once the tip is soft, take a clamp and compress the pipe until it closes completely. Leave the pipe to cool completely. Once it is cool, check to make sure the sword will still fit completely inside the pipe. If it does, mark off the flattened end to add a taper. Using a saw or Dremel tool cut away the excess plastic to make the taper at the compressed tip.
Part II: Leatherwork
Unlike wood, PVC is not porous. As a result, the leather may not grip properly to the plastic core without assistance. I recommend, especially to give the raisers something to grip onto, the PVC be wrapped in canvas. I hot glued a section of drop cloth around the PVC. Make sure that the canvas is reasonably tight and flat against the PVC.
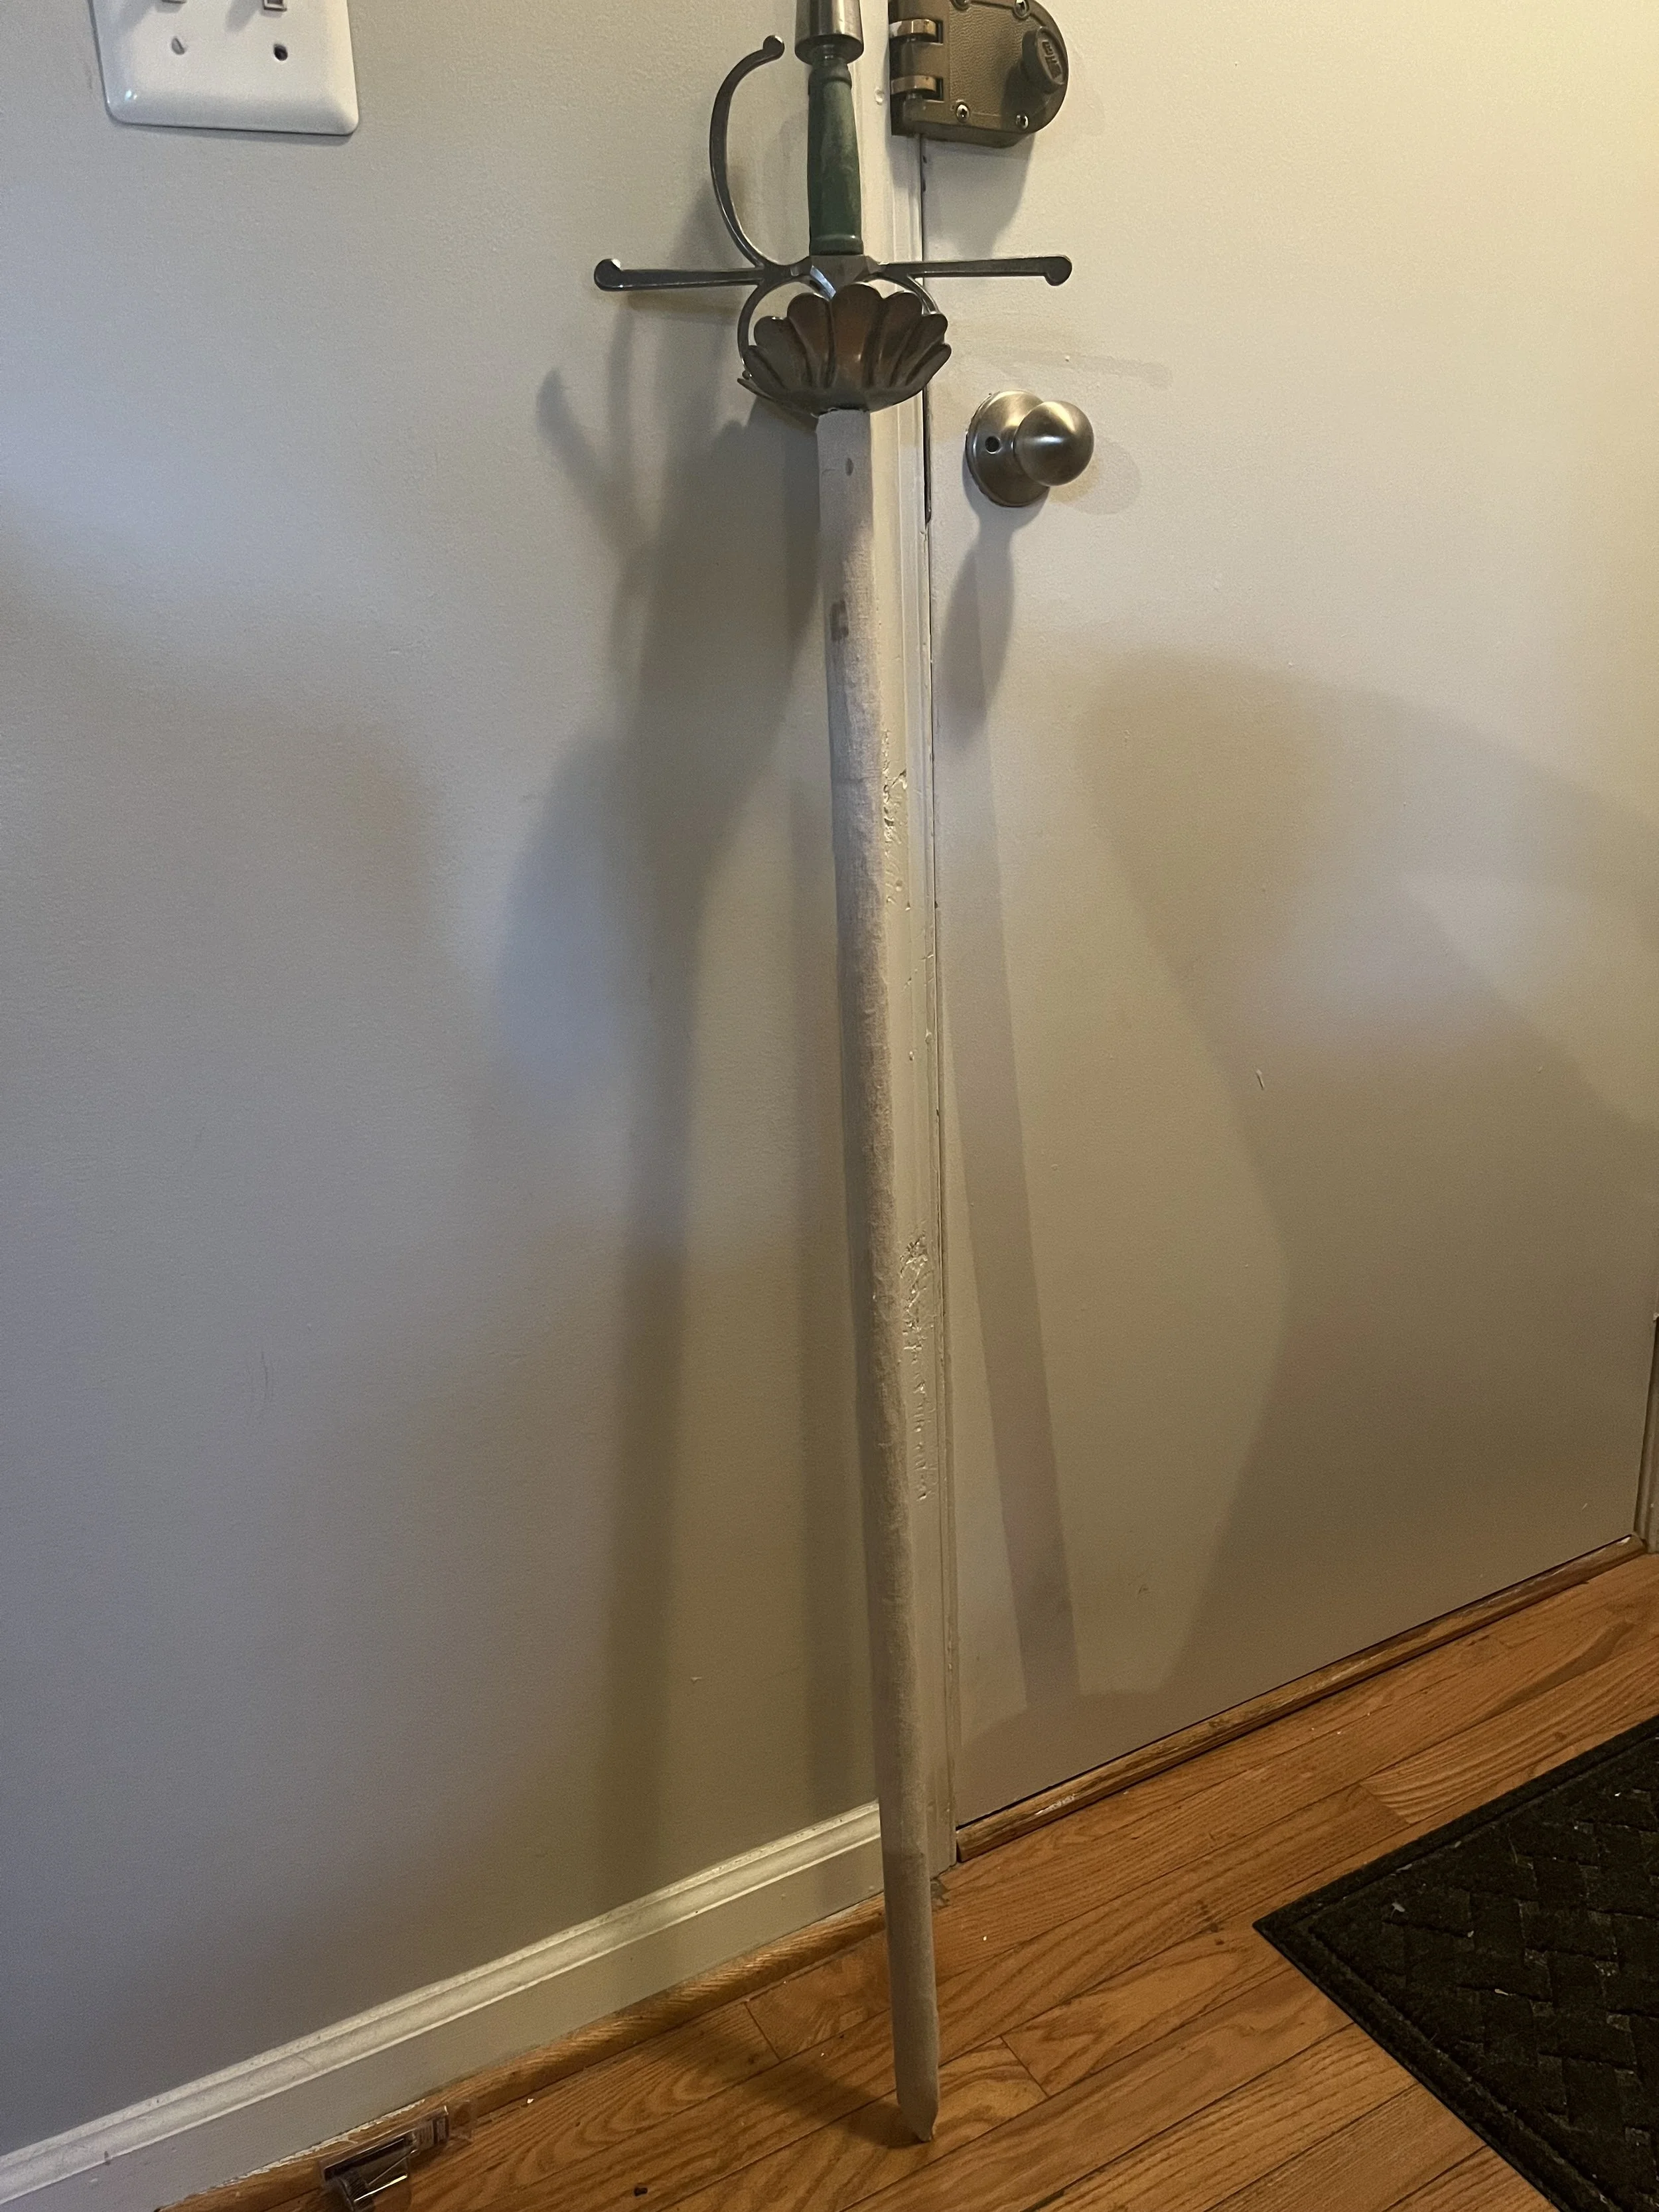
Fig. 1
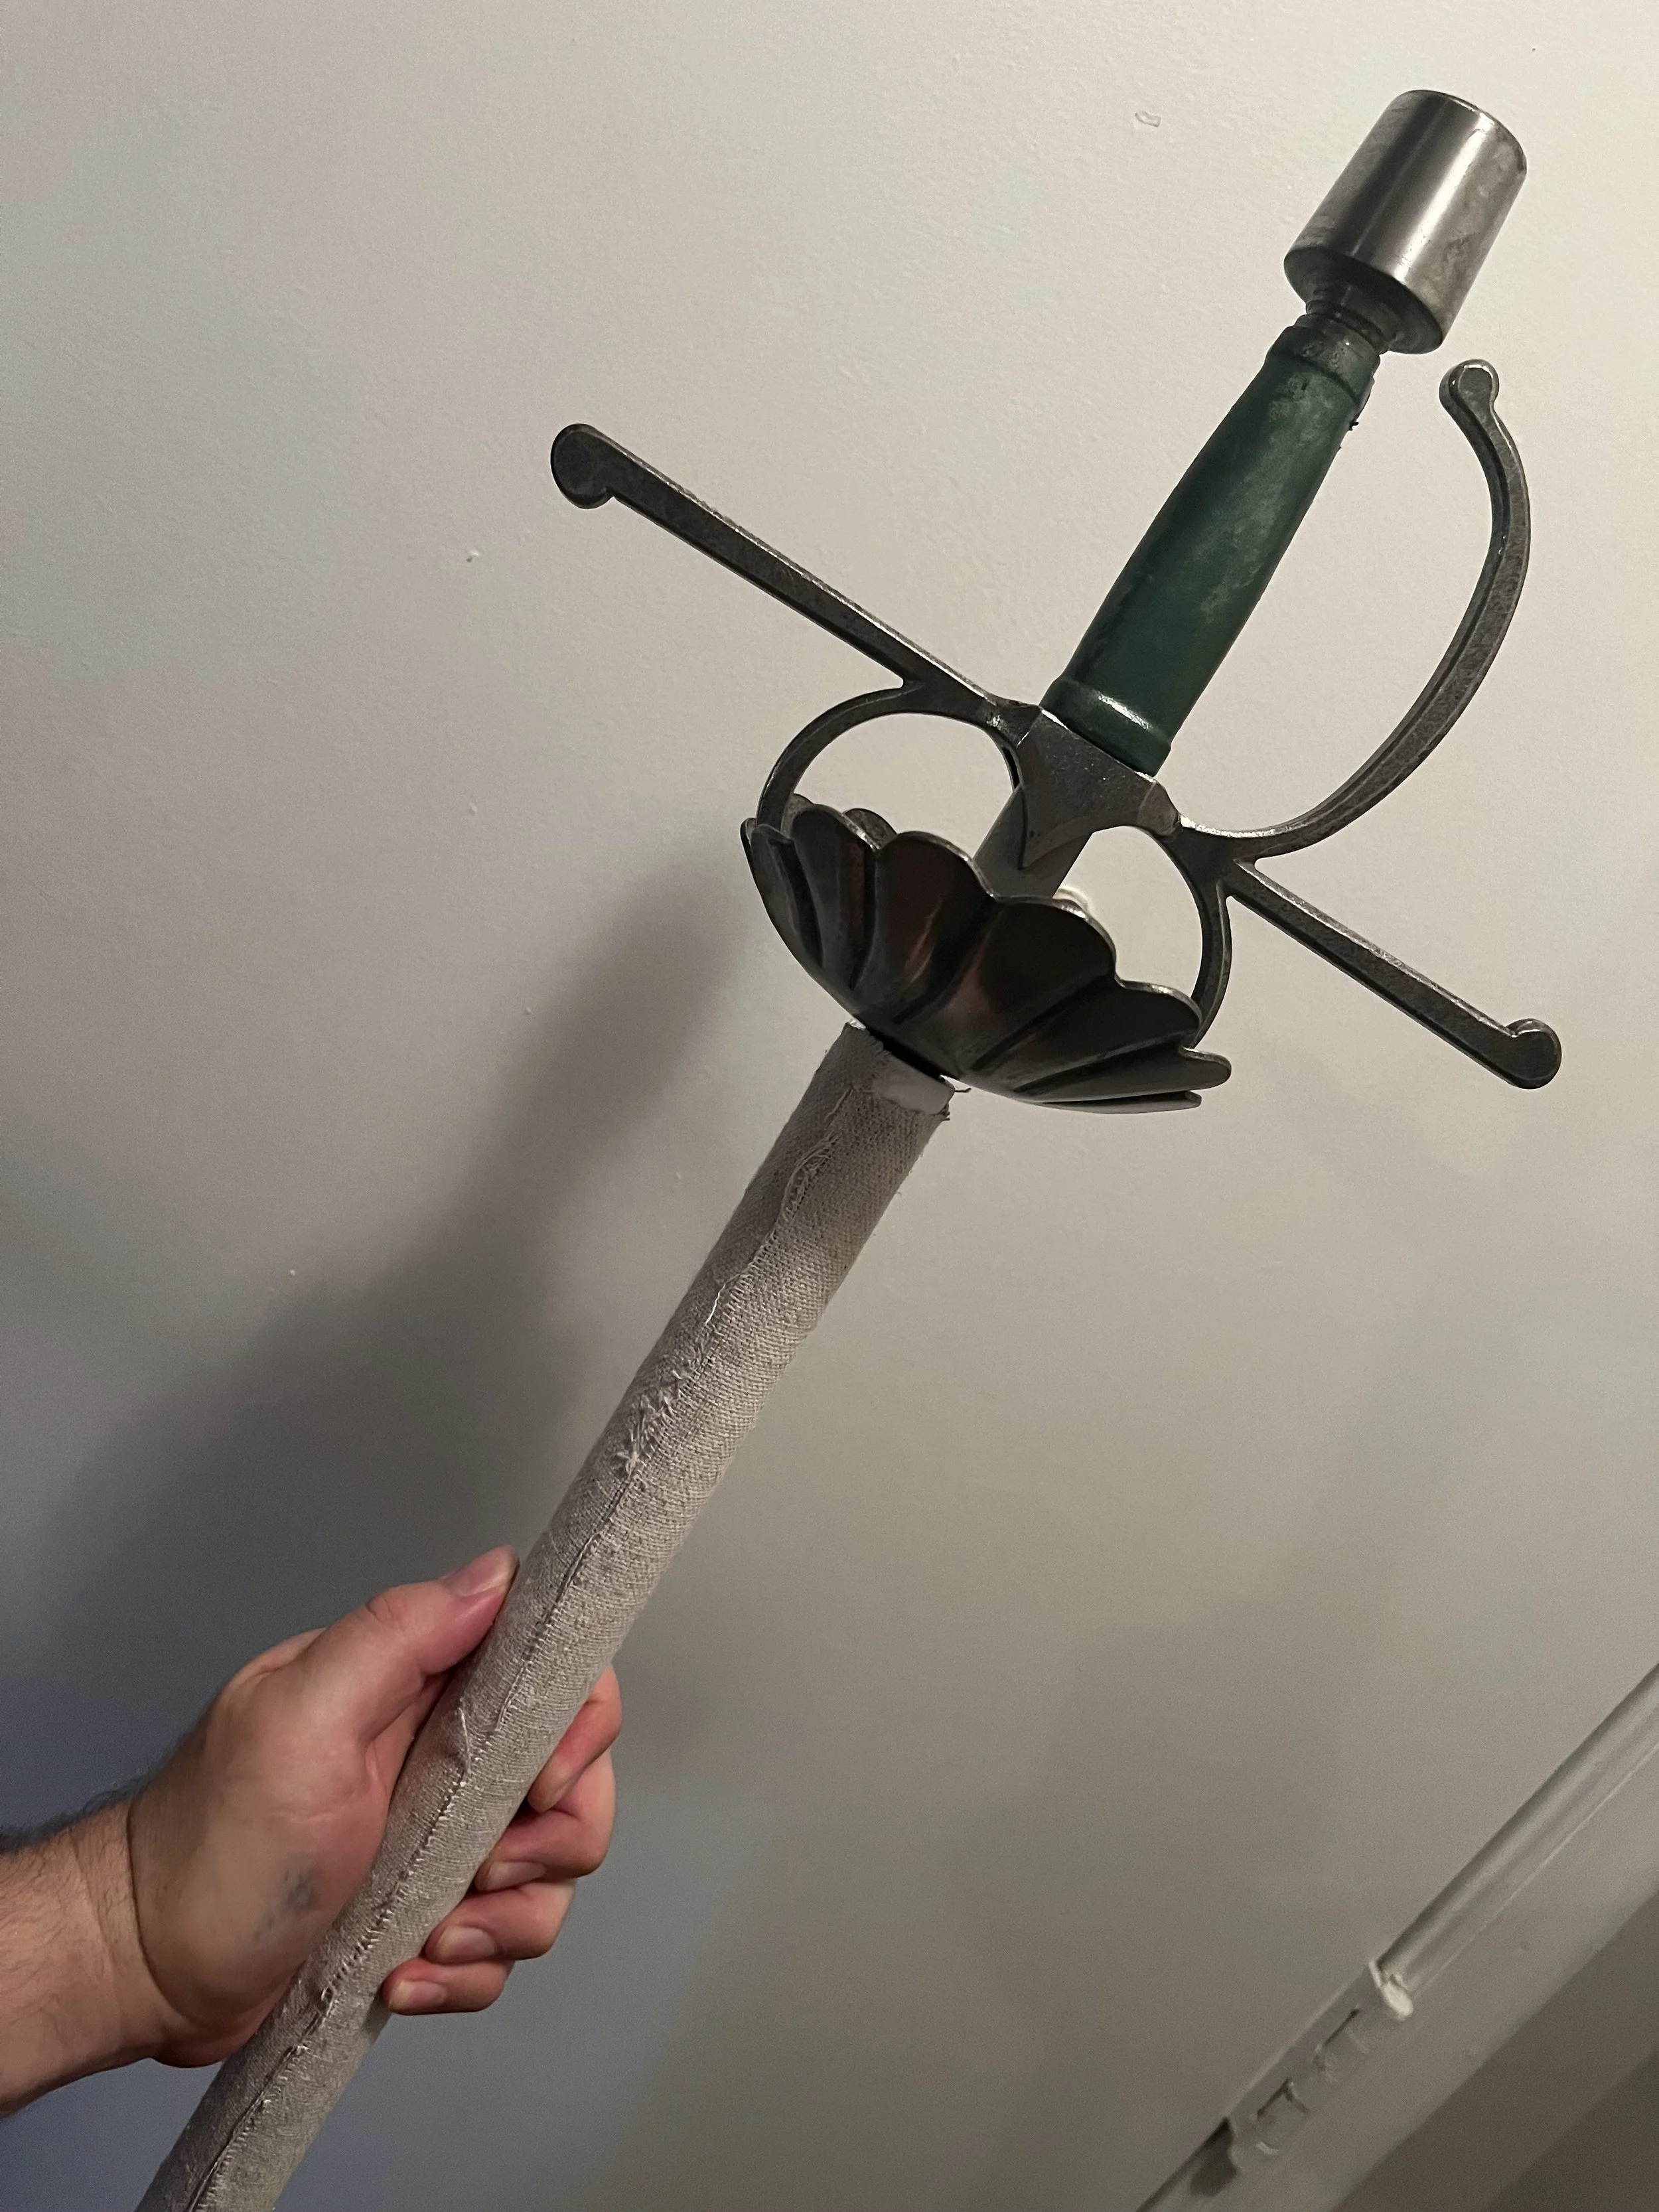
Fig. 2
The next part will be applying the raisers. Determine where your hanger will go on your scabbard. To an extent, this is a matter of preference for how you want the sword to hang at your side, and how wide all of the hanger’s buckles are collectively. For this piece, there are nine buckles on the hanger, each accommodating a 3/4 inch strap and have an inch wide exterior diameter. So, with some room for error, the raisers that boarder the hanger are about 10 inches apart on this scabbard. Hot glue thin strips of leather (about 1/2 inch wide) 10 inches apart to make the risers. Let them cool completely.
Next are the raisers for the three-dimensional pattern running up the scabbard. I decided to make a series of S-shapes spiraling up the scabbard. I did this to simulate waves around the dolphin motifs, and because the recipient of the scabbard is named Stefan. To help keep the spiral consistent, I wrapped the core with a measuring tape, marked a line along the edge, and then measured to make sure the line was reasonably even in terms of spacing. I then cut several pieces of string, and used hot glue to affix the string in a series of S-shapes along the line.

Fig. 3
After the risers are in place, take your 0.8 mm leather and lay it out. Place your scabbard on the leather and position it in such a way to ensure the leather will completely envelope it. Carefully mark how much leather will be used to completely and tightly wrap the scabbard, then cut out this shape. If it is slightly too small, don’t worry about it. Along the edges where you will sew the leather around the scabbard, punch a series of holes to enable stitching. After this, completely soak your leather. I used a sink, but your living companions might object to this. In which case, a bathtub or a bucket will also work. Wipe away the excess water from the leather before wrapping the scabbard.
Now the sewing begins. Take your artificial sinew and your needle and begin sewing your leather over the core. Try to move quickly, as the leather will grow stiff as it dries. You can take a wet cloth and re-wet the leather as you go if you need more time. For aesthetics you may wish to keep the knots of your stitchwork on the inside of the leather. As the leather is sewn around the risers, press around the edges of the risers with a hard, rounded tool. This will help the wet leather form around the pattern. I have a metal tool specifically for leather shaping, but any hard, round tool should do the trick (the back end of a table knife (don’t hold the blade), backend of a pen, etc.).
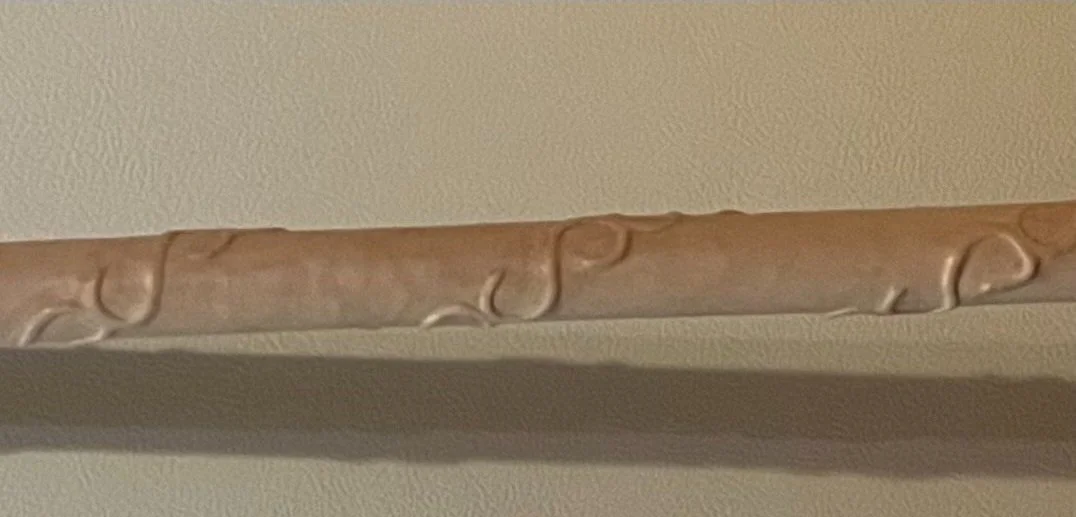
Fig. 4

Fig. 5
Part III: Decoration
The person this scabbard is for, Stefen von Baden, wanted a green base with silver heraldic dolphins (which are elements of his heraldry). So, I incorporated these features.
If you were looking to tool the leather, it is probably too late. However, minor tooling, dying and painting are still options. I drew my patterns onto sticky notes and affixed them to the moist leather (re-wet the leather if needed). Using a sharp-ish tool, I traced over the patters onto the leather (I used a mechanical pencil with the lead retracted). This leaves an impression in the leather that lasts even after it dries.
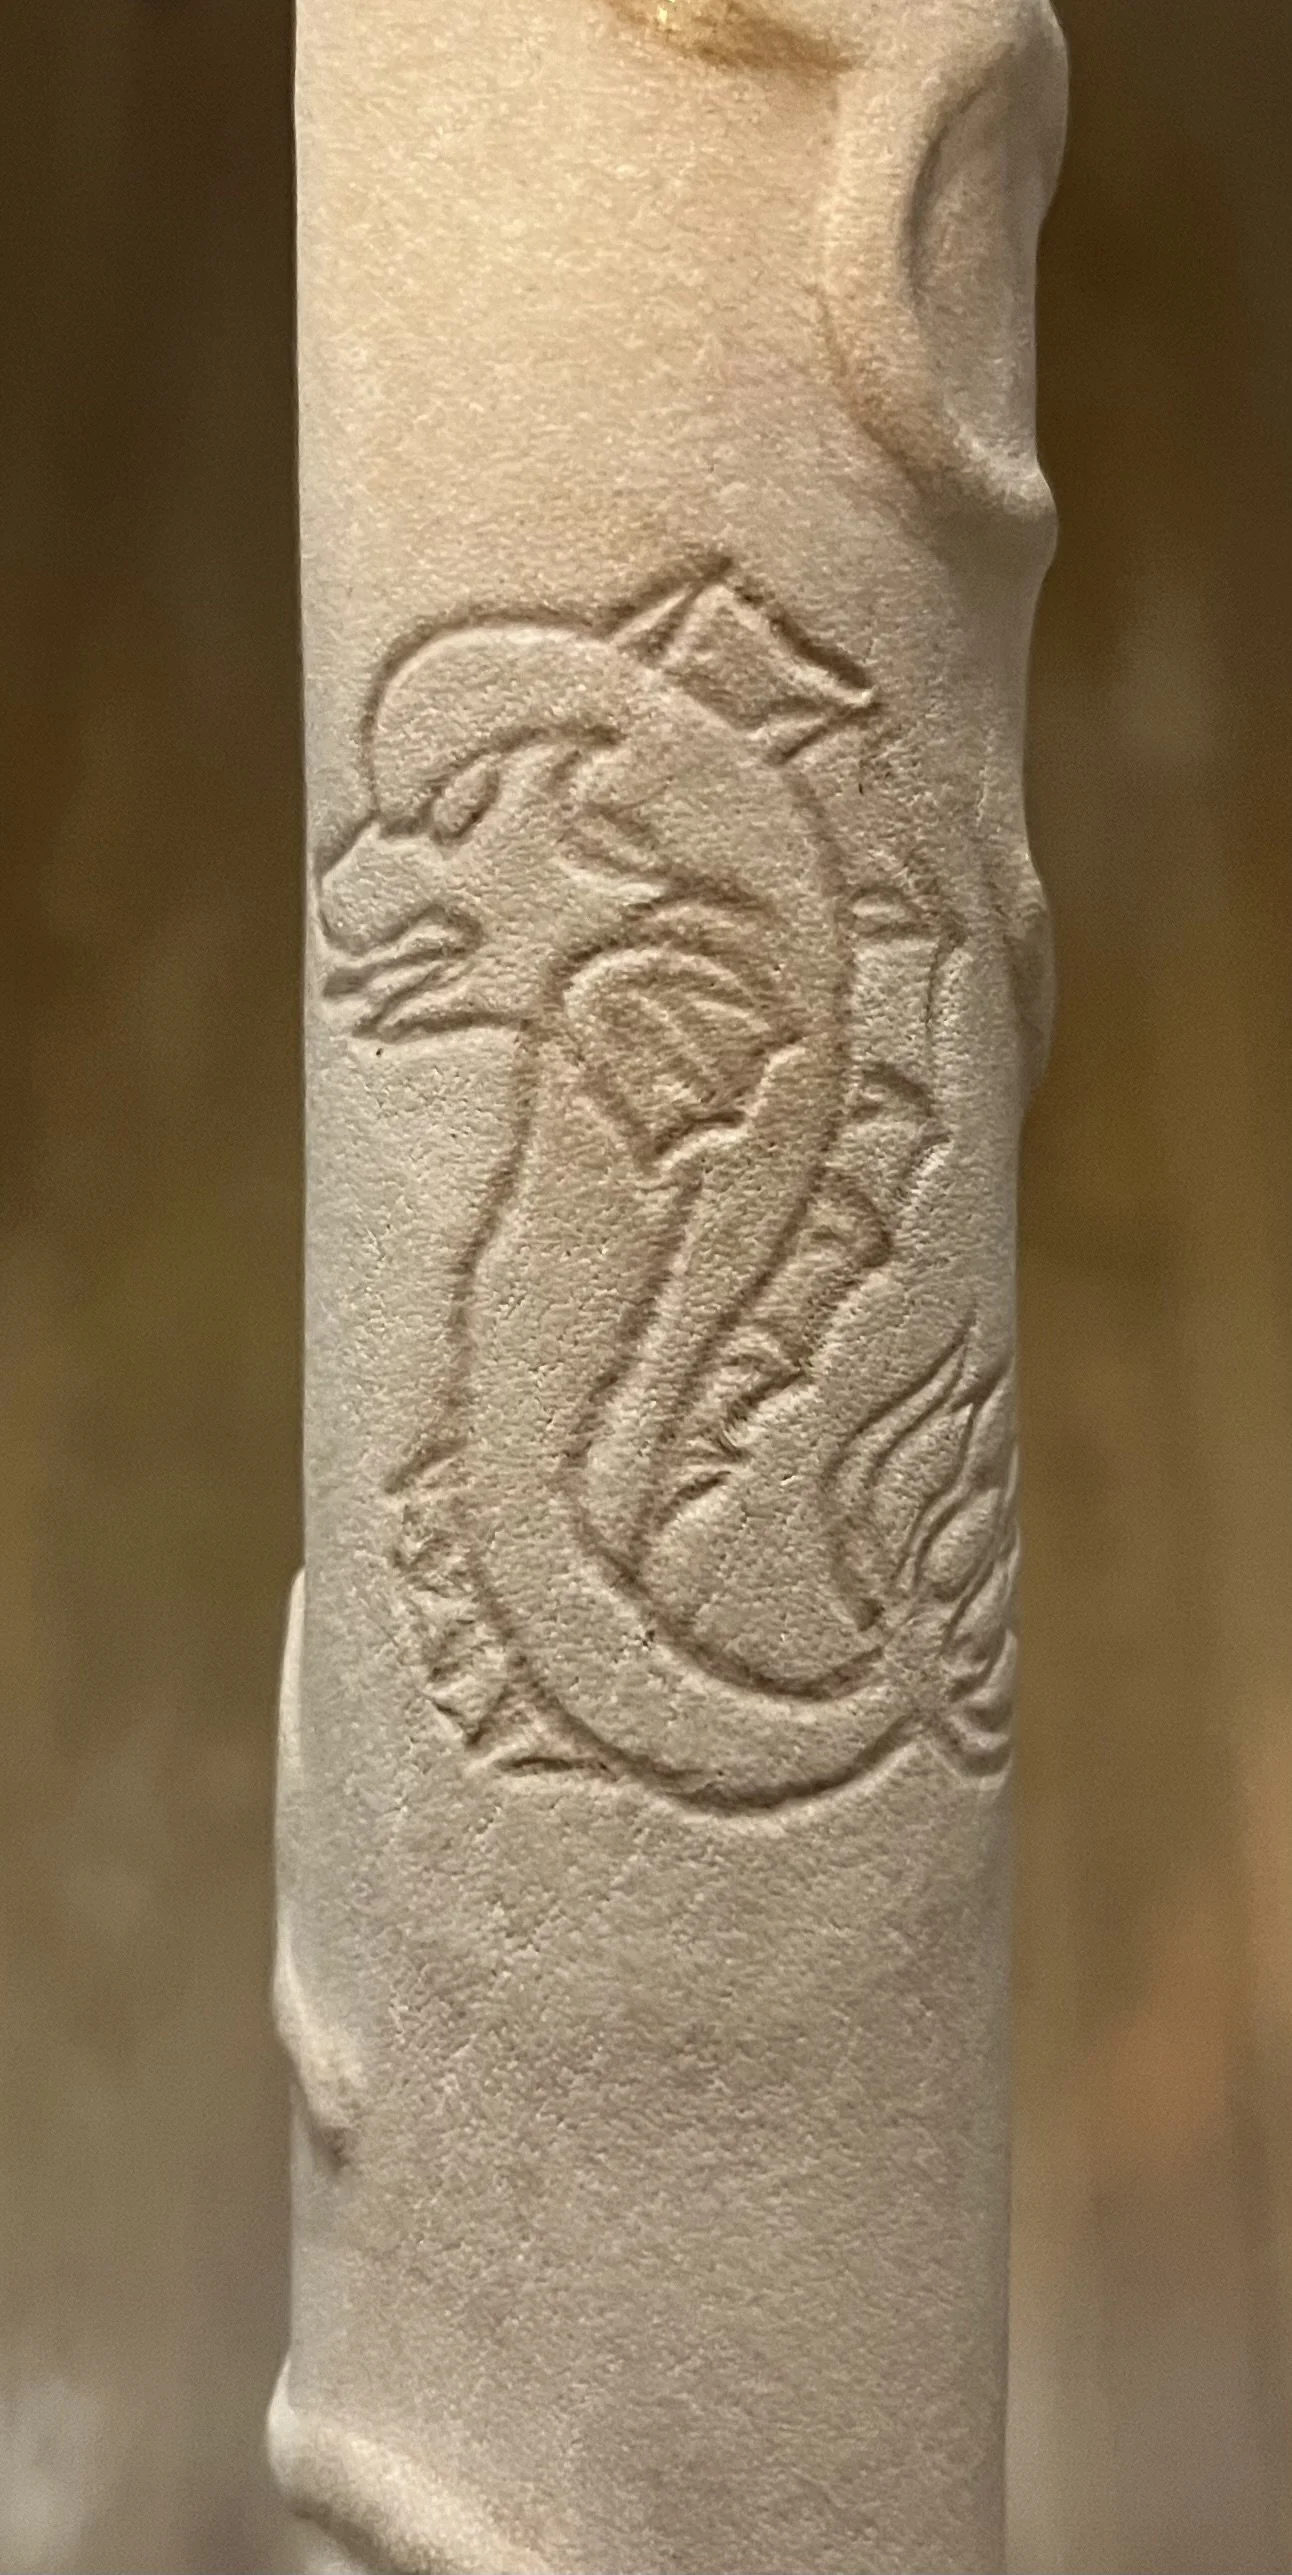
Fig. 6
Apply your dye to the scabbard in thin, even coats. Try not to stop mid application to avoid color inconsistencies. Also, be sure to test your dye on a scrap piece of leather first to make sure the leather you are using will absorb your dye. Apply a layer of acrylic finish to keep the dye from bleeding through. You may need more than one coat of finish.

Fig. 7
Once the base color is done, you can apply details. I first painted the dolphins white and then silver so the green would not bleed through. I used a bone needle and toothpicks to paint, in order to keep the details sharp. Apply finish again over the paint for protection. I applied a duller seal to help reduce the shine.

Fig. 8
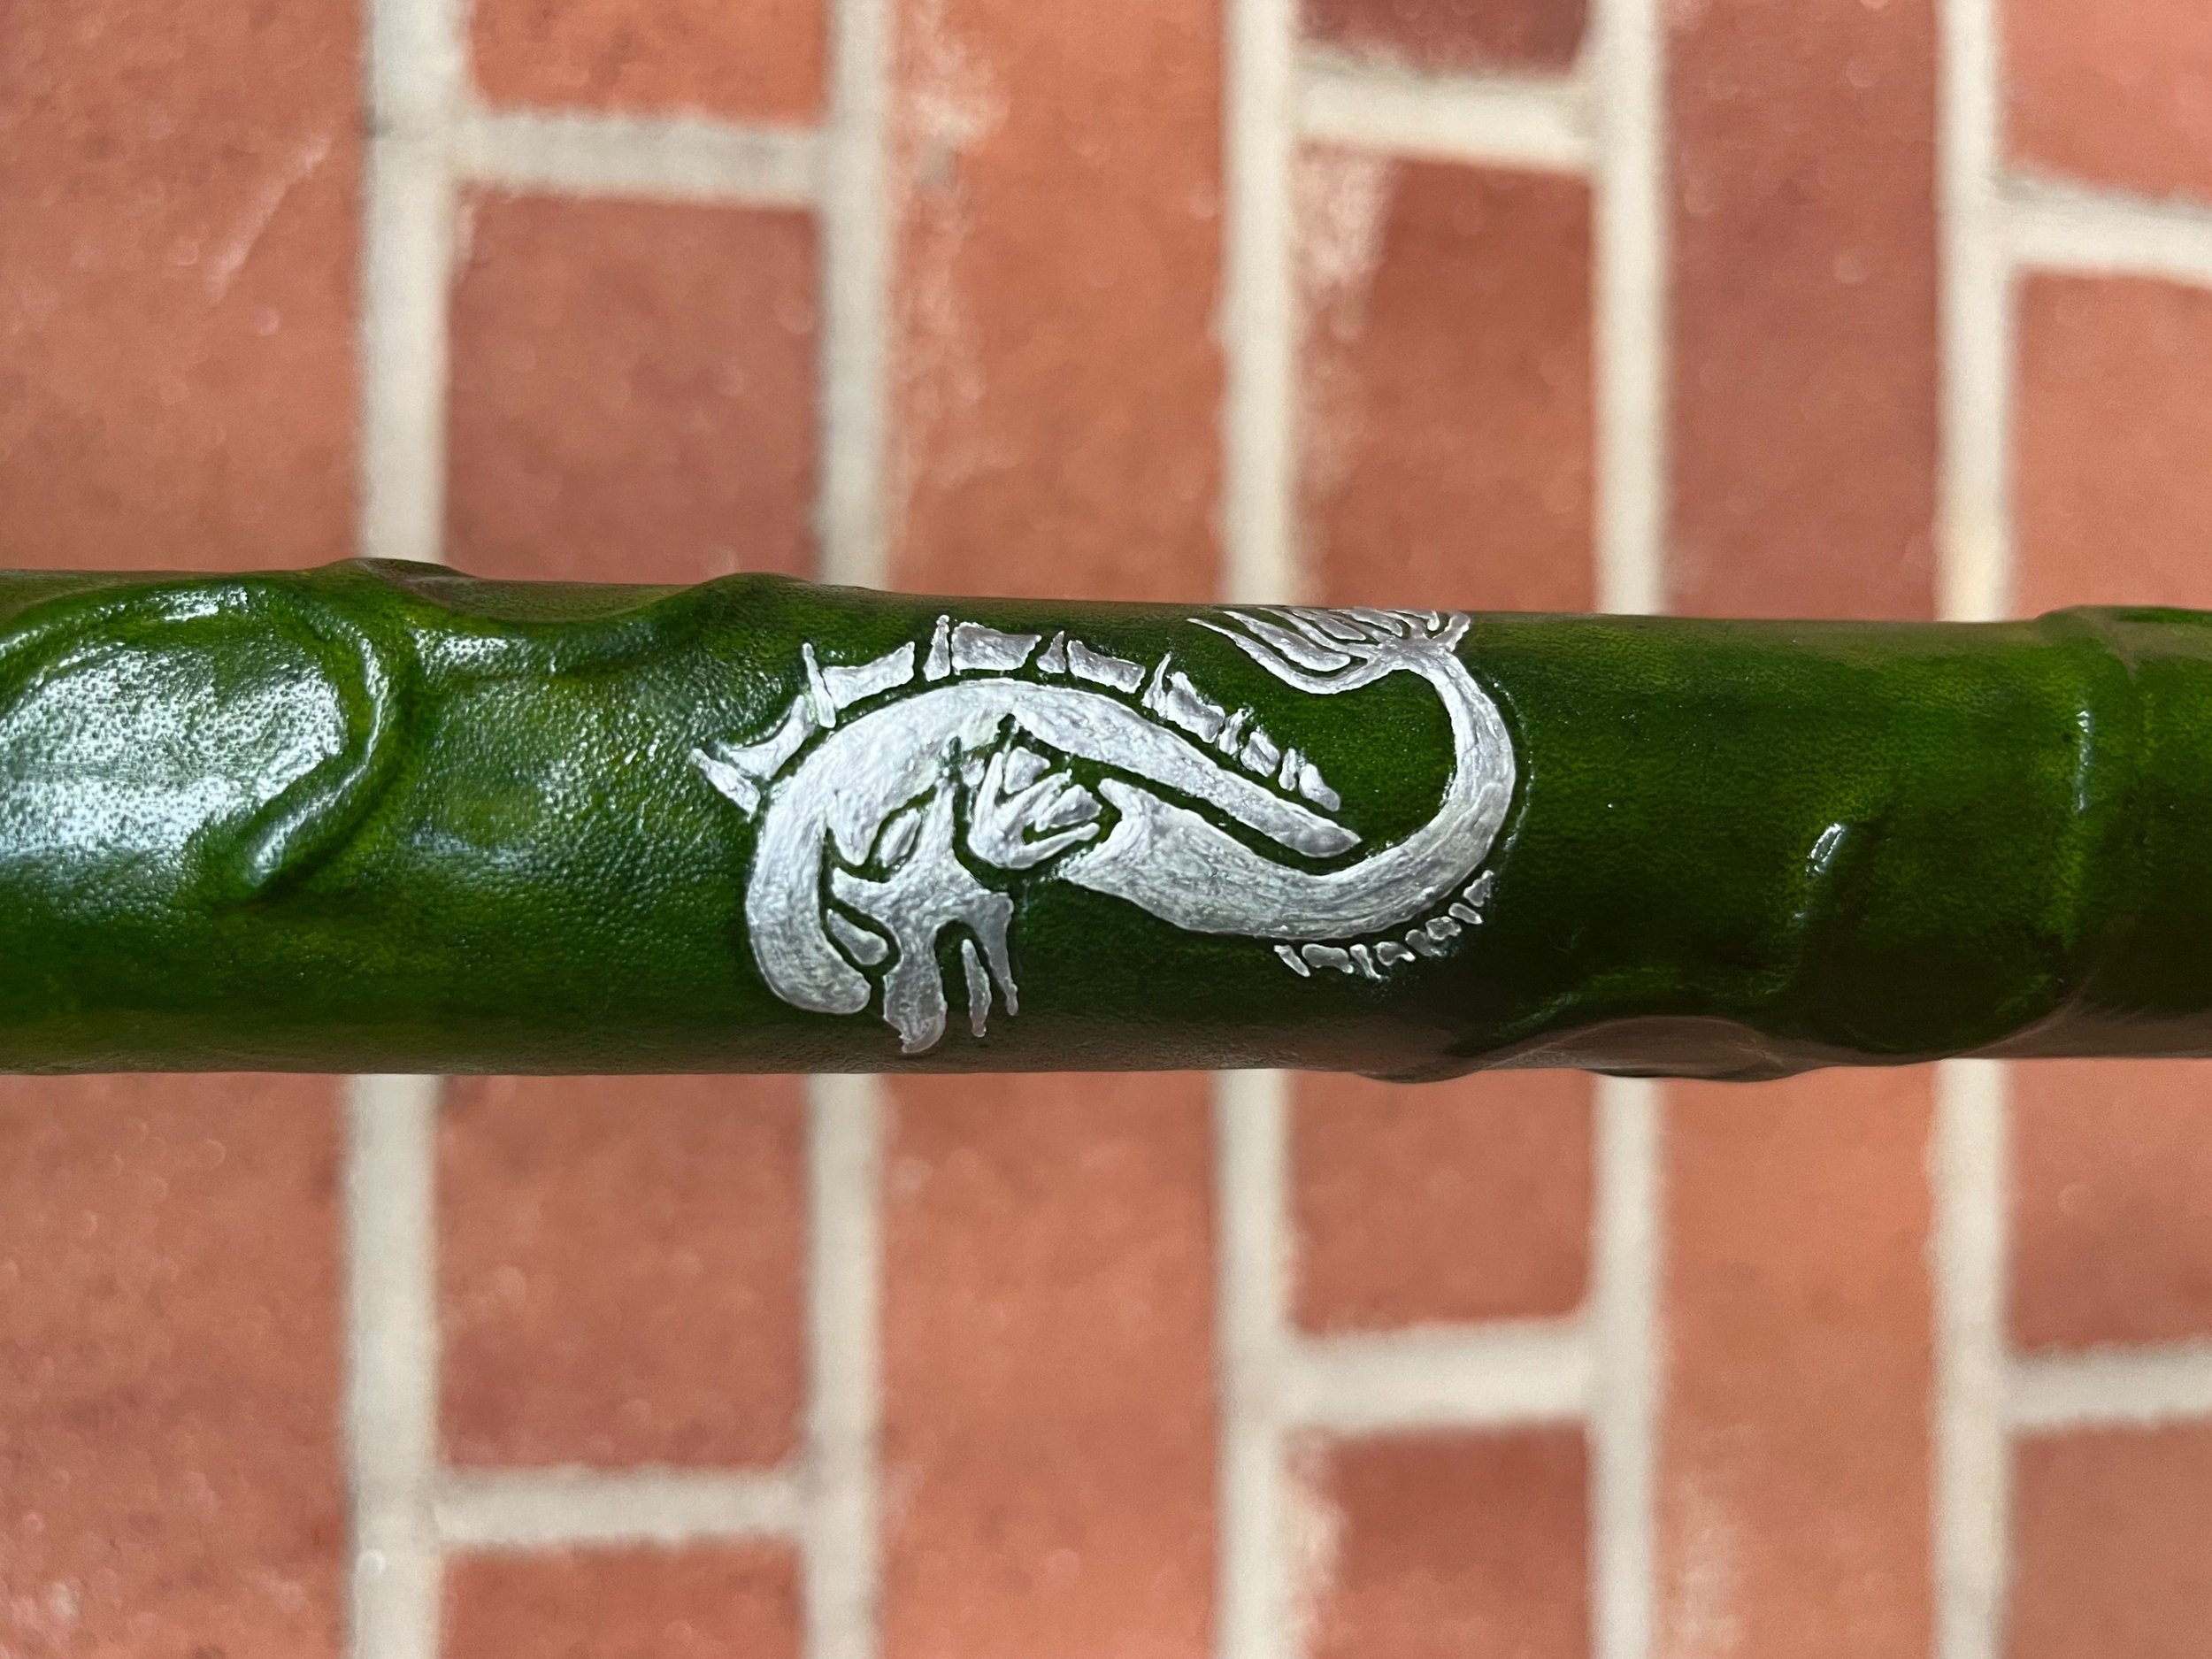
Fig. 9
Step IV: Metalwork
The chape is a small piece of metal that cups the bottom of the scabbard. I began by measuring the scabbard’s bottom to ensure it would roughly fit. I then measured and used a pair of tin snips to cut a general shape out of a piece of sheet aluminum. I then cut the piece further until it was a flattened shape of what I wanted. Using a set of robust plyers, with the mouths wrapped in leather, I bent the chape into shape. I actually bent the piece too far and snapped it in half (oops).
I applied a two-part epoxy to the inside the chape and secured it to the end of the scabbard. It did not stay in place easily, so I rubber-banded it in place. To cover the gap where I broke the chape, I epoxied an aluminum rivet. After the chape is secure, use increasingly higher grit sandpaper to polish the chape to remove any imperfections.
I followed a similar process to add a metal band around the mouth of the scabbard. I measured the space between the mouth and the riser, cut a band of aluminum, and affixed it. I tried to solder the band closed. Turns out… this was too ambitious. However, epoxy and clamps got the job done.
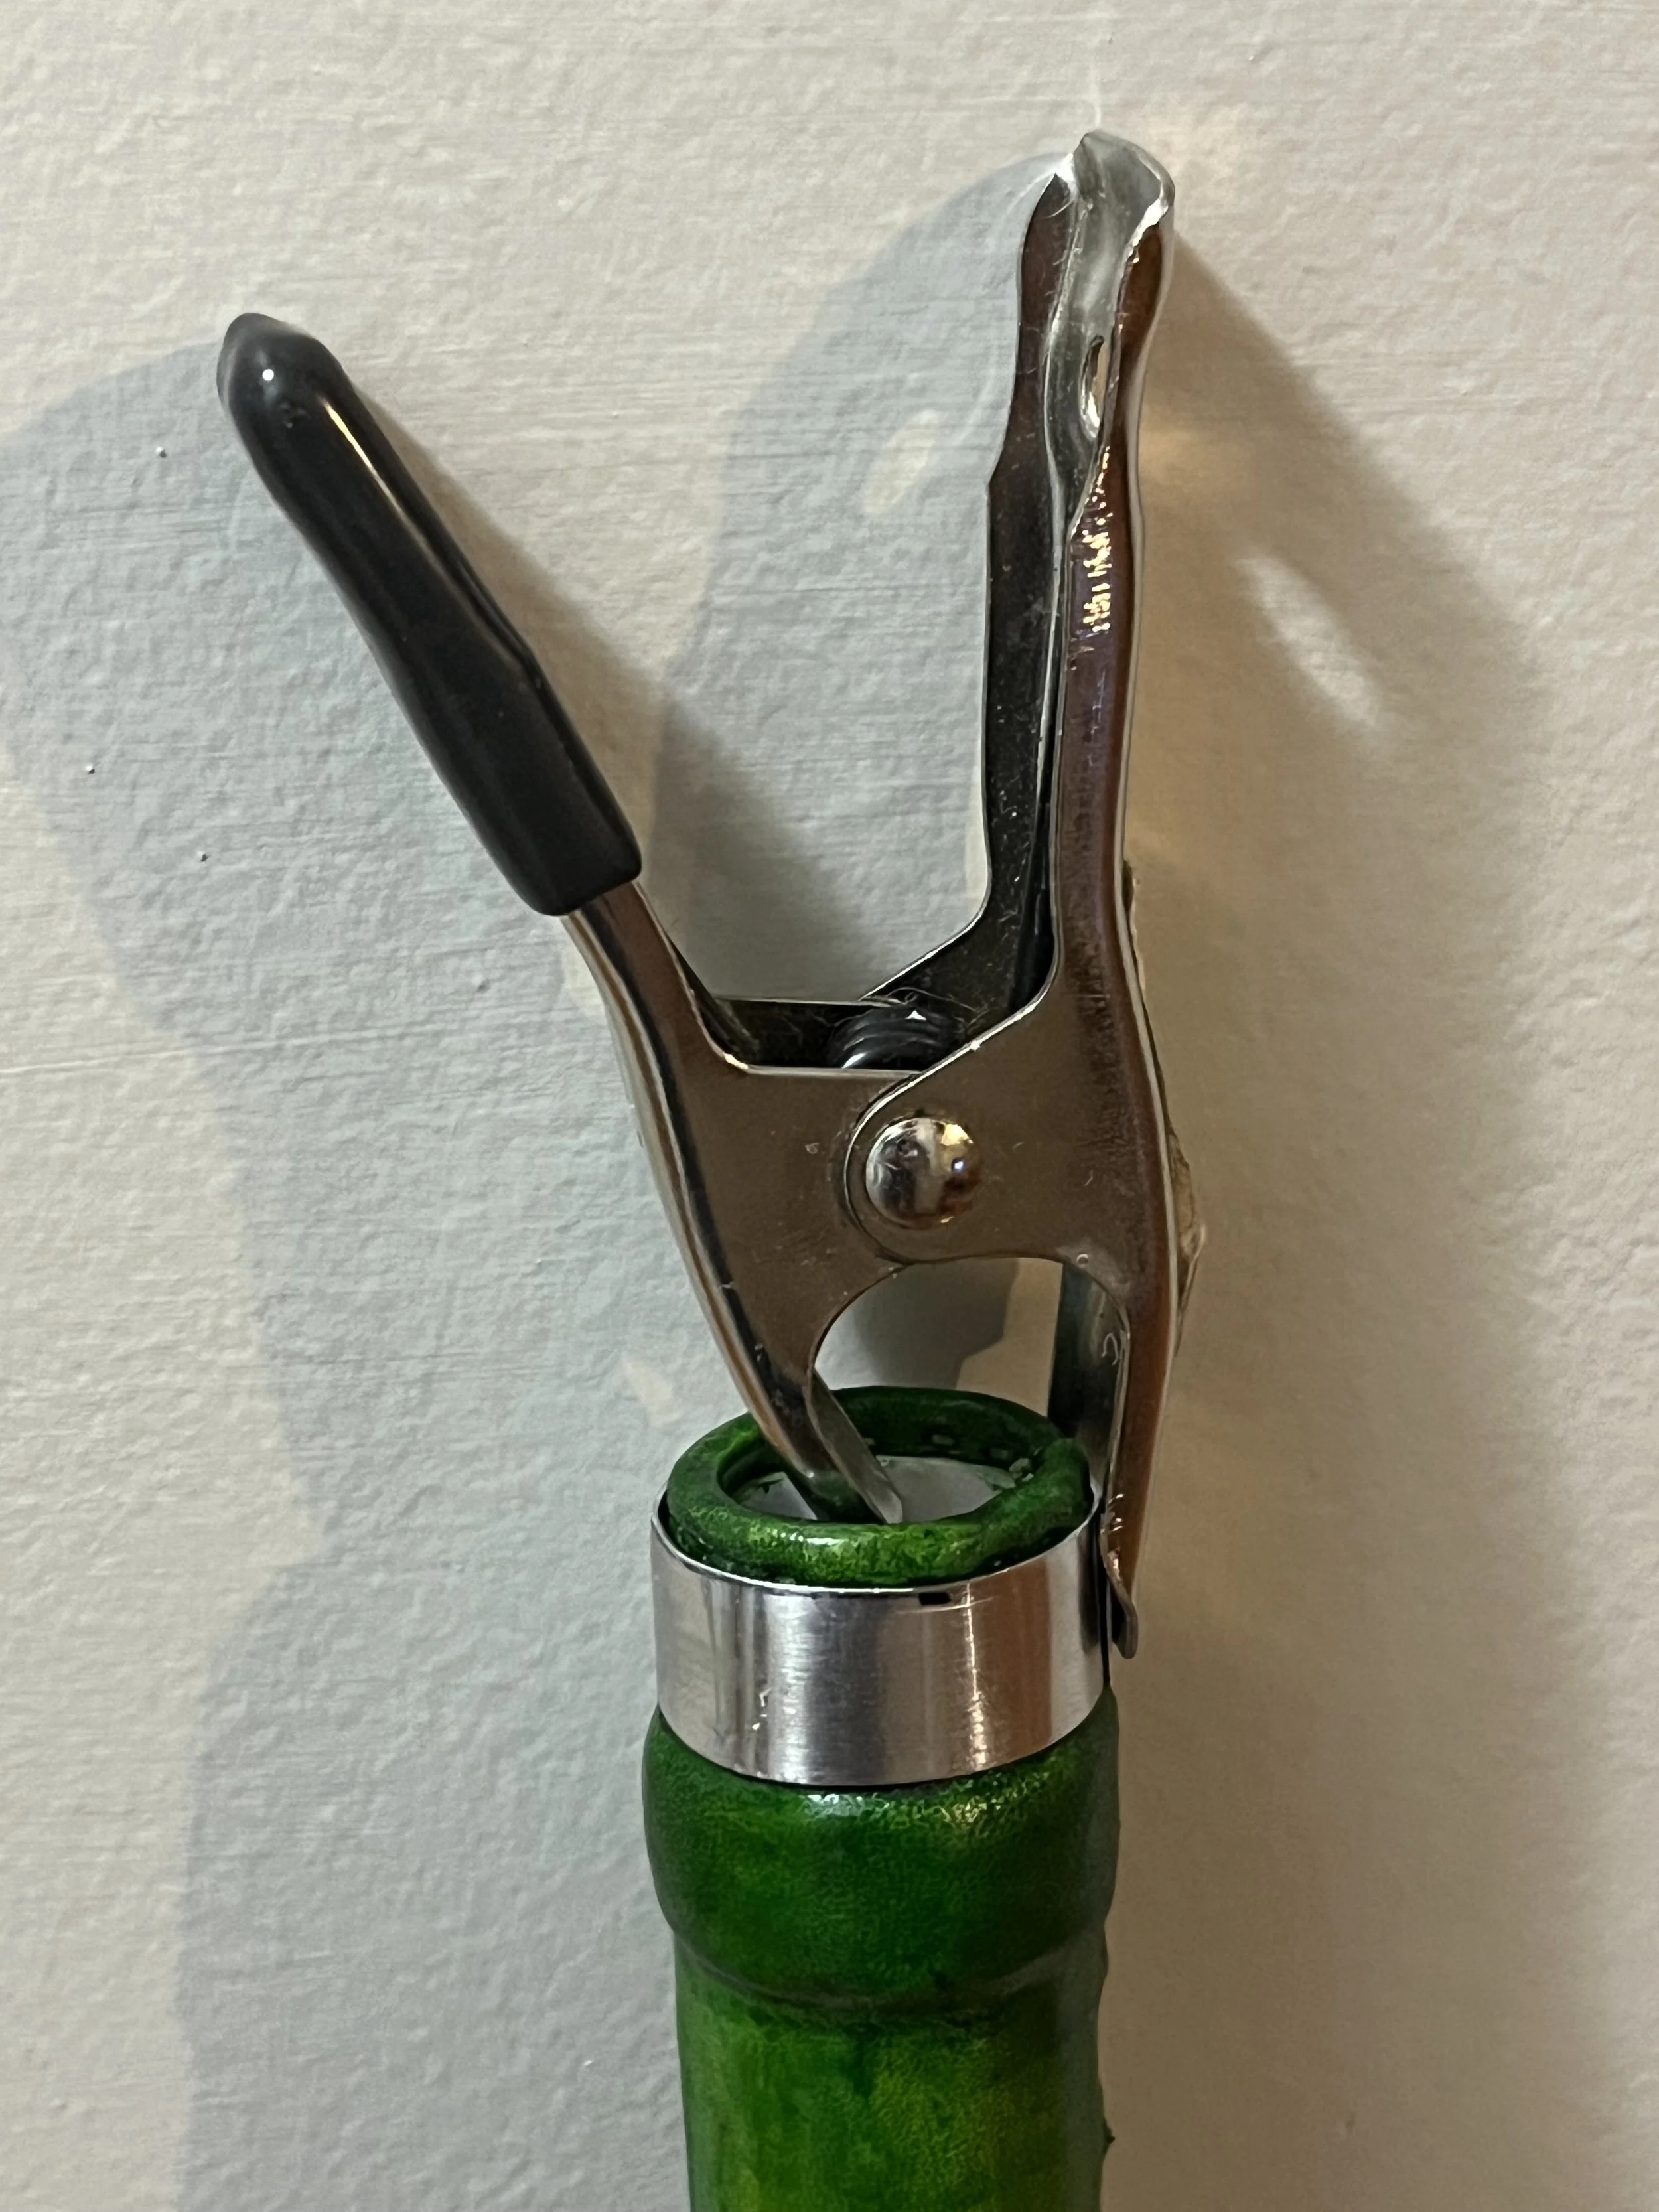
Fig. 10
Step V: Hanger and Belt
A rapier scabbard presents a unique challenge: it does not hang directly from the belt. Rather, it connects to a part called a hanger, and the hanger requires specific hardware to then connect the whole set-up to a belt. I attempted to cast this hardware out of bronze. I… well… I will have to try this again at some point. Instead, I got 12 buckles, some stainless-steel wire, and improvised!
I cut the body of the hanger out of 4mm leather. The hanger breaks into three sections, each having three straps that will tighten around the scabbard. This varies a lot among surviving examples of historic hangers, so this may just be a matter of taste. I repeated the decoration process of the scabbard on the hanger. The only major difference is a boarder around the hanger. This simple line was achieved by wetting the leather, making a shallow cut with an X-acto knife, and then running a mechanical pencil through it to widen the groove.
Now comes the “hanger” part of the hanger. I got a length of 14-gauge stainless steel wire, and fashioned it into a hook. This hook has three anchor points. I then punched three holes into the leather of the hanger to place rivets that will secure the anchor points of the hook to the hanger. However, for added decoration, I added an aluminum plate for the face of the hanger. In addition to riveting the plate in place, I added some additional epoxy to keep the edges of the plate firmly connected to the leather base of the hanger
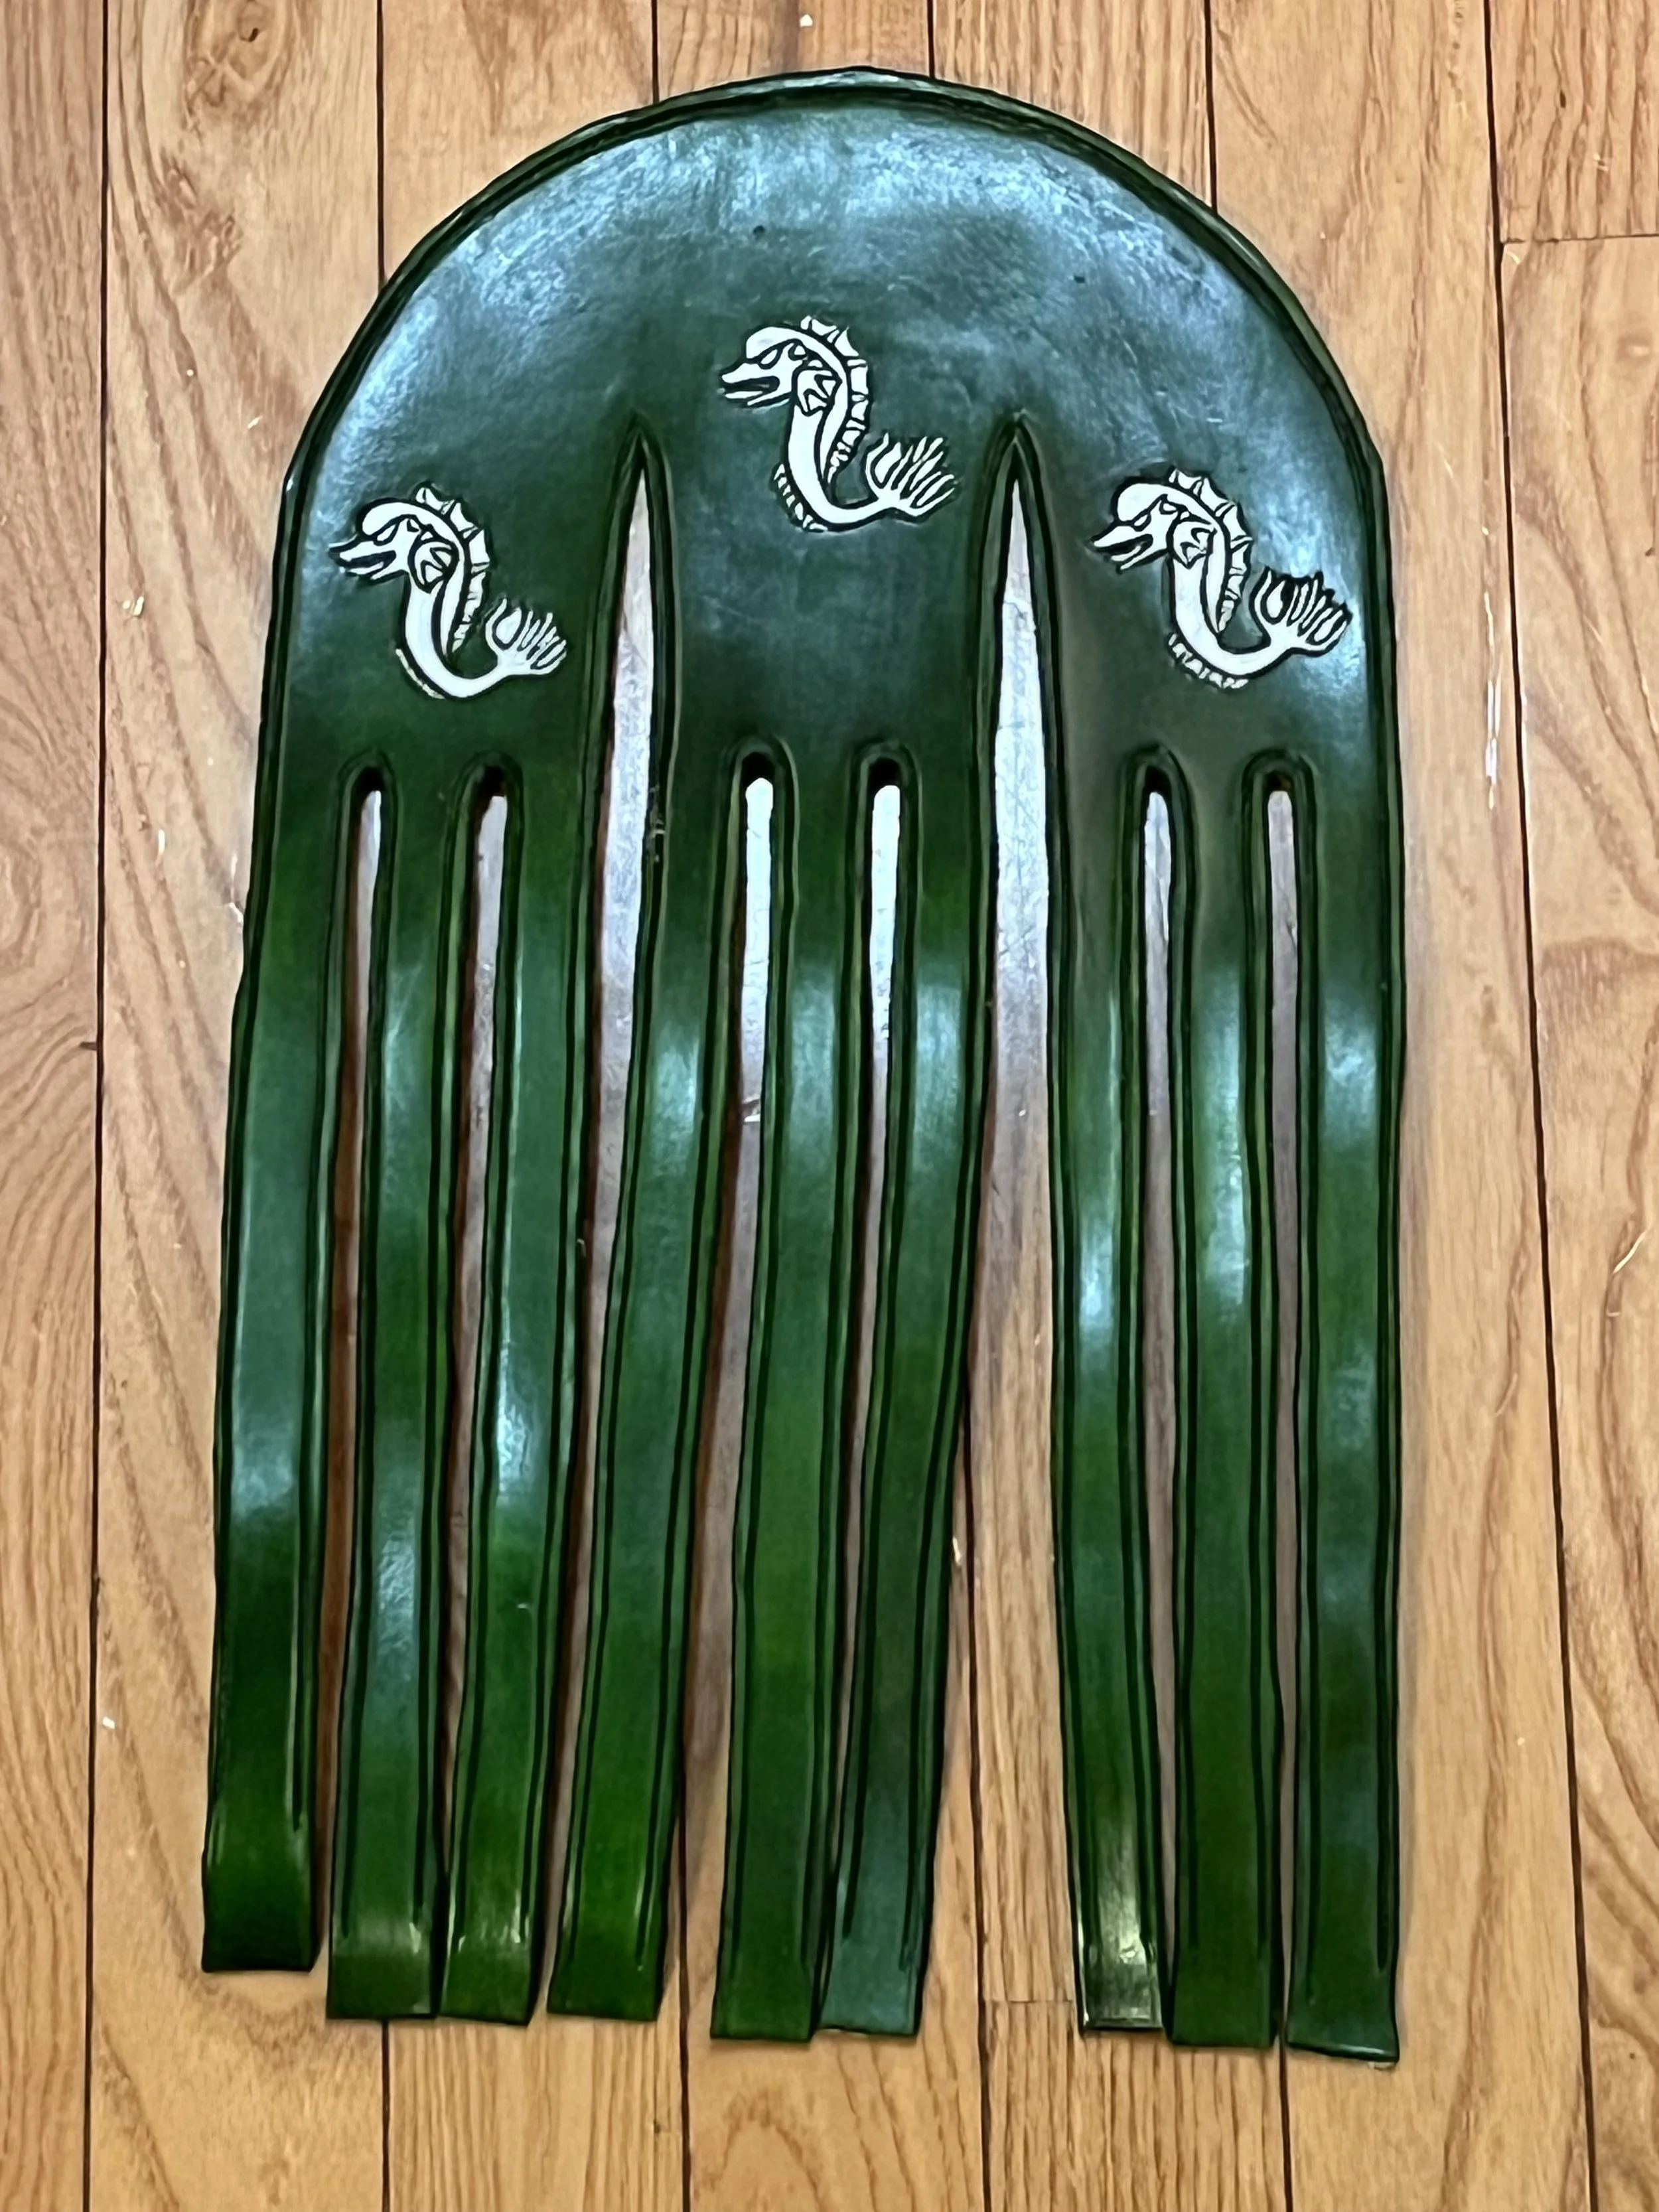
Fig. 11
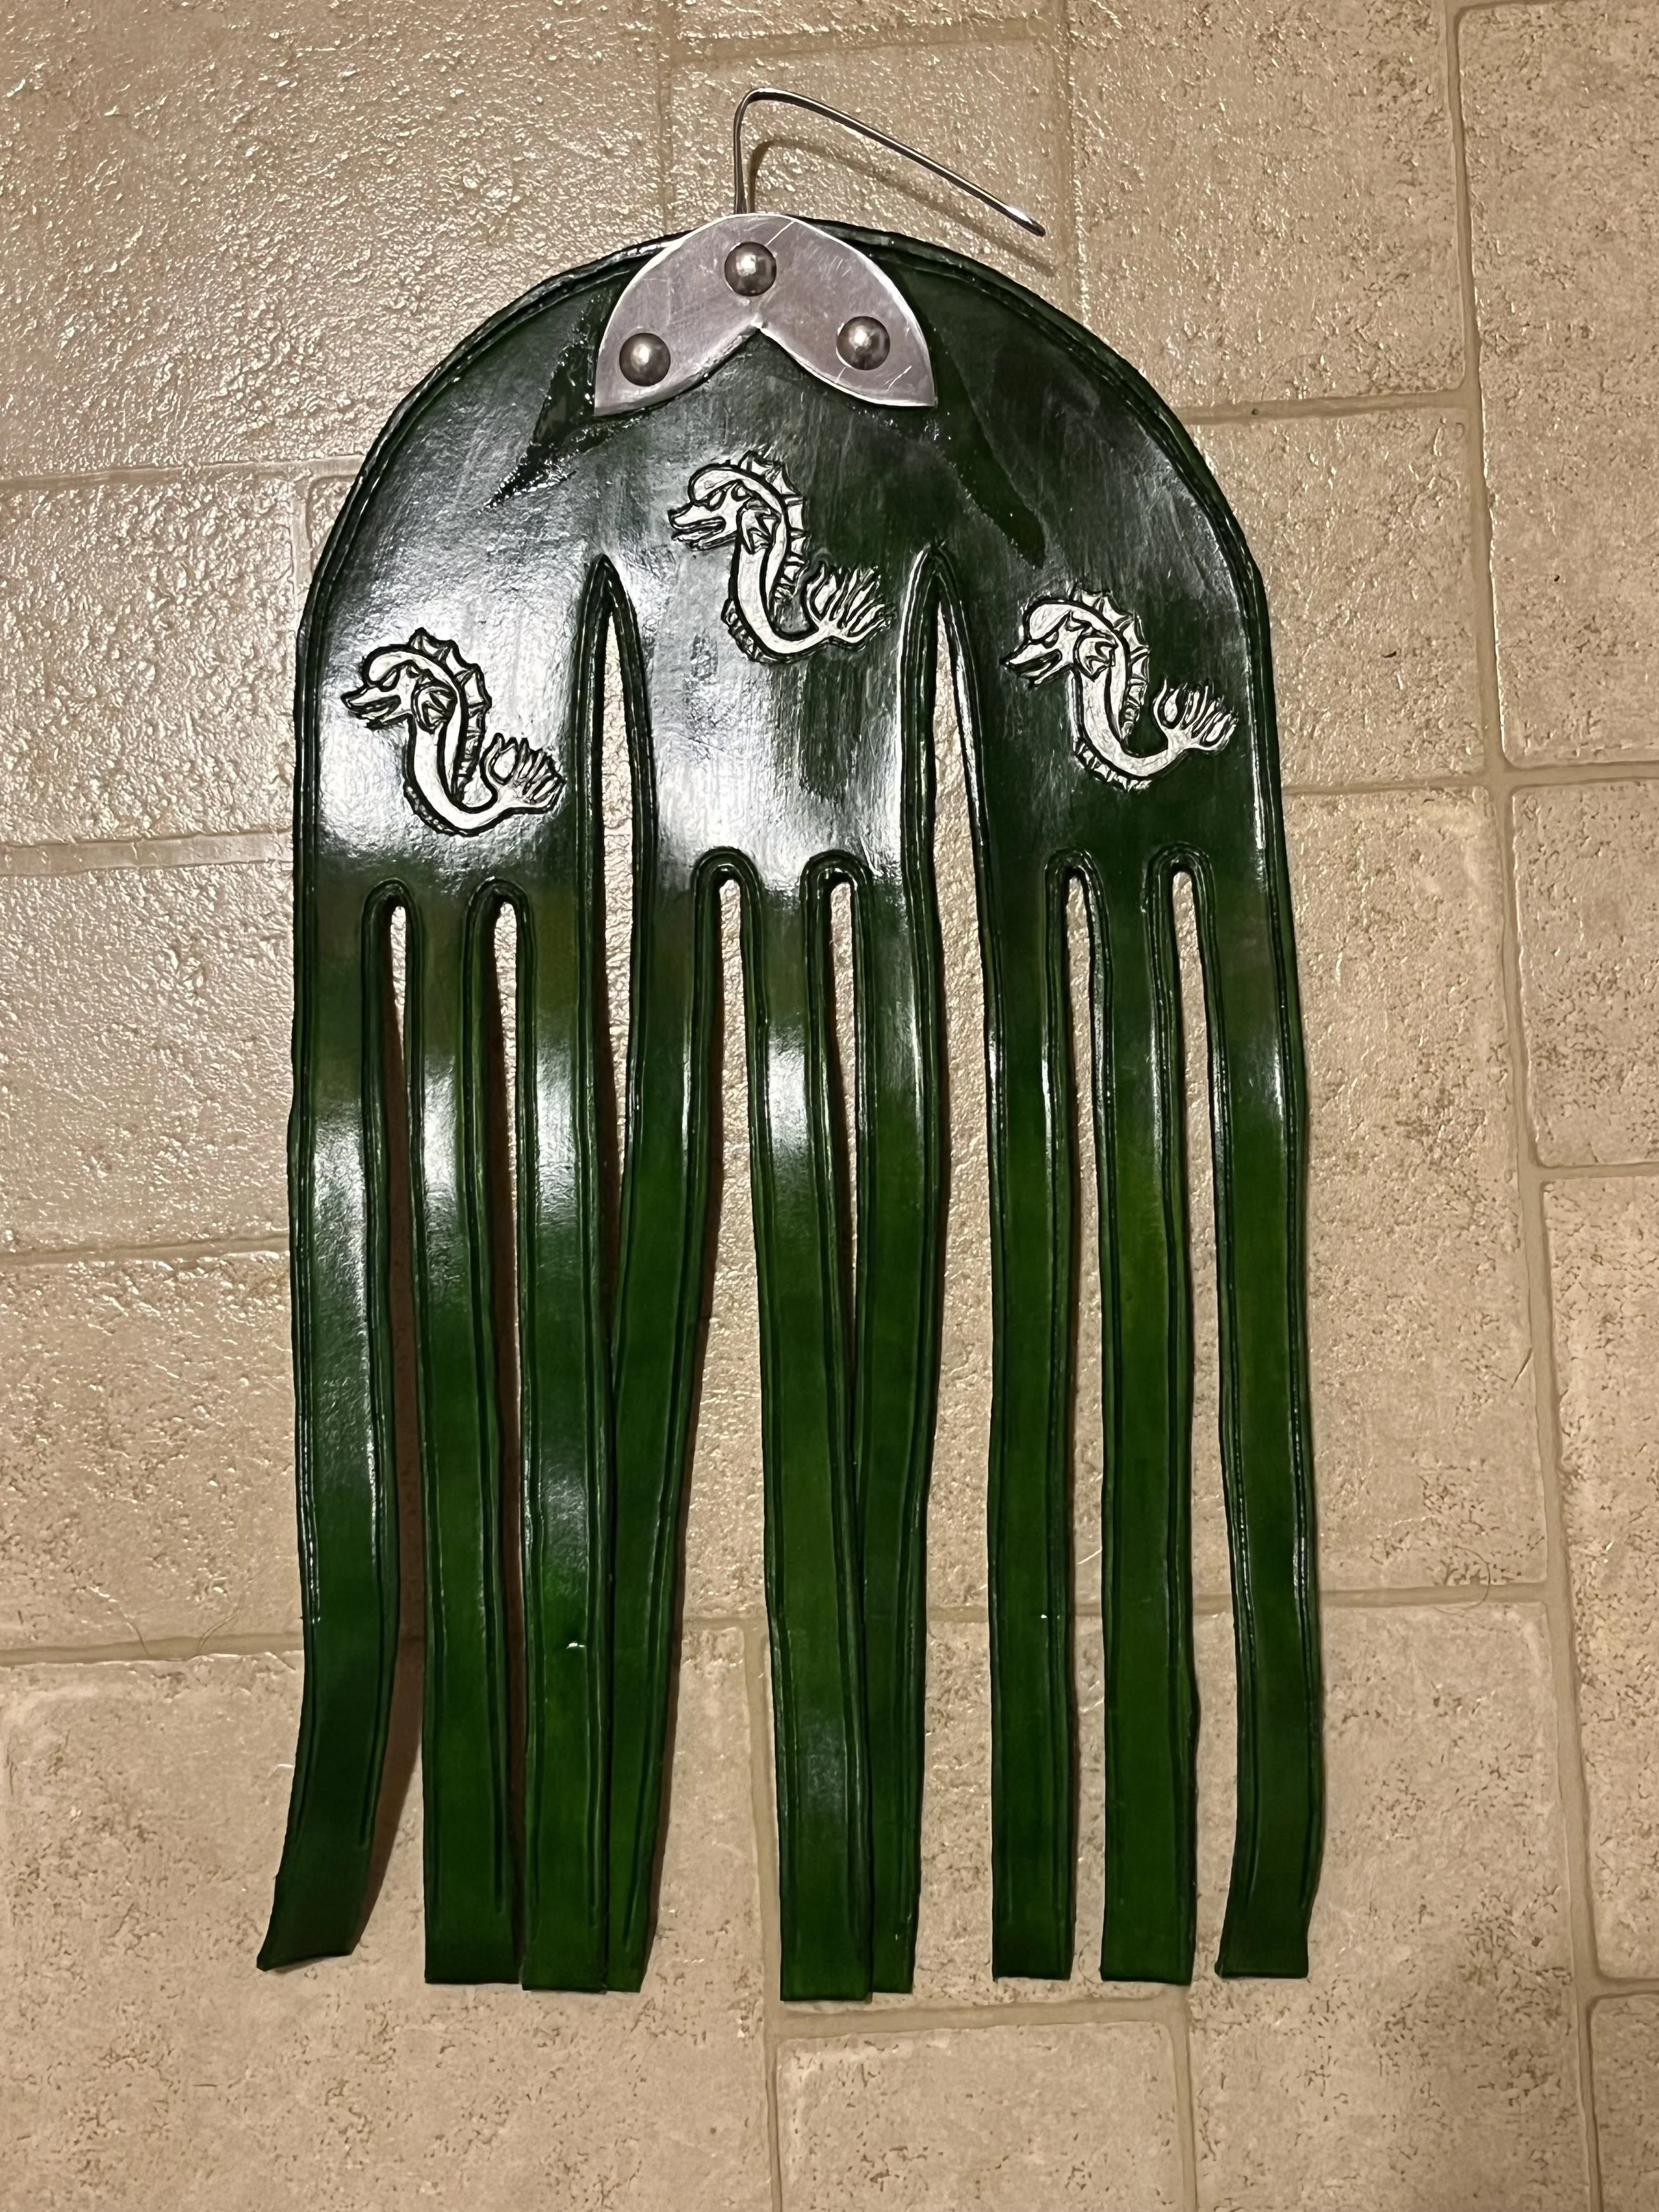
Fig. 12
Also important to note, the buckles on the hanger do not actually fasten, they hold the scabbard in place by tension and friction. Based on the surviving examples I could find, the buckles do not typically have tongues (although this also varies). Instead, the straps all tighten through the buckles, and the risers on the scabbard keep the scabbard from slipping out of the hanger. So, using plyers, I ripped the tongues off of 9 buckles, and sewed them onto the end of the hanger’s straps. Two points I want to emphasis:
1. I had to shorten the straps on the hanger so they would not be too long. Ideally, they should be long enough to run through the buckle, around the scabbard, and then a little extra to adjust to taste.
2. Run the straps through the buckles BEFORE sewing the buckle onto the end. You will not be able to get the strap through the buckle if you sew the buckle on first.
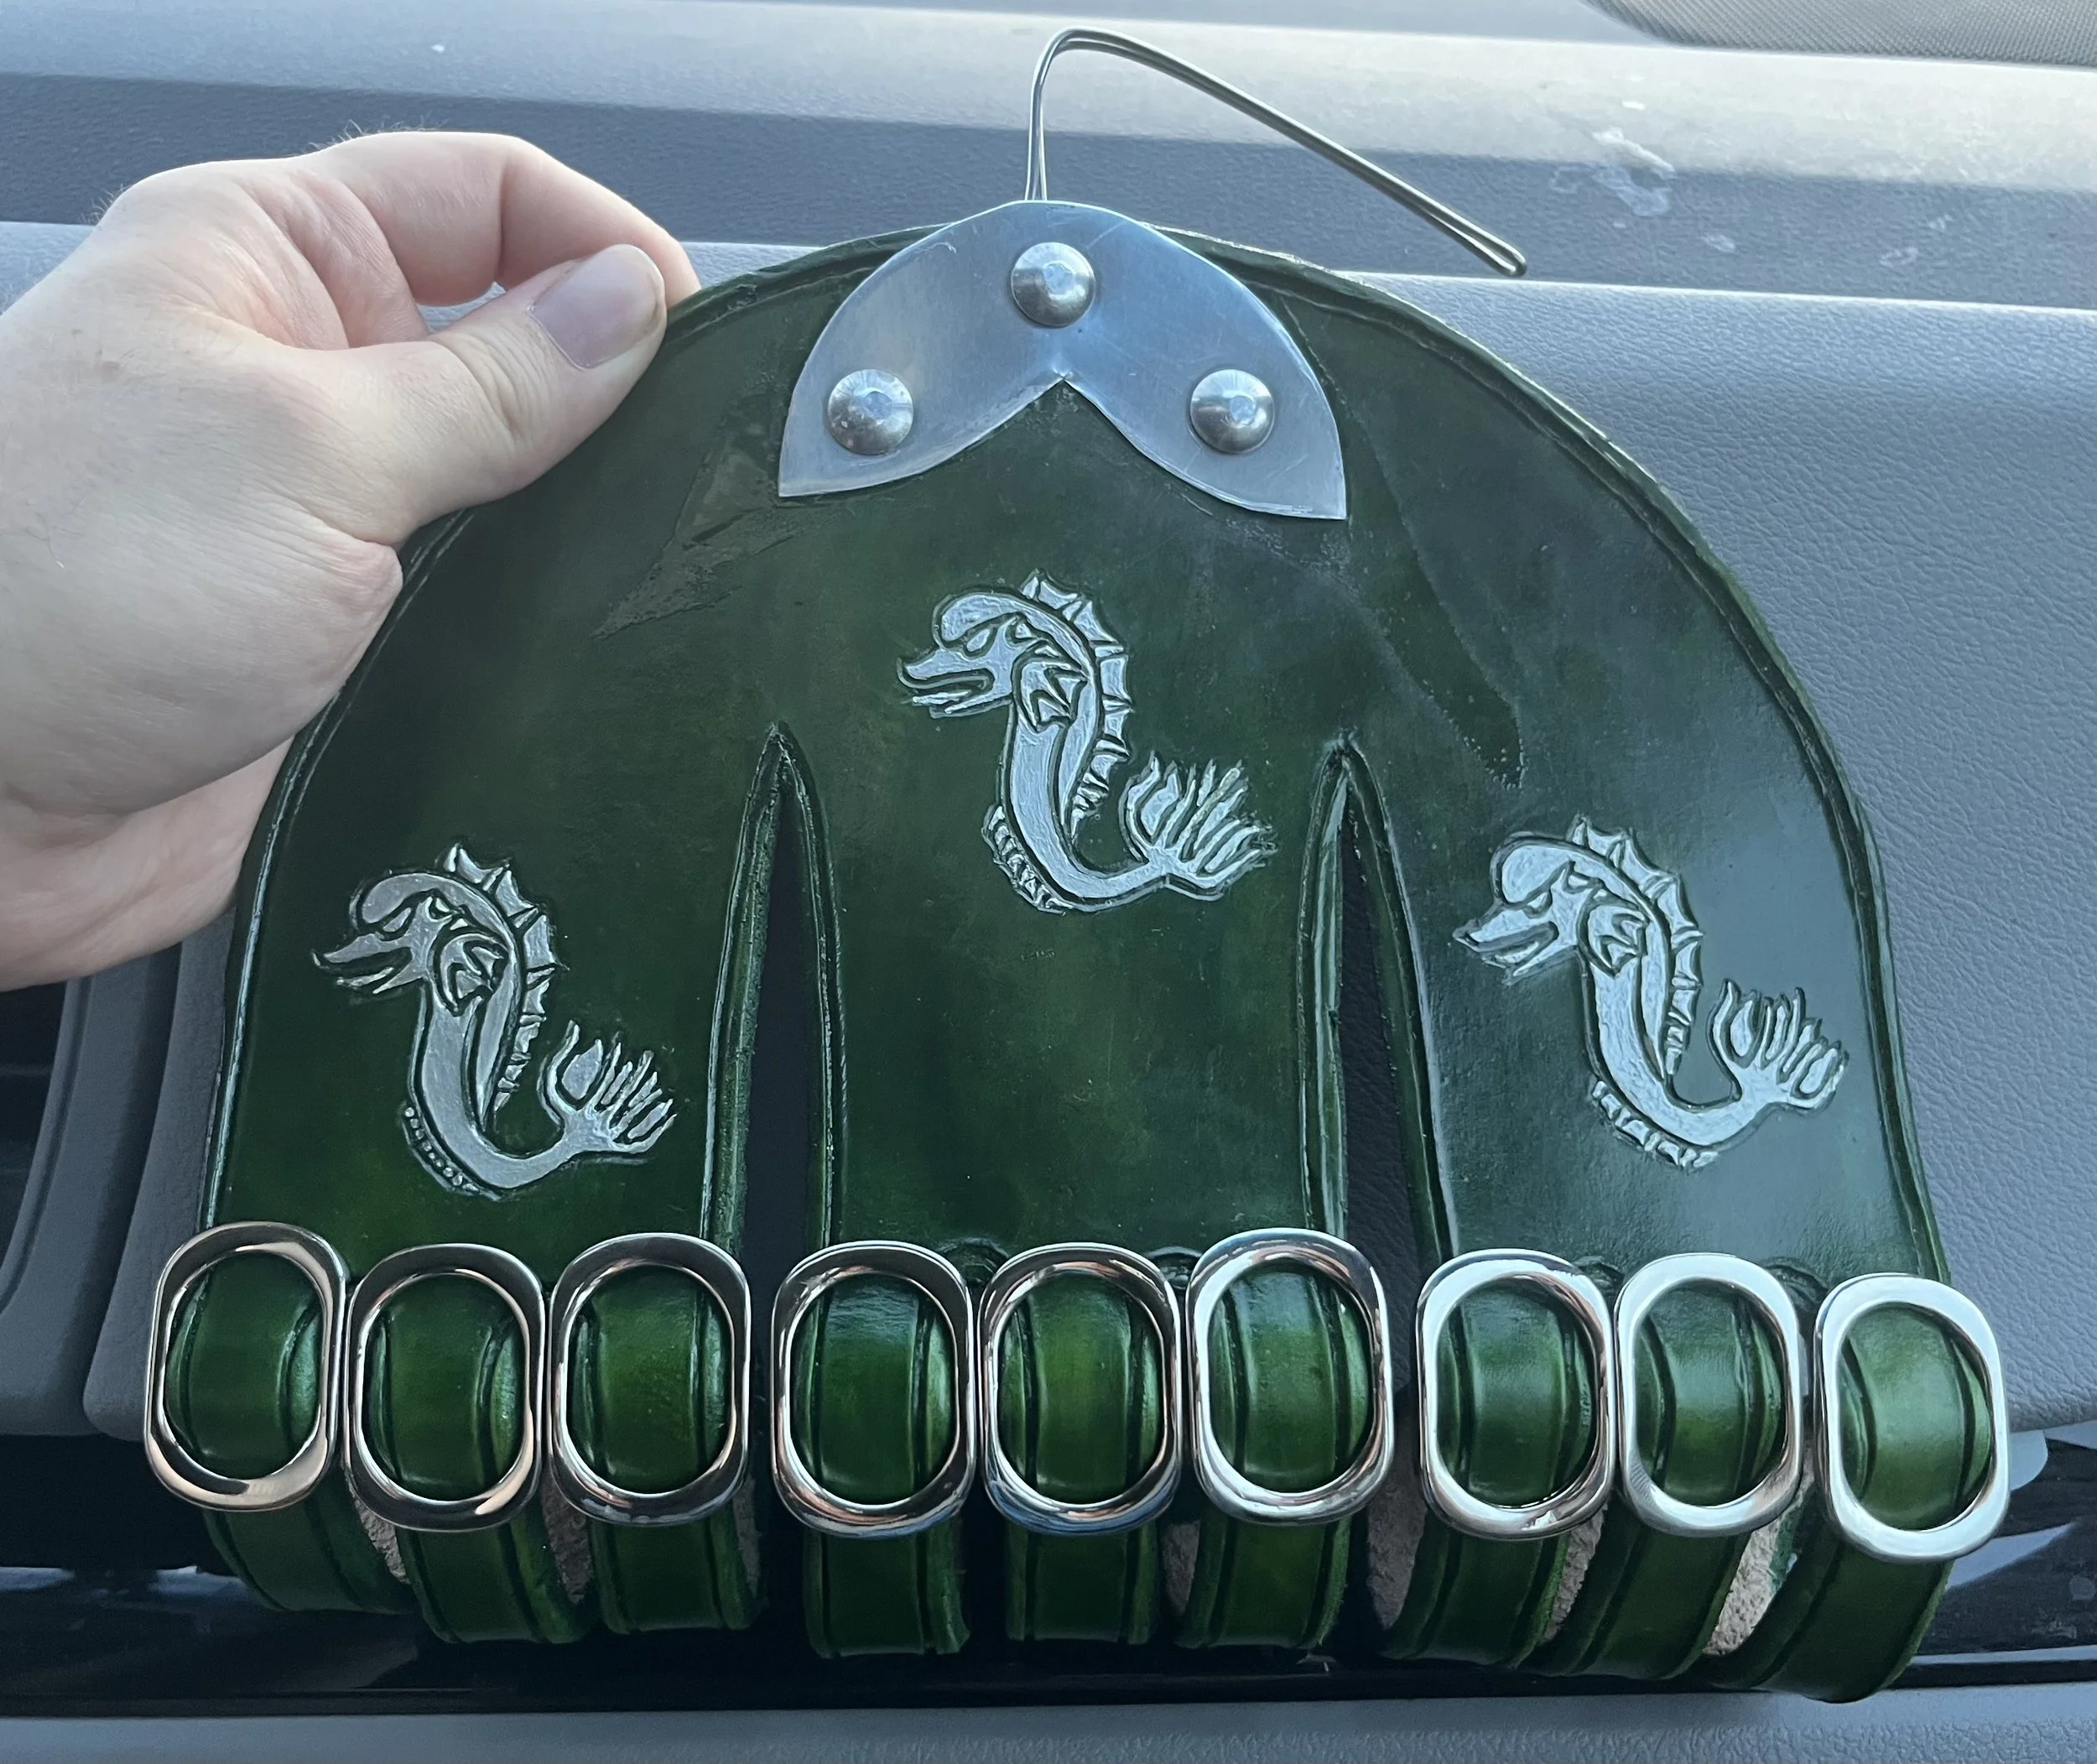
Fig. 13
Finally - the belts. As a result of the hanger requiring specialized fittings, it cannot easily connect to an existing belt. So, I made a specialized sword belt for this scabbard and hanger. The belt is made of 4 mm leather. It is covered in tooling, repeating the S-shape of the scabbard, and dyed green to match the scabbard and hanger. The leather I had was not quite long enough, so I made the belt in two halves. Oddly, I remember seeing more than one connection point for sword belts in period examples. I have no idea why this is the case, but I was glad to have the excuse to replicate it under the circumstances.
I was unable to create the needed fittings by casting, so again I improvised. I took two buckles similar to the ones on the hanger, and removed the tongues. I then slid the buckles part way down the belts, and added two stainless steel rings to each. These rings serve as the connecting points of the hanger. I then added two buckles at the ends of the belts by connecting them with sheet aluminum. I dilled a hole in these brackets and secured them to the belts with Chicago Screws. To the other end of the belts, I could have made a chape out of sheet aluminum; however, I happened to have stainless steel scales that fit the sea theme. So, I used the scales for belt chapes.
There was one final belt to add - a belt directly on the hanger. This belt connects to the top of the first strap facing forward from the body. This strap runs in front of the body and connects to the sword belt on the other side. This belt ends in a hook. I made this hook out of stainless-steel wire, and (like the hook on the hanger) connected it via rivets/Chicago screw to the belt. For decoration, there is an aluminum plaque on the hook end. You should have the hook open downwards, even if it makes fastening more difficult. This one faces upwards, and it has the potential to come undone more easily. I intend to fix this when I have the time.
Conclusion
Connect the hooks to the ringed buckles on the belt, and adjust to your preference. At the end of this process, you should have a set-up roughly like the one I made. Thank you for your time.
Alexander of Ayr
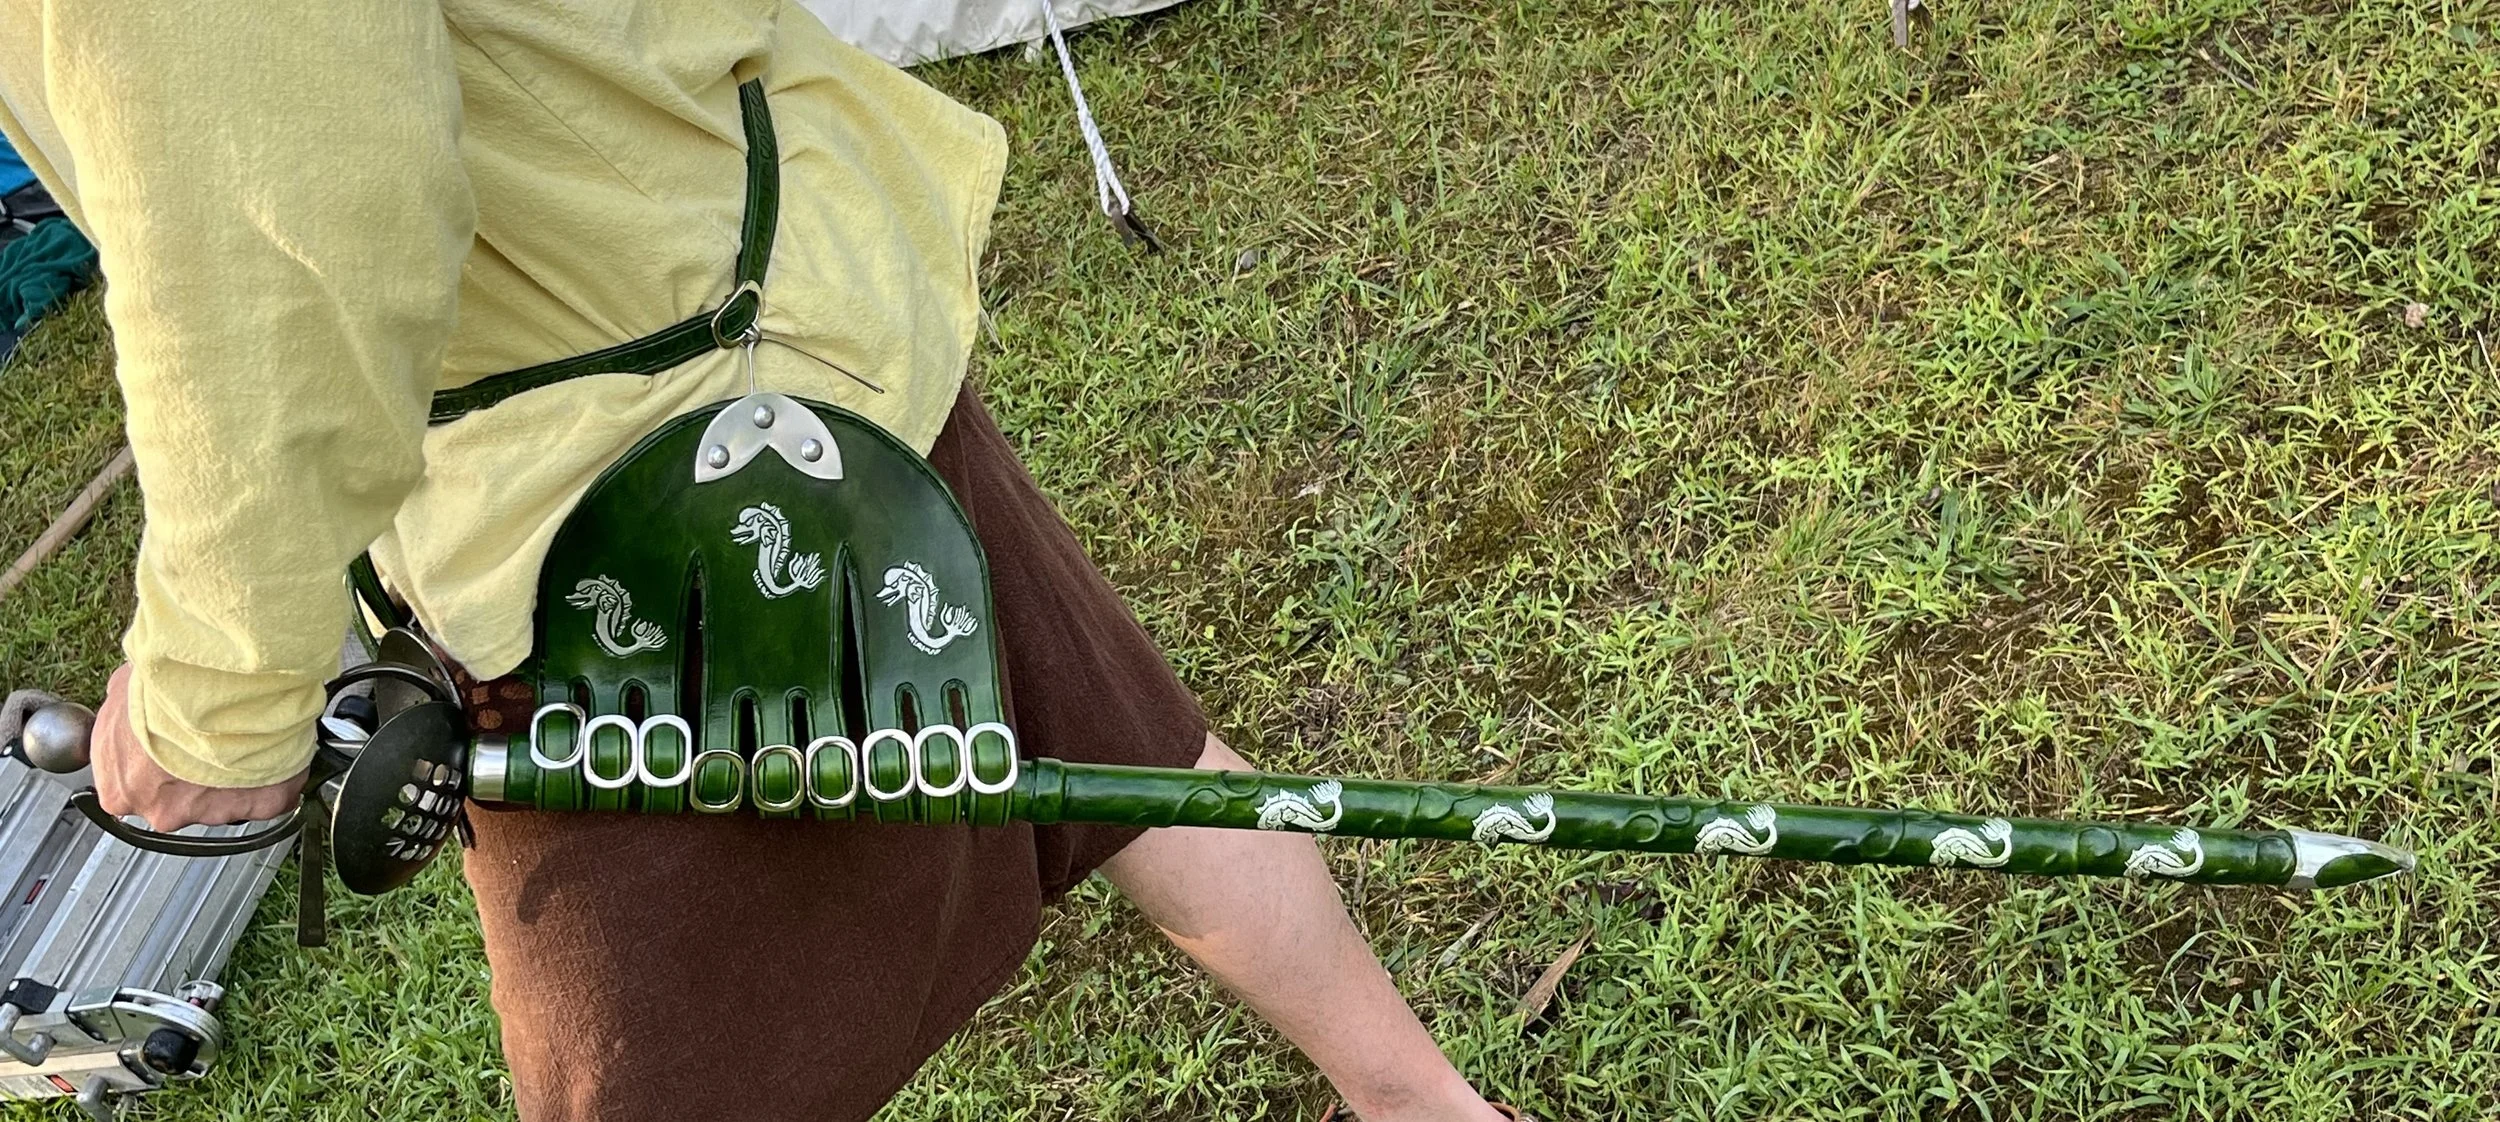
Fig. 14
References
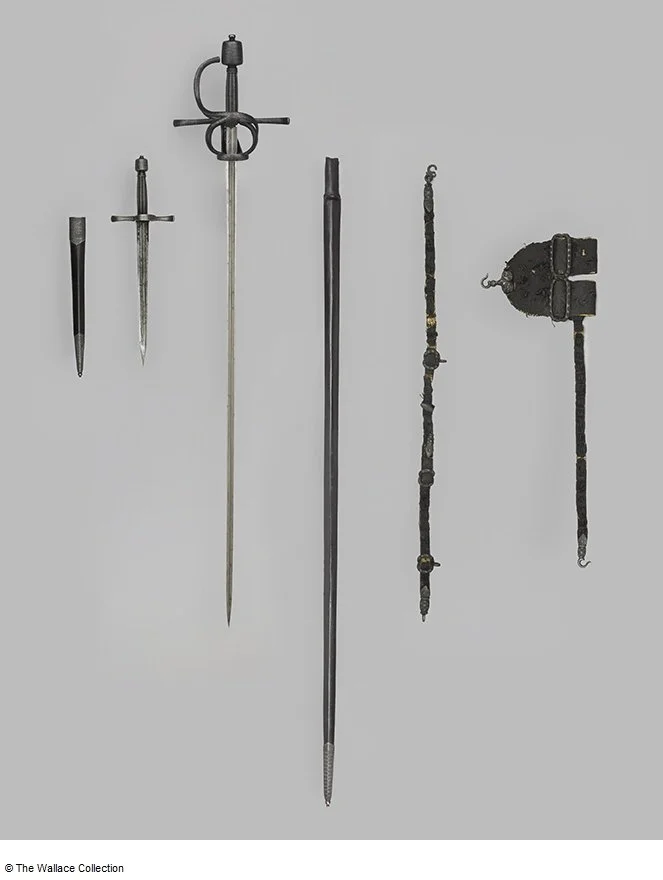
Rapier and Dagger set - 1620 (19th century scabbard mounts)
Germany, possibly Solingen
Inventory Number: A575
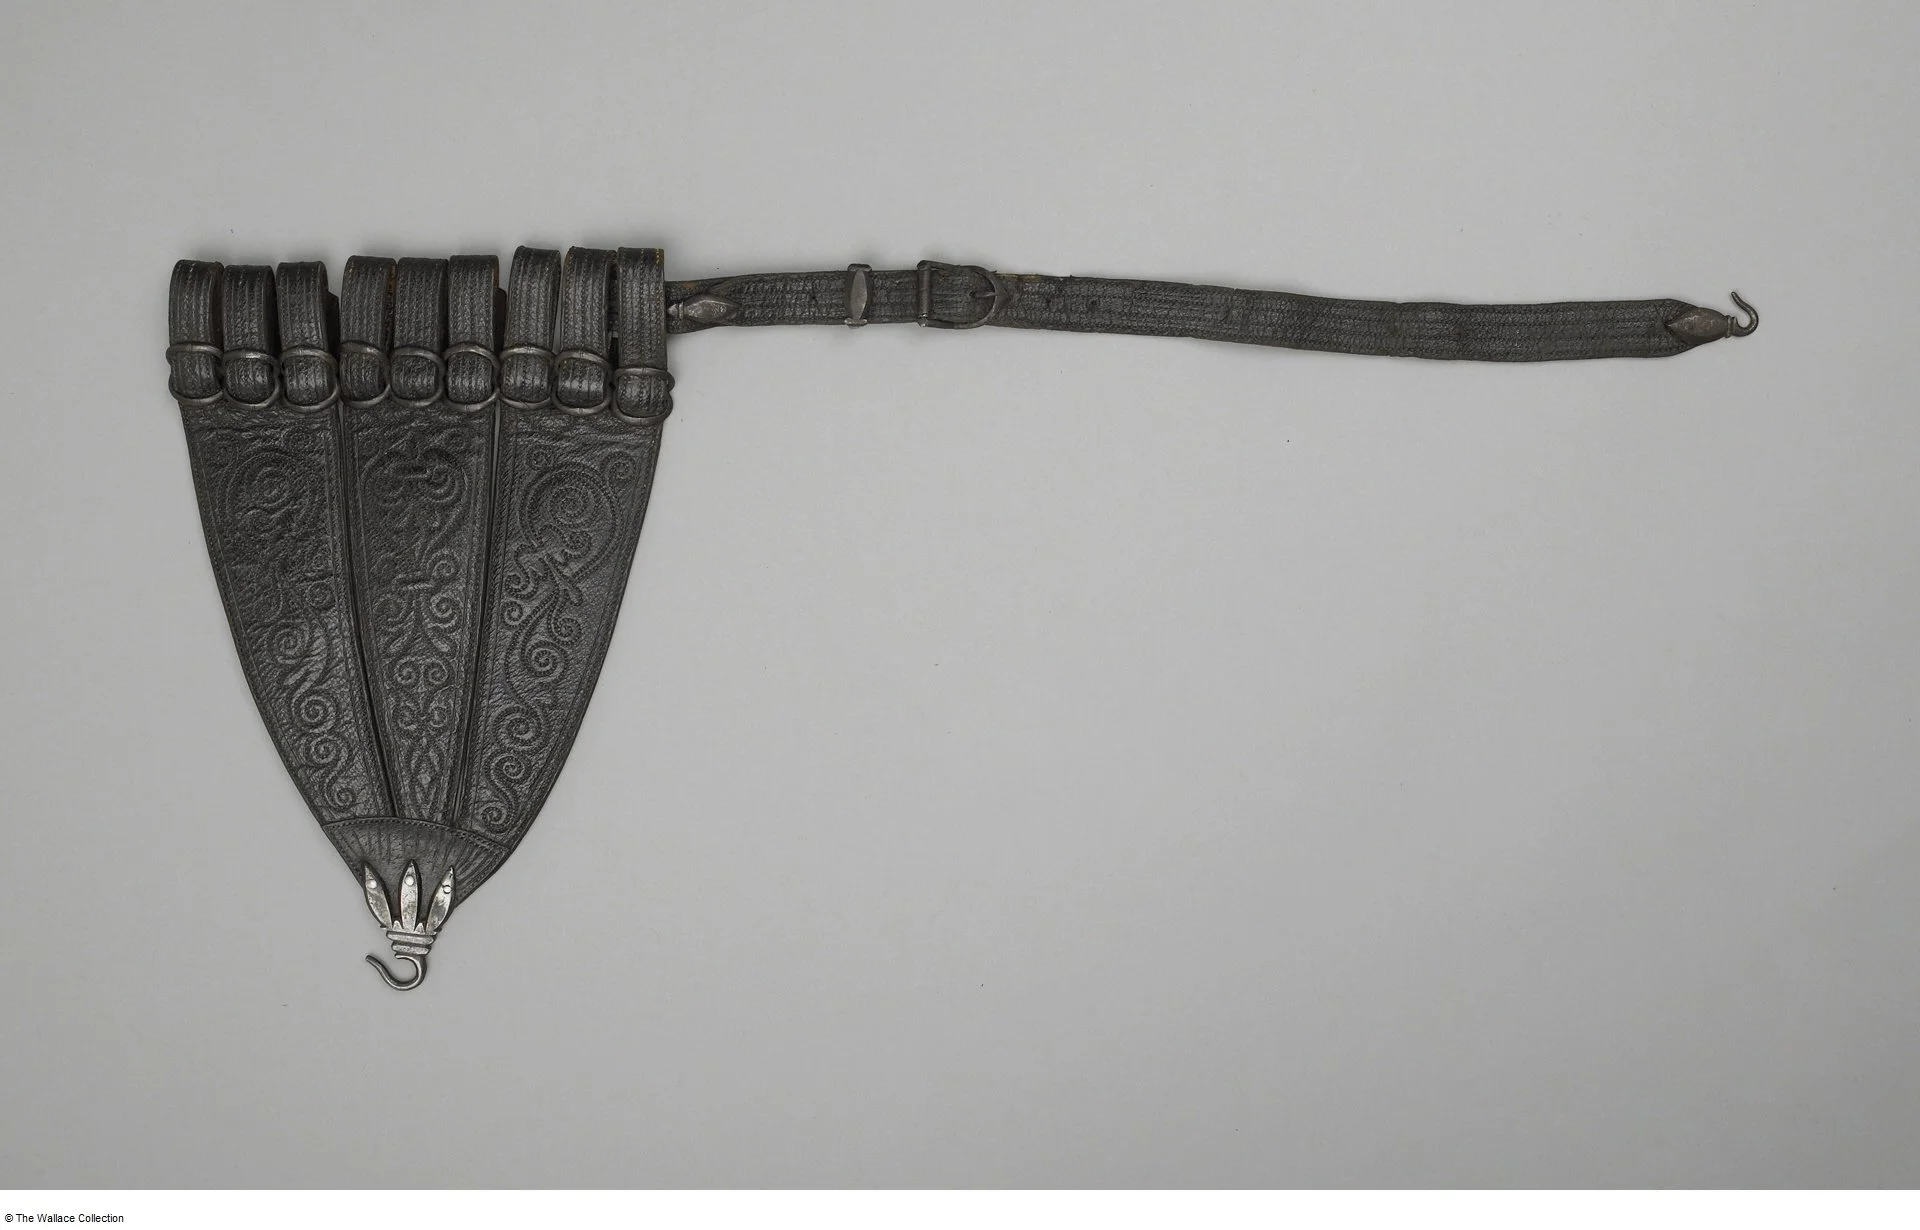
Rapier Hanger - 1610-1620
South Germany
Inventory Number: A1066