Elegant Dinner Wear for an Elizabethan Sword

A Rapier Hanger Suitable for Formal Occasions
Description
A rapier hanger is a device principally constructed of leather (although textile coverings were also used over a leather base), that utilized a series of straps and sliding buckles to secure the sword’s scabbard to the wearer’s sword belt. This particular rapier hanger is a combination of leatherwork, sewing, and embroidery.
This hanger is based primarily on rapier hangers from the early 17th century of English and German designs, with motifs I’ve seen in Renaissance art of the same period. Examples of these pieces can be found in the Victoria and Albert Museum in the United Kingdom. For reference photos, please see the attached documents.
Supplies:
Leather (4 mm, 2 mm, and 0.8 mm)
Crushed velvet
Artificial sinew
Gold colored embroidery floss
Gold colored thread
Artificial pearls
Brass sheet (18 gauge -20 gauge is probably best)
Ten 1.25 inch wide buckles
14 gauge brass wire
14 gauge brass rings (3/8 in diameter)
Brass and/or copper nails/rivets
Stainless steel washers
Tools:
Leather punch (leather punch stamp)
Leather sewing needle (strait and curved)
Permanent marker
Ballpein hammer
Stout Scissors
X-acto knife or a very sharp knife
Tin-snips or equivalent
Safety goggles
Leather gloves
Power drill
Construction
First of all, be careful when working with tools - especially sharp blades and power tools. If it can cut leather, wood, and metal, it can cut you. I know this from experience. Wear safety goggles. Wear work gloves. Be safe.
Part 1: The Base
The base is 2 mm leather cut using a pattern I modified from an earlier project. The pattern was made after reviewing multiple historic examples from the 16-17th centuries. The leather base is covered in crushed red velvet, and embroidered using gold colored embroidery floss. This floss holds the covering to the base. The bordering lines are additionally whip stitched with a covering of shiny gold-colored thread.

Part II: Embriodery
I did additional embroidery across the surface of the velvet covering. This embroidery consists of a series of dotted lines that overlap to create a field of diamonds. Fake pearls were then sown onto the hanger for additional decoration and to help further secure the velvet to the base leather (notches were carved into the leather, so the anchor points for the pearls run up through the base). The pearls are positioned at the points of several of the diamonds in the base pattern.

Step III: Straps
Velvet is not great for generating friction. So, the insides of the straps that hold the scabbard have strips of 0.8 mm leather sewn with the rough side facing outwards. The brass sliders on the straps were originally off-the-shelf buckles. I removed the tongues of these buckles before sewing the frames into the hanger. Each strap was fed through a buckle frame, before the end of the strap was sewn onto the middle of the buckle using artificial sinew. I recommend using a curved needle for this, because the space in the newly formed strap loop will be rather tight.

Part IV: Hooks
In period, the hook and the rest of the hardware probably would have been cast or forged out of metal. However, I lack this skill. So instead, I found a few work arounds.
To secure the top hook to the hanger, I made a vaguely heart shaped brass plate. I cut this plate from sheet brass. I can’t remember the sheet’s thickness, but 18-20 gauge is probably sufficient. I removed all sharp edges from the metal so the plate would not cut into the fabric. I then drilled two holes into the plate for anchor points, and polished the brass.
The hooks of the hanger are made of brass wire. I carefully shaped 14 gauge wire into a hook with two anchor points to secure it to rivets on the hanger. Well…. first, I messed-up and made an unusable mess. But then I carefully shaped the wire into a hook with two anchors to secure it to rivets on the hanger. I used two copper nails (to compliment the red of the velvet) as rivets. These rivets were fed through the brass plate, the hanger (after carefully punching two holes near the top), and the hook’s anchor points. Then broad washers (preferably of stainless steel) were placed over the ends of the nails. The copper was then trimmed and peened to hold it all together.
The back of the hanger (after all of the sewing and embroidery) was a mass of knots. To protect the knots from damage, I stitched a 0.8 mm leather cover over the back.
Part V: Sword belts
The hanger for a rapier does indeed hang from the wearer’s belt. So, I made a belt to go with it. I cut a length of 4 mm leather, about 1.25 inches wide and 60 inches long. I punched a series of holes around the edges of the belt, to facilitate sewing on a crushed velvet covering. I used more gold embroidery floss to affix the velvet to the leather, I then fed through a tongueless buckle on each end. To these buckles I affixed two brass wire rings facing downwards (the hooks will connect to these). I then sewed on a still tongued buckle onto one end of the belt and punched a series of notches into the other.
Finally, there is an adjustable strap that runs from the forward-facing edge of the hanger, across the front of the wearer’s body to hook onto the belt. This strap ends in a hook. I made this hook out of brass wire, and (like the hook on the hanger) connected it using rivets. The strap separates in the middle to be a touch more adjustable. To accomplish this, I sewed a buckle on one end and punched a series of notches in the other. I made sure to have the strap’s hook open downwards (I discovered that if the hook faces up, it has the potential to come undone more easily).
Conclusion
I then connected the hooks to the ringed buckles on the belt, and adjusted it to my preference. If you repeat this process, you should have a set-up roughly like this one. Thank you for your time and I hope you’re having a great day!
Alexander of Ayr
I intend to upgrade this piece in the future, but it is fine for now.
References

Figure 1
Rapier Hanger and Belt - English (1600-1629)
Materials: Leather, silk (embroidery, satin and velvet), silver, wool
Victoria and Albert Museum
Accession Number: T.58-1913
https://collections.vam.ac.uk/item/O315258/sword-belt/sword-belt-parts-unknown/

Figure 2
Rapier Hanger – English 1600-1624
Materials: Leather, silk (taffeta and velvet)
Inventory number: T.39-1938
Victoria and Albert Museum
https://collections.vam.ac.uk/item/O318743/sword-belt-part-unknown/
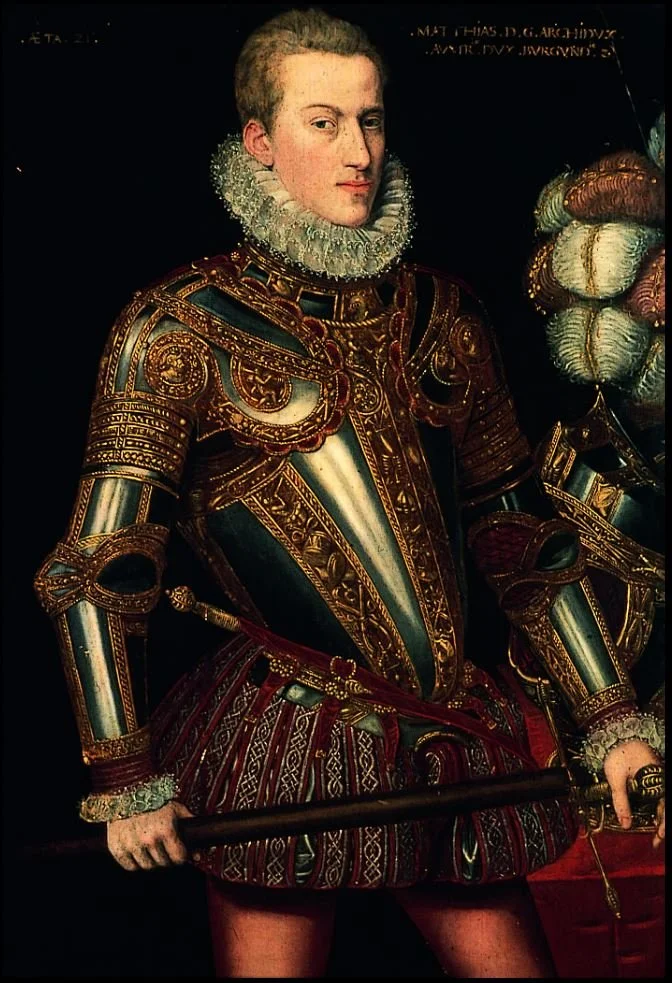
Figure 3
Portrait of Archduke Matthias of Austria (Painting by Antonis van Blocklandt of Utrecht (?) 1577)
Victoria and Albert Museum
Identification Number: I.49