Let Me Tell You a Whale of a Tale

Credit to Magister Ishmael for the picture.
There are times in life when you’re wrong. You make assumptions, and sometimes this is perfectly normal. You learn things about the world, you head into new situations, and you apply those earlier lessons going into the unfamiliar in order to make a plan or to try to understand what may be happening. However, sometimes your understanding is flawed. As a result, your assumptions can be wrong. These humbling moments are times for reflection. A time to think on the limitations of your own knowledge (indeed on the limitation of all human understanding), on how life is a journey of constant learning and growth, and appreciate the opportunity to become wiser and try again. That is, unless it’s 2:35 a.m. on the day something is due and a string of seemingly reasonable assumptions you made… were wrong. All of them. Every single one…. almost. In those moments you curse your ill-fortune, chug the nearest caffeinated beverage, and - like a monkey trying to out run a hurricane - frantically scramble to finish before the storm closes in.
This will be a little different than past entries. Instead of going step by step on how to reproduce something I made, I will be describing how I failed working on this project… time after time. I learned a lot making this hanger and I’m genuinely happy with how it turned out. That being said, I messed up… a lot. It seemed like a simple project - no intricate tooling, no extensive embroidery, minimal dying - just the clever use of materials in a novel way. I thought I could knock this out in a week after coming home from work.
That’s what I thought. Reality had other ideas.
This project humbled me. Multiple challenges arise, and I rose to meet them only to be knocked down. But, we learn more from failure than success…. and, If that’s true, this project was a collage-level course on “things not to do.”
Prelude
I drew up a pattern for this project and it was approved. At this point I had over a month.
“Easy.” I thought. “I’ve done harder projects than this in less time.”
Pride goeth before the fall. In my case, pride before the pratfall down a flight of stairs. But that was still in the future. The first step was to get supplies These are things I cannot make myself or did not already have (velvet, cast hardware for the hanger, etc.). For the sake of simplicity, here is a list of what I used (getting them is a separate story):
Supplies:
Hardware (Reliquaria Medieval, and some additional buckles from Tandy Leather (5/8 inch interior))
Copper/brass blackener (Jax)
Copper nails
Stoat scissors
Nail or bolt cutters
X-acto knife
2 mm veg tan leather
0.8 mm veg tan leather
Black upholstery leather (appears to be .8 mm or less chromoly tan leather)
White velvet
Black sewing thread
Black embroidery thread
Artificial sinew
A stoat needle with a fine point
Black leather paint
White leather paint
Leather seal
Acrylic seal
Brown leather dye
Ballpoint pen
Needle tipped permeant marker
Paint brushes
Whatever other paints you desire
Phase 1: Get Supplies
Time to delivery - 6 weeks
1. Get the hardware - just pop online and get a set from the vender I used before.
Except my previous vendor closed down.
Bothersome, but not insurmountable. I still had time and there are other vendors. I found one I was happy with out of Canada called Reliquaria Medival.
2. Get velvet - Just a quick trip to my local fabric store.
My local fabric store went out of business.
Annoying. Still, there are other options. I placed an order from another online store.
3. Get velvet …. again - Just place an order online.
I then somehow failed at buying something online.
I have no idea how. But the first order of fabric failed to go through and I lost a week waiting for an order that was not coming.
Aggravating. Still, I had time. I was very careful to make sure the next order actually went through.
I still had several weeks - about a month. Unless something debilitating happened, this project would be done with plenty of time.
4. I got Covid.
As my fever-stricken mind was adrift in a sea of disorientation, I was unable to work on much of anything. It took almost everything I had to get through my job (working remotely). After work, I was fit for not much else besides staring off into the distance for hours.
I lost about 2 weeks.
Still, my supplies had arrived and I should have had enough time as long as nothing else happened.
Phase 2: Production
Time to delivery - 3 weeks

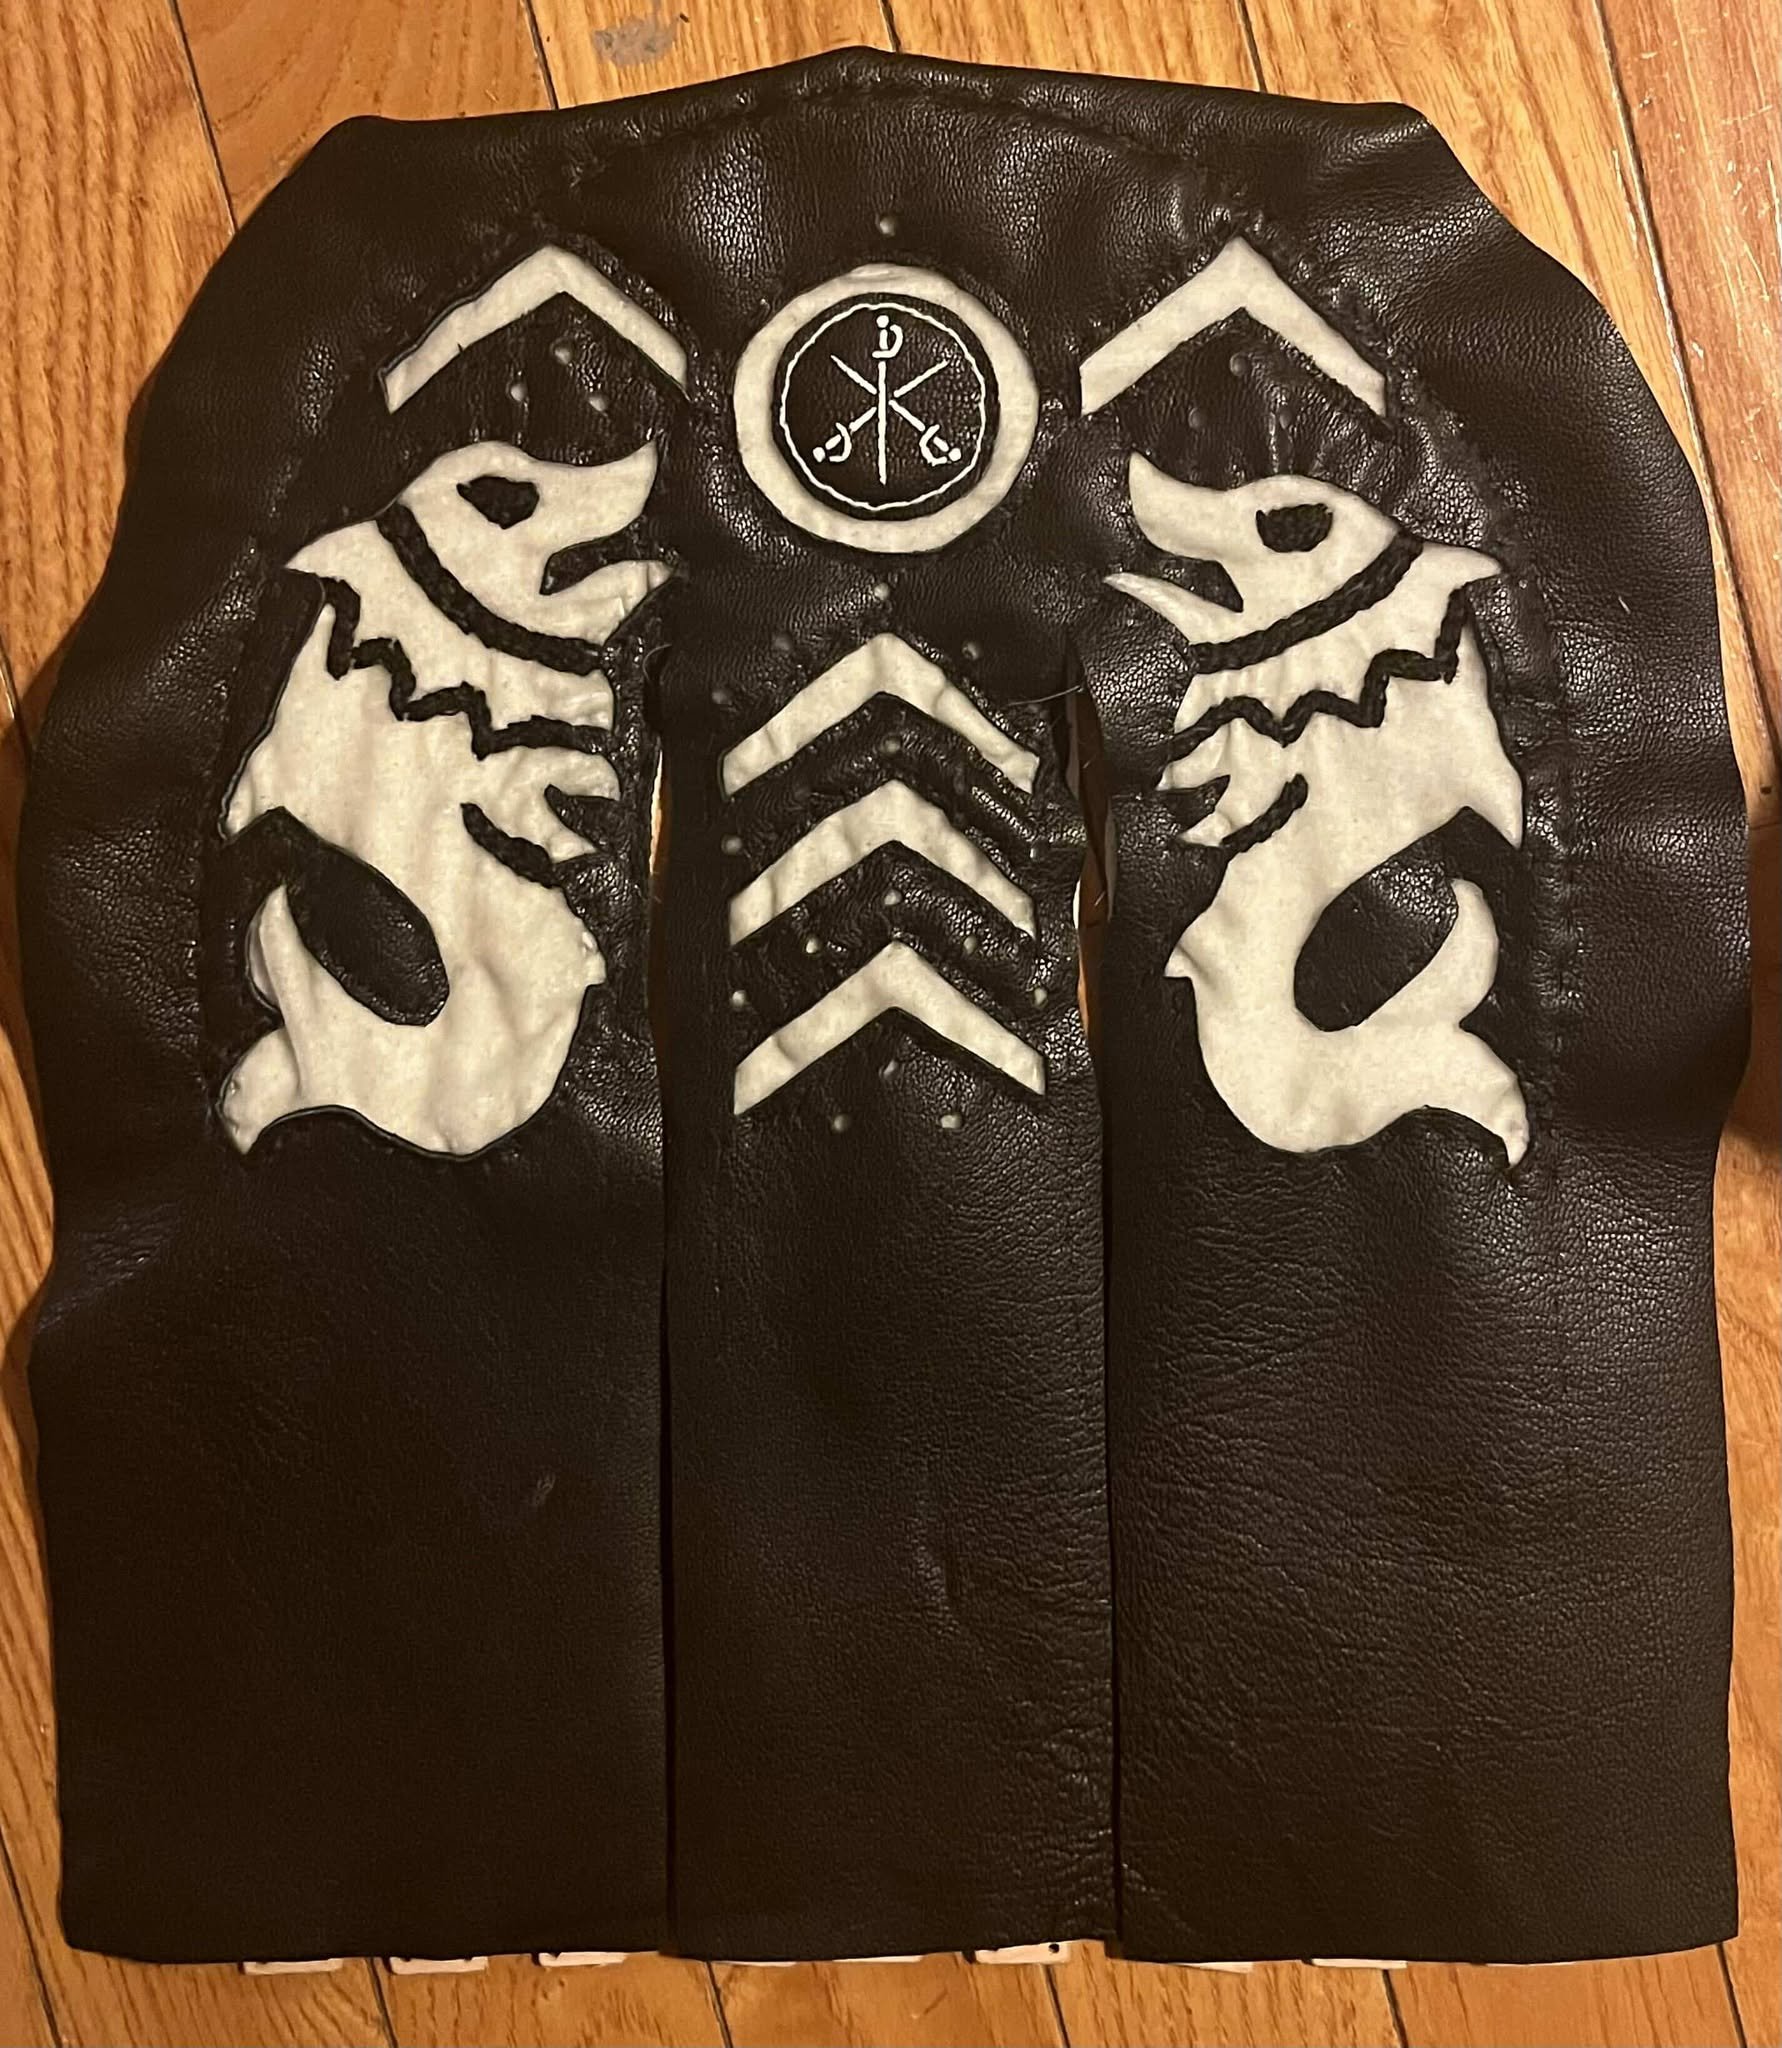
I admire this picture, because it represents the simplest part of the project with the fewest problems. Happy times.
5. Cut out the base.
I made the base layer out of 2 millimeter leather using a custom pattern I made based on the hardware I acquired. I then punched a series of holes using a leather punch. These holes would help to sew everything in place.
For the first time, no problems. We’re back on track!
6. Blacken the hardware - just follow the instructions. They wouldn’t lie to me.
I applied the acid in light coats to the different metal pieces. It is going well, but taking a lot of time.

I looked at the bottle of acid, and it recommended submerging the piece completely in the solution for a more thorough blackening. So, I try submerging the brass hardware in the acid.
All the blackening rubs off and I have to start over.
This…. this was fine. Everything was fine.
I set this task aside, and I worked on a different part for a while.
7. Make the top decorative cover.
I made the top leather panel out of 0.8 mm veg tan leather.
I traced the pattern on the rough side of the leather, to ensure I got the correct shape. However, I did not fully cut it out to avoid misshaping during dying and sealing.
Ordinarily, I would hold off dying and sealing until a piece was further assembled; however, the black leather was going on top of white velvet and I wanted to aviod bleeding or spilling from the black dye onto the velvet. So, I dyed the leather and sealed it before any further work was done.
It wouldn’t matter in the end, but it was a nice thought.


8. Sealing the cover
Can’t have the velvet getting stained by the dye bleeding out of the leather. So, I sealed the leather front and back. That should do it!
Now to cut the patterns into it!

The leather was too thin. The leather seal penetrated so deeply it basically turned the front panel into an inflexible plastic sheet. It became so brittle that it began cracking at weak points and it would clearly not survive use.
Infuriating. But…. these things happen when you’re trying new processes. Fortunately, I had something for this.
I had a roll of black upholstery leather I got months ago when it was on sale. I pulled it out. It was chromoly tanned leather. I could not dye it, but it was already solid black so I would not have to.
I cut a test patch of the new leather out and soaked it to see if it would bleed dye. Nothing. Only loose particles of leather fiber. Perfect!
Using the pattern, I cut out a section of the upholstery leather and kept going.
9. More blackening.
It’s took forever, but it couldn’t be helped.
Eventually the hardware became a fairly uniform black.
I oiled the pieces and set them aside.
10. The new velvet arrives.
It’s great! It’s glorious! It’s …. it’s too thin. I can see the leather underneath.
*Groan*… Ok, just layer it and move on.
11. Treat the velvet.
My mom told me of a way to treat velvet to make it resistant to staining and wate. I know what you’re thinking. This can’t go well. The tide was clearly against me. Well, wouldn’t you know it….
IT WORKED! NOTHING BAD HAPPENED!!! VICTORY!!!
I used tent sealing spray and applied a couple light coats on the velvet. Did it work? Time will tell, but it didn’t immediate catch on fire, so I’ll take it!
12. Sew on the velvet in three layers.
I used white embroidery floss to hide the stiches and rolled over the excess velvet to avoid fraying.
Now, we’re closing in!

13. Sew on the top leather panel.
The holes in the base leather are too full from sewing on the layers of velvet and nothing was sitting right. Also, I had no way to sew the loose edges of the cover leather to the velvet or leather bse unless I want to try to punch a bunch of holes in the fabric I am running out of time to replace.
…… I did not have time to be angry. So… I just… cut all the fabric…. off of the base … and tried…. something else.
Phase 3: Assembly
Time to delivery - 10 days
14. Paint the leather base.
I got my leather paint and painted the base leather of the hanger white.
This allowed me to remove a layer of velvet, which made the sewing easier.
15. Sew the velvet onto the leather cover - again.
I began again (for the… third time?) by sewing the velvet directly onto the outer leather cover.
Unfortunately, the fabric kept bunching up and it was difficult to get everything to remain level.
So… I had to cut the layers apart … again.
16. Start sewing the partially sewn velvet and leather cover onto the base… again.
By sewing the three layers (base leather, velvet, and cover leather) to each other in stages, I could adjust each layer as I went along. This kept the layers from bunching too badly.

Finally, progress!
I used a leather punch to make a few decorative holes in the leather (carefully to avoid damaging the velvet). I had to enlarge them a bit, but that was easy enough.
I had to cut the stitches a few times to adjust the layers. However, I made sure to not completely sew down the edges so I could do the internal sewing (along the whales, chevrons, etc.).
17. Sew on leather lines inside the whales - actually, change of plans. Embroidery it is!
Sewing leather lines onto the whales to provide details (fins and frills) proved to be FAR too finicky.
Embroidery was quite period appropriate for these kinds of hangers, and I had black thread. So, onward!
I used a piercing stitch which I’ve used on other pieces, which is quite good for filling up spaces and for thicker lines.
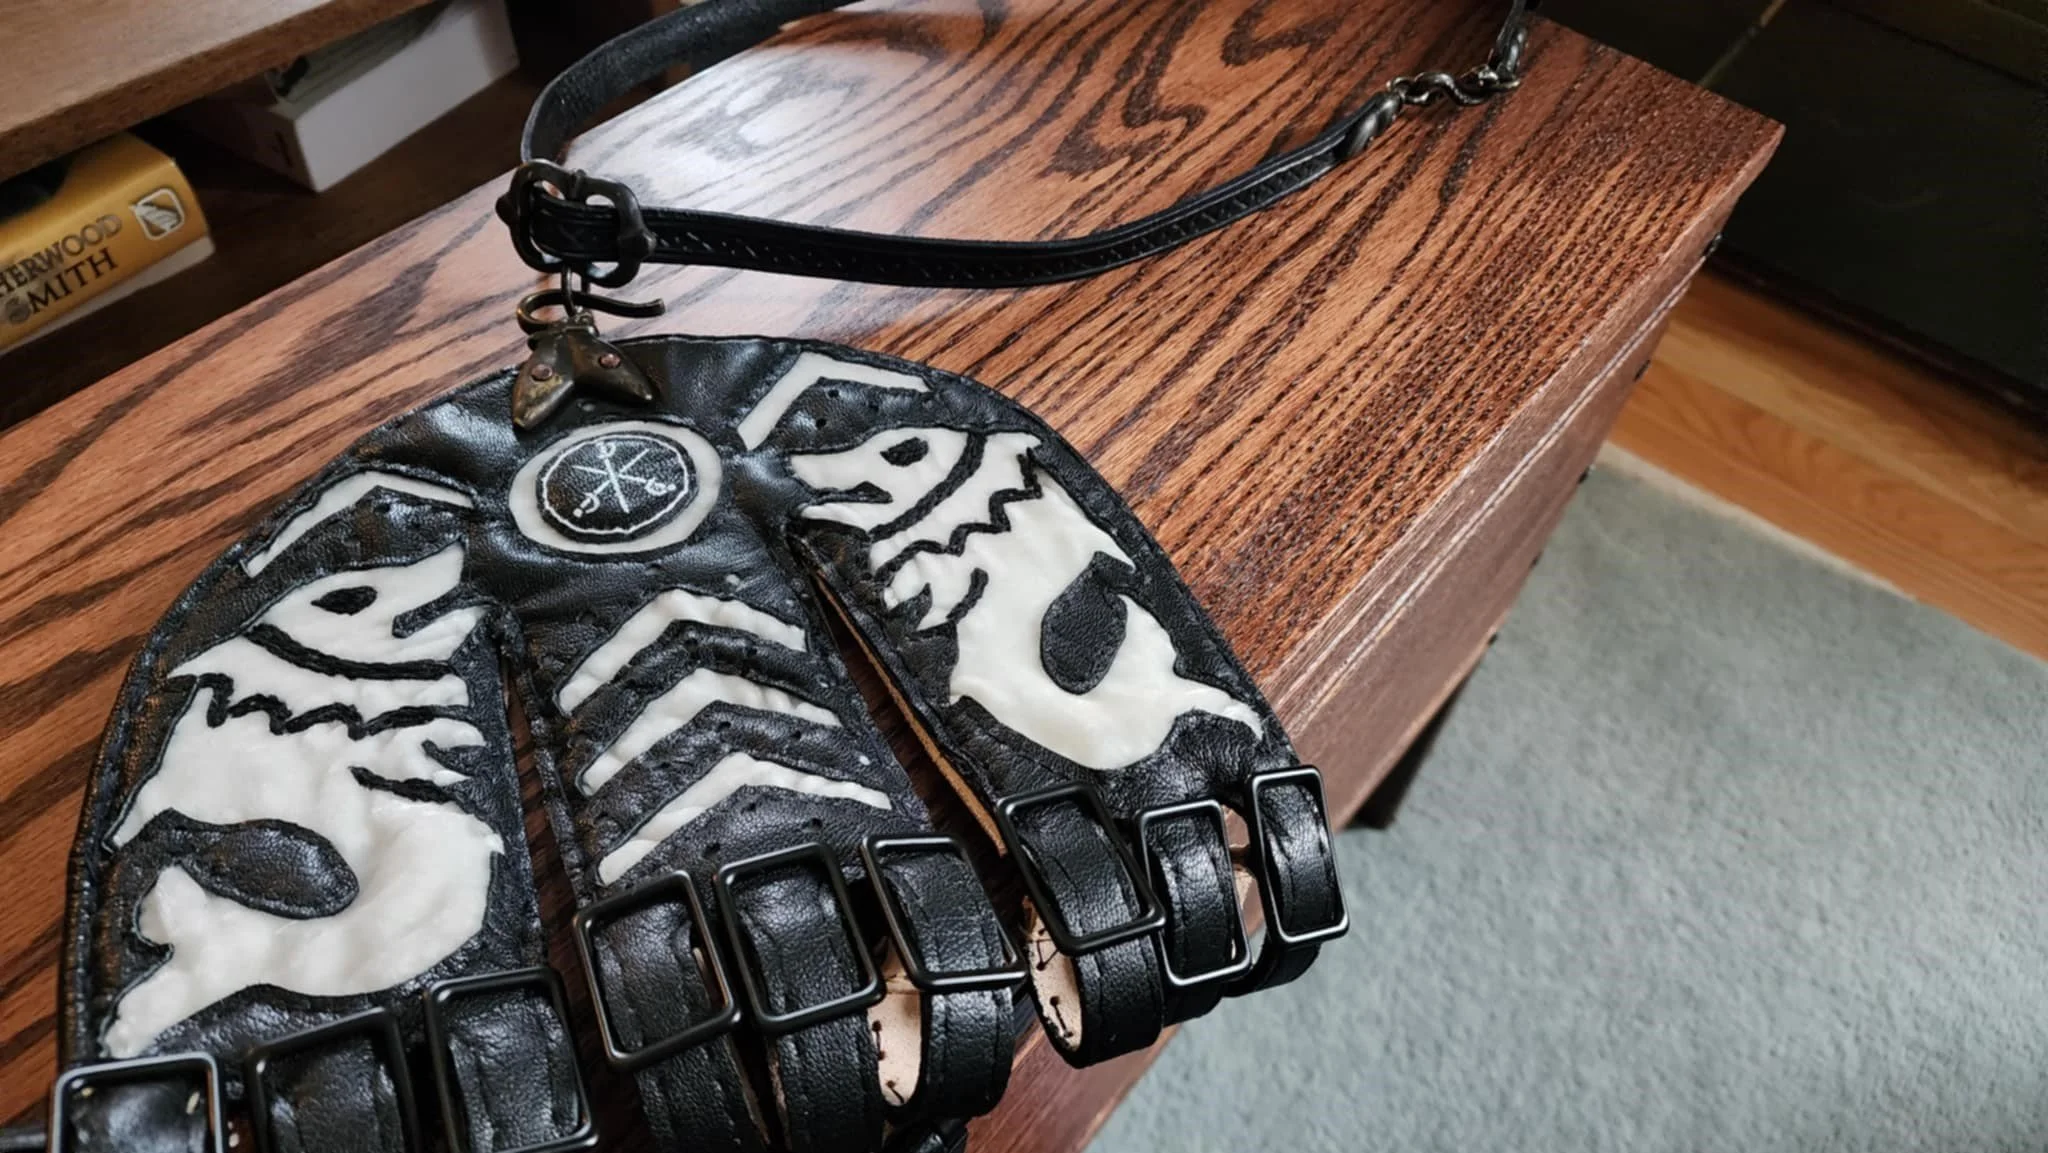
18. Device for a Master of Defense.
I cut a circle out of the extra cover leather to place within the circle cut in the hanger.
Very carefully, I used a toothpick to paint the three crossed swords for the Master of Defense peerage with white leather paint.
After the paint dried, I used leather seal to help protect the device.
I used a stamp punch to pre-punch holes around the leather circle.
For a bit more emphasis, I used white thread to sew the leather disk onto the velvet.
Nearly done!
19. The fabric is bunching again. …. *Sigh* Ok… Cut more of the stitches.
Re-sew again.
It was finally fitting well!!!
Quickly, I rolled the excess leather over the edges of the hanger, and sewed everything down.
I then cut away the excess cover leather.
The straps for the scabbard were a touch too long. So, I shortened them by about an inch. I did a quick measurement, and the adjustment should have been fine (forshadowing).

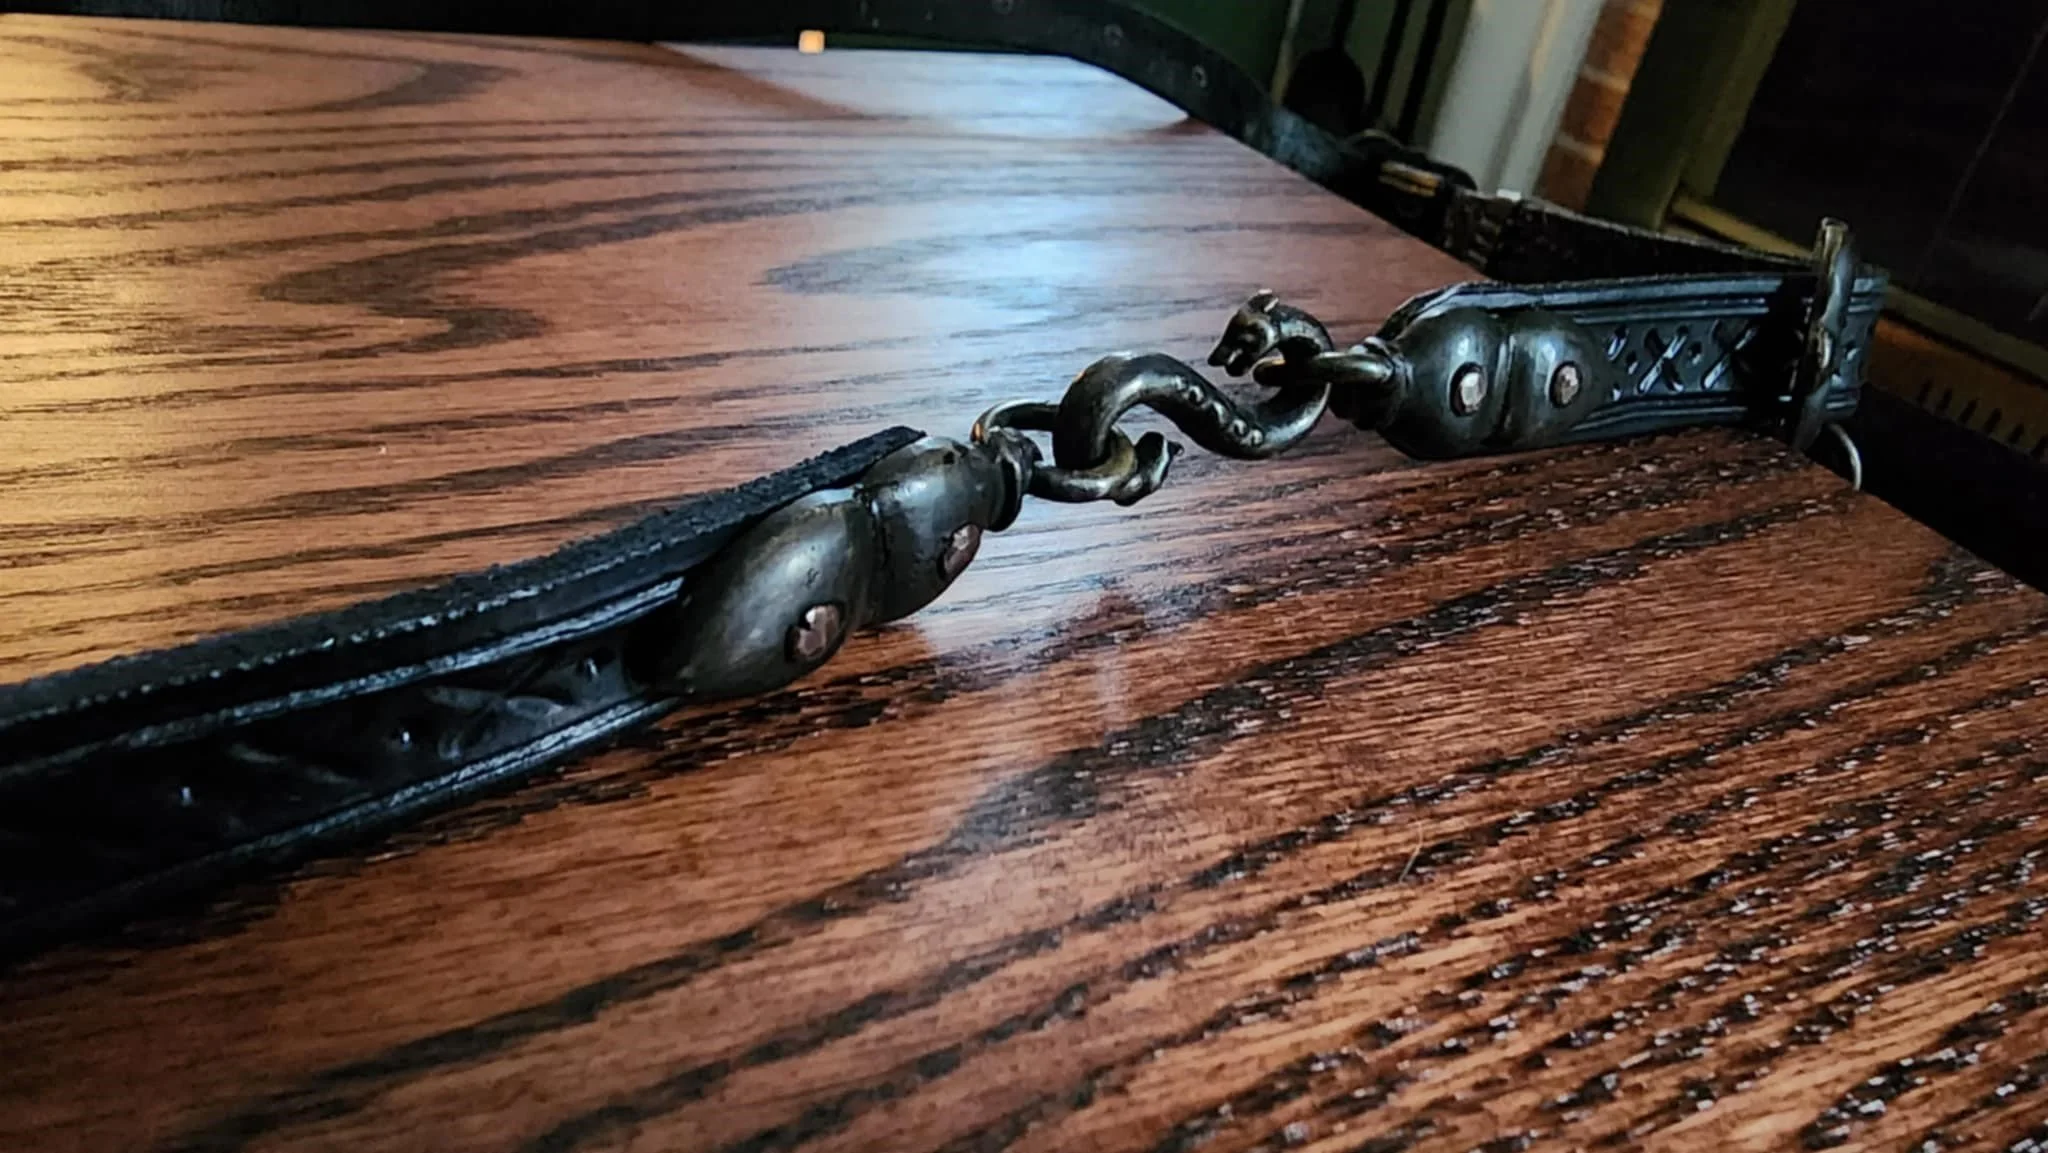
19. Sword belt! The hanger needs a belt.
I cut a couple of lengths of 4 mm leather to fit the hardwear.
I used an X-acto knife to cut a couple of lines along the edges.
I wet the belt, and used a mechanical pencil to widen the lines.
I then used a philips head screwdriver to press small divets into the belt.
Rewetting the leather, I used the mechanical pencil to make a series of Xs between the divets.
After the leather dryed, I applied three leaers of black leather dye to ensure a deep, uniform color.
I left the dye to dry.
After it dried, I applied leather seal, followed by acrylic seal to keep the black from bleeding through.
20. Attach the hardwear - So close to the finish!
The hardwear didn’t fit.
………. What!?!
I checked again and again. The leather was too thick to slide through the buckle.

Looks nice… Unfortunatly it doesn’t actually work.
Phase 4: Suffering
Time to delivery - 1 more day.
I was thinking of tomorrow - of those depending on me ….
No.
… 24 hours. I still had 24 hours. The dawn was coming, but it wasn’t there yet!
21. Remake the belt.
I salvaged the hardwear, cut a new length of 2 mm leather and repeated my process to get a new belt.
Due to the construction, I only had to remake about 3/4 of the belt. Still a lot, but I took the victories I could at that point.
While I waited for the belt to dry, I applied black leather paint along many of the edges of the hanger to give a more finished appearance.
Things are getting done! 24 hours. I still had 24 hours!

22. Go to my day job.
Ok… So I had less than 24 hours. Still - FORWARD!!!
23. I return from work and realize that the straps on the hanger were not too short… only after I cut them.
FECK!!!
Ok, well… maybe I could make it still work.
I could not.
Ok…. Calm down. You know what? I can save this!
I sewed 0.8 mm leather strips over all eight sliders that would have gone directly onto the ends of the hanger’s straps. This, in addition to extending the loops by about 1/2 an inch, would also make the slider more secure on the straps than just sewing the slider on with artificial sinew. This was no longer a bug. This was now a feature!


24. Issues attaching the hardwear.
After riveting on the hardwear, some of the blackening came off. I reapplied the acid to repair the appearance and dull the shine of the copper rivets.
I then oiled the hardware again.
I had a touch of an issue with the S-hook on the belt coming undone. As a result, I took a pair of iron tongs I use for crushing rivets, and compressed the gaps in the S-hook to make it harder to come undone.
Credit to Magister Ishmael for the picture.
It was 1:00 am. Mt eyes were buring. The world was starting to feel different - a kind of numb pressure was pushing against me. It was as though I could feel time literally pressing in on me. I was on my fourth or fifth cup of tea, and past my third can of Dr. Pepper. My veins may have had more caffiene than blood in them… but I was closing in.
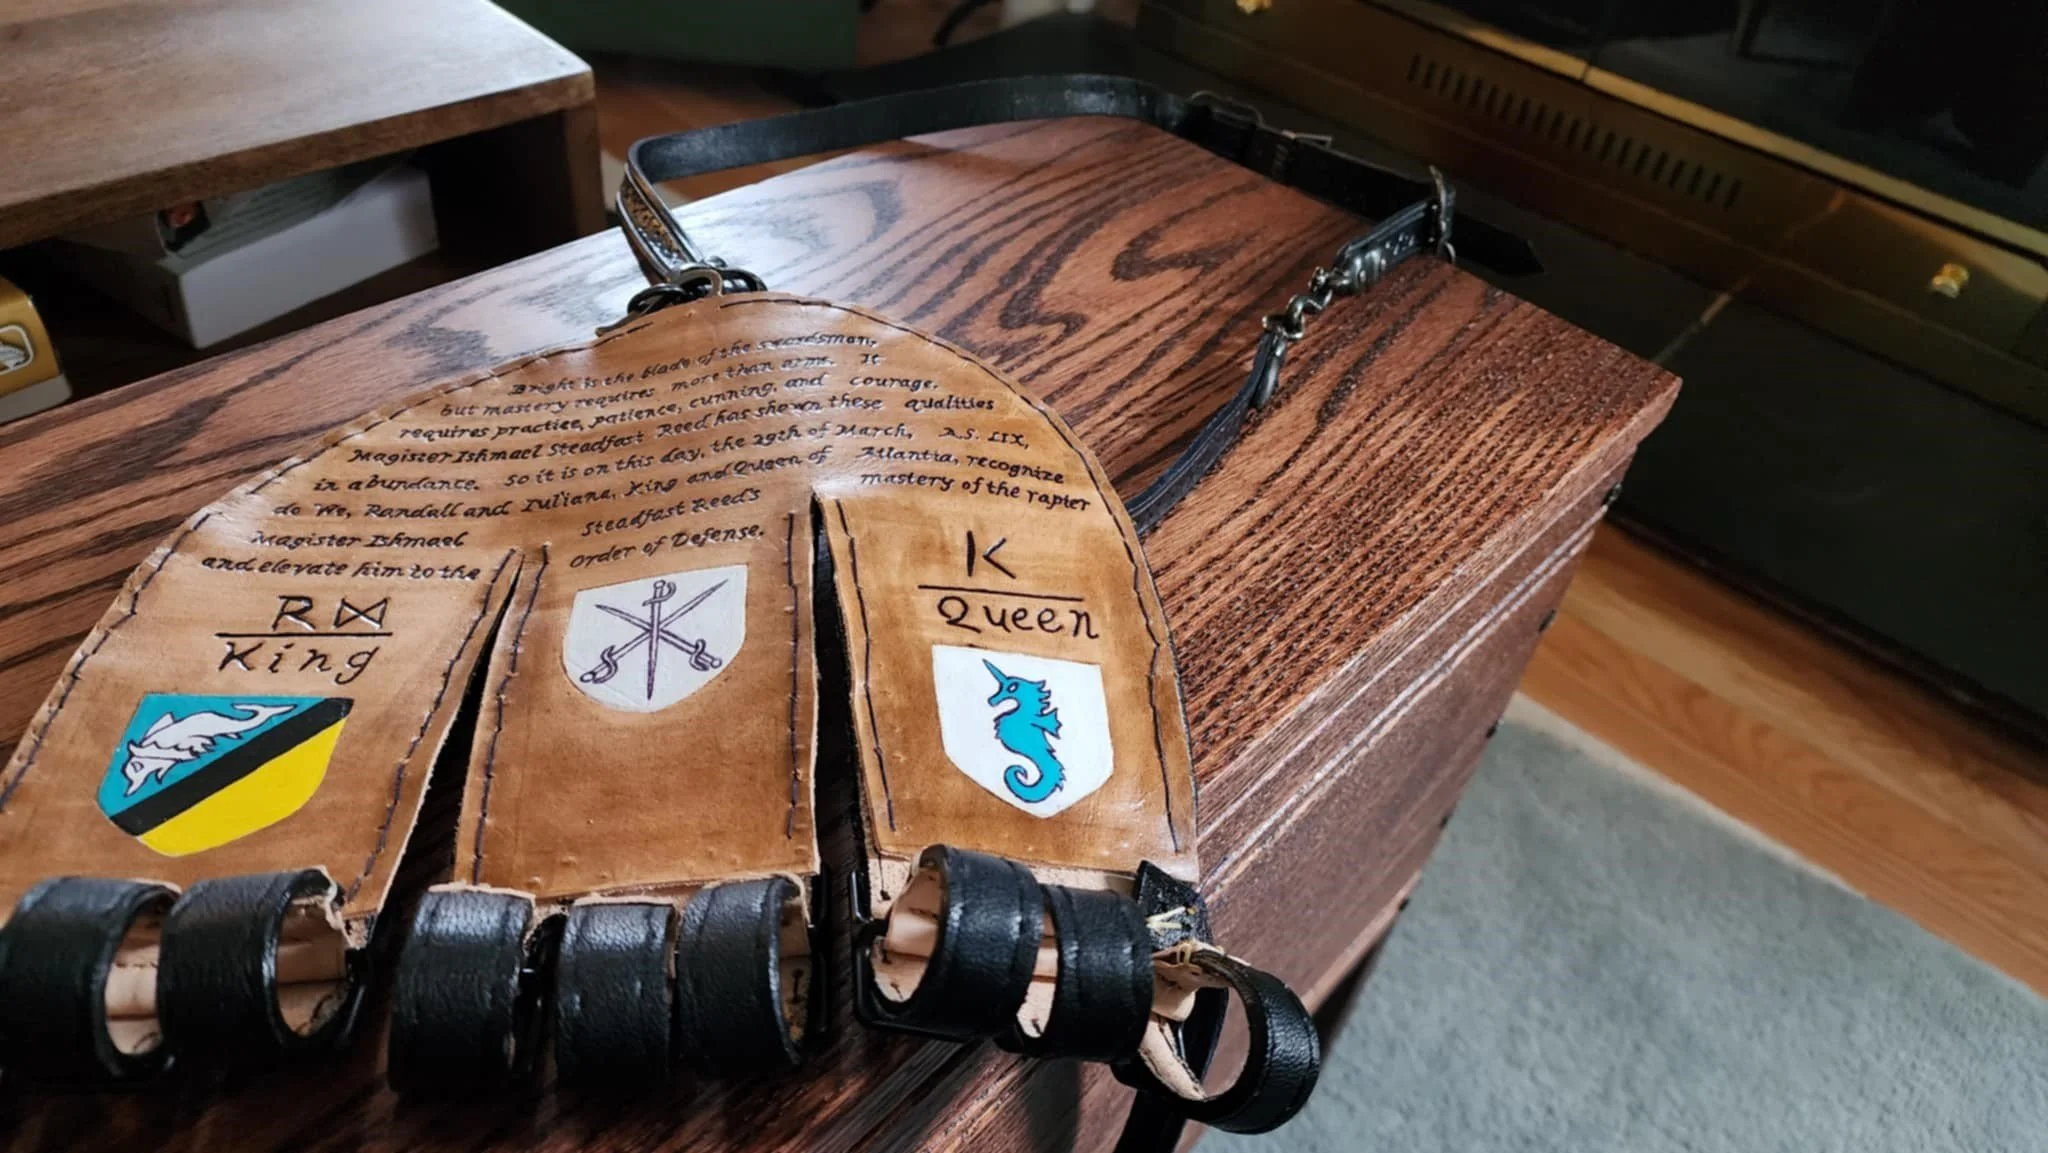
24. I still needed to finish the scroll.
Right! Back on track.
I previously printed out the words agreed upon for the elevation scroll. I cut this print-out into strips.
I cut a pannel of 0.8 mm leather to fit onto the back of the hanger.
I wet the leather, and laid out the strips of paper on it. I then traced the words onto the leather using a mechanical pencil, pressing as I went. This would provide dimension to the letters by tooling them slightly into the leather.
After all of the words were on the pannel, I traced the words again with a ballpoint pen.
To give the lettering a deeper color, I finally went over all of the lettering with a needle-tipped permenent marker.
To give the appearance of aged leather or parchment, I used brown leather dye. I applied it a bit heavier at the edges for more weathering.
Permenent marker ink tends to bleed through most seals, so I had to be careful.
Using a miniature painting brush, I applied a seal over the letthering before I covered the rest of the piece.
As the seal dried, I painted the haraldic divices at the bottom.
I went over the rest of the piece again with leather seal.
Using the permenent marker, I added lines around the divices at the bottom to help them pop a bit more.

25. Sew it all together.
It was 4:00, and I had to leave in a bit over an hour. Go time!
I pre-punched holes using a punch stamp, and started sewing.
I also was able to sew on the front strap to the hanger without issue.
I was able to get the job done (well, done enough) just in time.
To the car and drive!

26. Drop it off.
I was able to get the hanger and belt to Ishmael just in time.
We were even able to do a test fitting. His sword fit splendidly. He looked great in it, and seemed exceedingly pleased.
I could not attend the event unfortunatly. However, I heard the elevation went beautifully.
I arrived home at around 8:30 and callapsed into bed for a few hours.
27. Sleep.
Credit to Magister Ishmael for the picture.
Credit to Magister Ishmael for the picture.
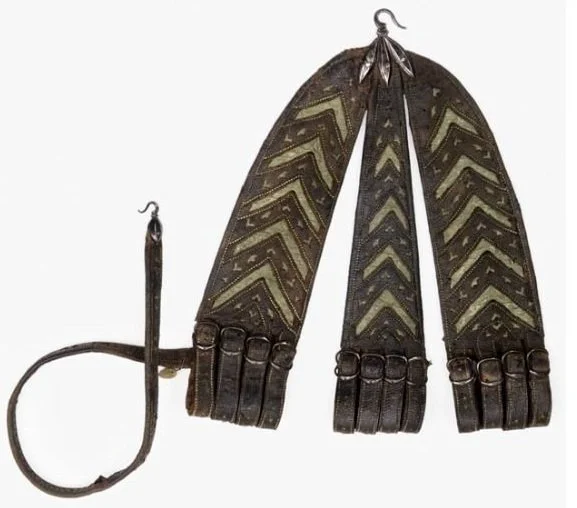
Which brings me to the end of my tale. I had a couple of things I would like to tweak, but I am happy I was able to pull it off. It came out pretty well, and Ishmael seemed thrilled. Despite all of the setbacks, I’m glad I was able to do this for him. A happy conclusion to this story…
… that is until I was contacted after the elevtion and told that Ishmael is actually left handed..
… and the hanger is on the wrong side.
………………..
Oh, well.
That will need to be fixed. But, that’s a story for another day. Here’s to another adventure!
References.
Rapier Hanger (late 16th century)
Keivingrove Museum
ID Number: E. 1939.65.II